Onirix Leaderboard: CRM on the fly
This documentation gives you the ability to easily add a process of user registration and login, as well as a scoring system (ranking page) to your experiences. This is perfect to encourage engagement through gamification, and to get some data from your experience players or visitors.

Obviously this functionality allows you to create a kind of CRM on the fly, so you can get data from your visitors, customers or users in an organic way. In this tutorial we will also show you how to create a database (we will use Google's Firebase for this), in a simple way, to store the information collected with your dynamics.
With our library you will be able to include in your experiences:
- Welcome page to your experience
- User register and login authentication (including legal terms)
- Score table where you will be able to show a ranking of the users based on their points.
- Customized texts and styles of the screens to match your brand.
Starting point:
In this tutorial we will convert our Binball experience, in a complete leaderboard experience, with all the mentioned components.
Final outcome:
Here you can compare the previous experience with the final result: Binball game with leaderboard.
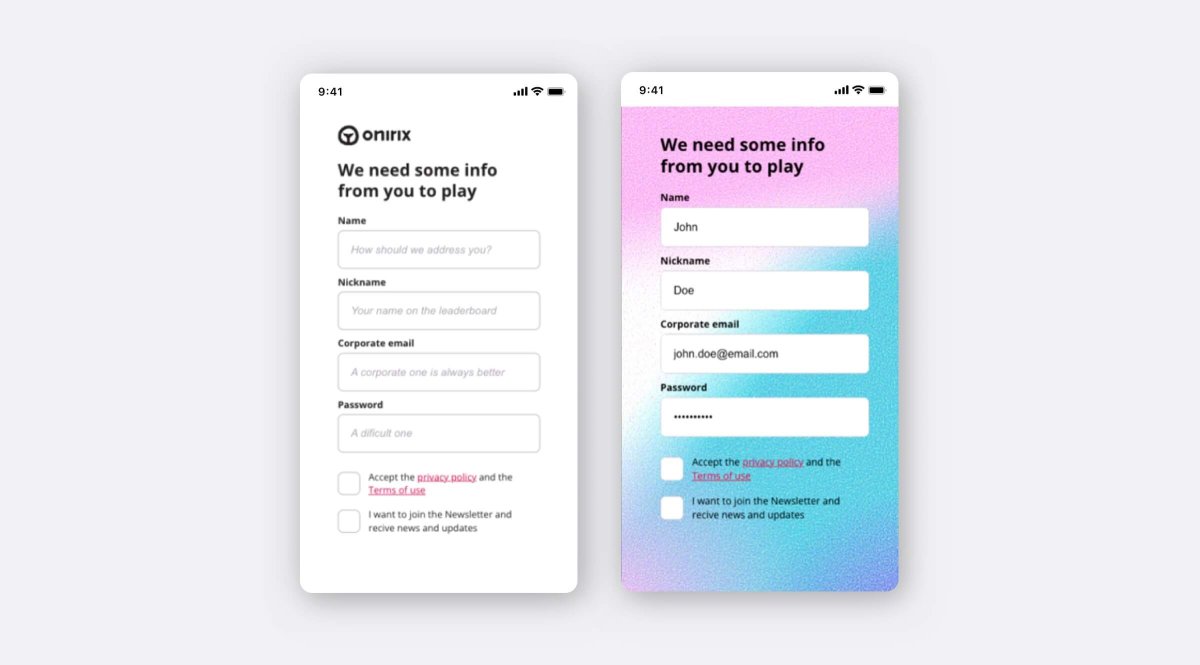
Comparison of customisation:
For example, if we take a look at the register page, we will adapt the first one (the basic register page with Onirix style) to the second one (same functionality adapted to our Binball game style). Thus we will get something like this;
In this tutorial we will explain, step-by-step, how can you do the same in any of your Web AR experiences.
Here we go!
Onirix leaderboard screens
First of all lets take a look to the Onirix Leaderboard screens and remember that you can customize all of then.
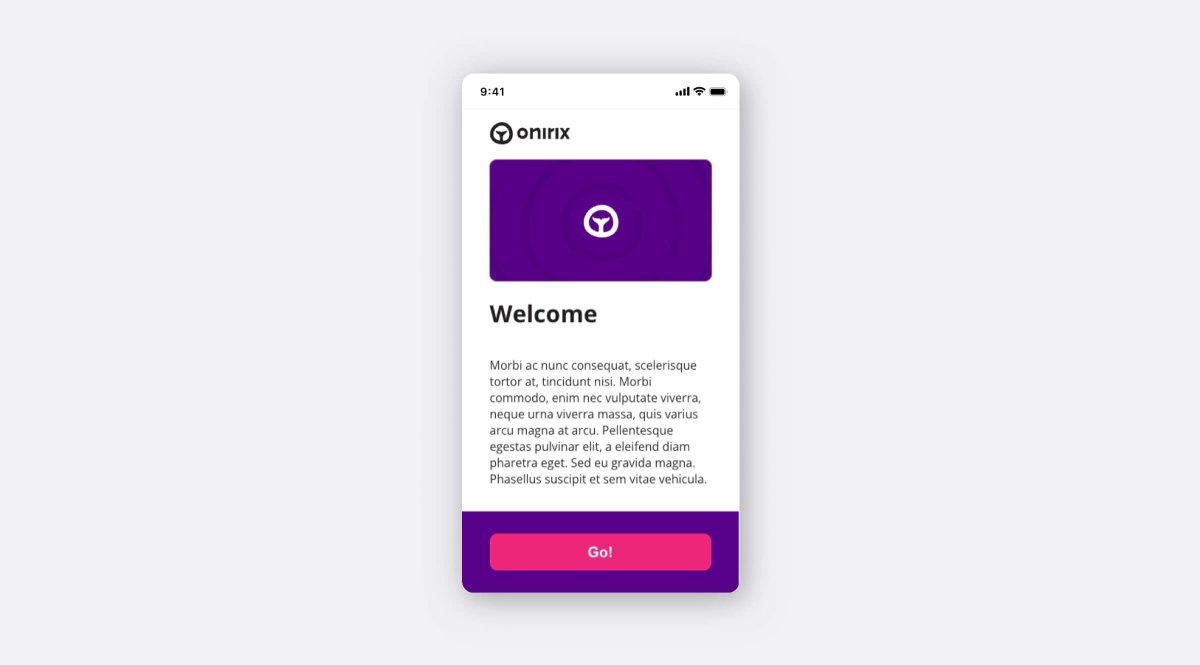
Welcome page
This is the first screen show when you init the leaderboar library. You can use it to introduce the experience or your brand.
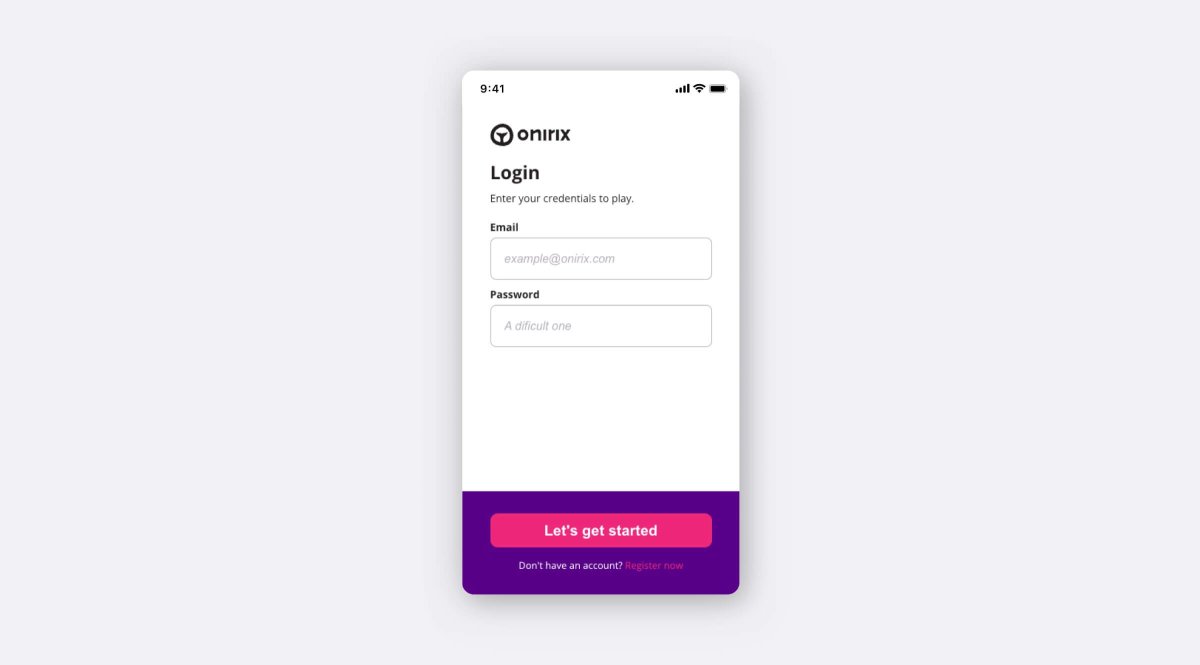
Login
If the user has previously register in (even on another browser or device), he/she can authenticate and play again to try to raise the score.
Register
If this is the first time accessing the experience, the user must register. The data entered by the user can be consulted in the Firebase Firestore.

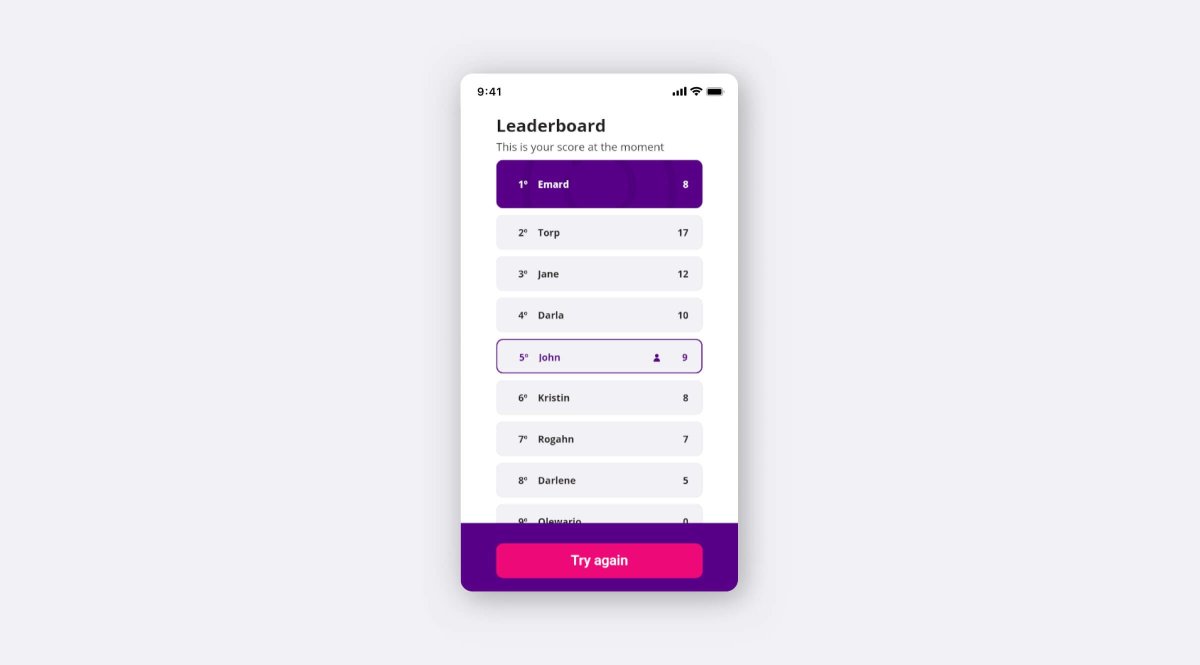
Leaderboard (ranking page)
And this is the leaderboard screen.
Step 1: Get the experience
Go to our Onirix experience library and add Binbal experience to your Onirix account. For this example we will use the same experience, but you can do this with any of our other games, or maybe with one of your own.
Step 2: Set up Firebase
The Onirix Leaderboard library uses Firebase to store and consume user's data and scores. Thus you will need to create a Firebase account using your Google account and configure a new project to connect it to the library.
Create Firebase project
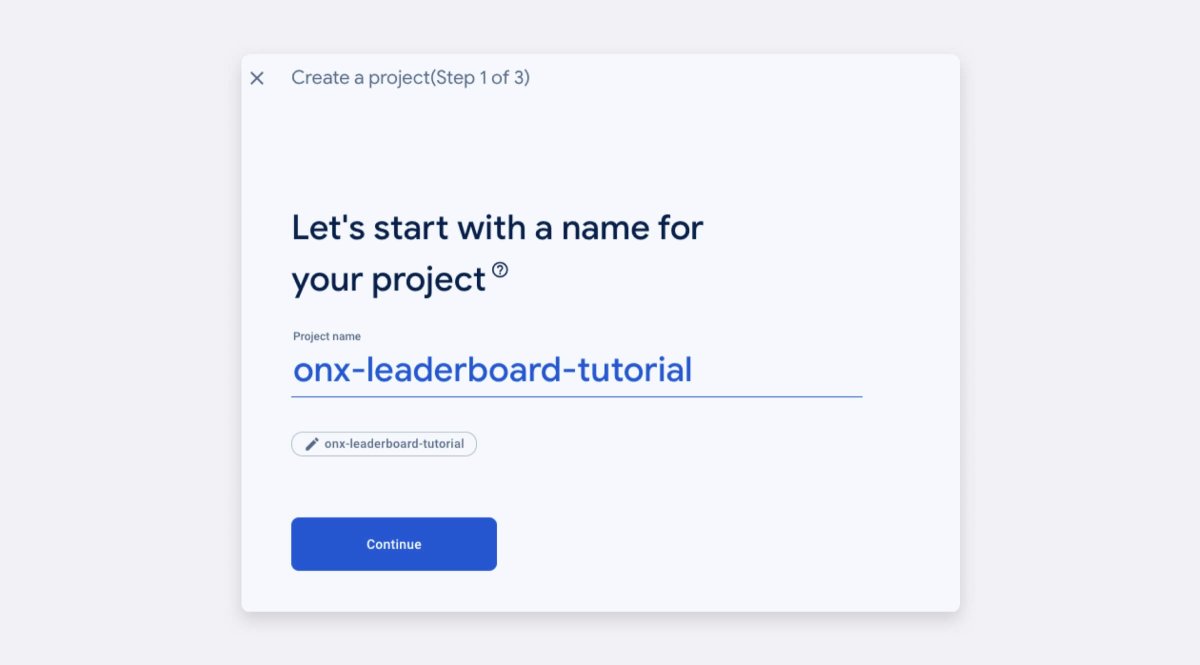
Once you are logged in on Firebase’s console, choose the “Add project” option. This will take you to the creation form, input the name for the project, enable (or disable Google Analytics for the project). If you choose to enable it, you will need to create an account on Analytics and Google will automatically create a new property for this project.
If you are interested in setting up Google Analytics on an Onirix Web AR experience check this tutorial.
Finally, select create project, wait for the process to complete and click Continue.
Add and configure Onirix Leaderboard
In the project overview page, select the </> icon in order to add a web app to the project, fill in the field with the name of the app (in this case “onx-leaderboard-tutorial”) and click Register app.
After a short wait, Firebase will provide you with all the information you need to connect to it from the experience (apiKey, authDomain, projectId, ...). Once you have copied it, save it! you will use this data to init Onirix Leaderboard.
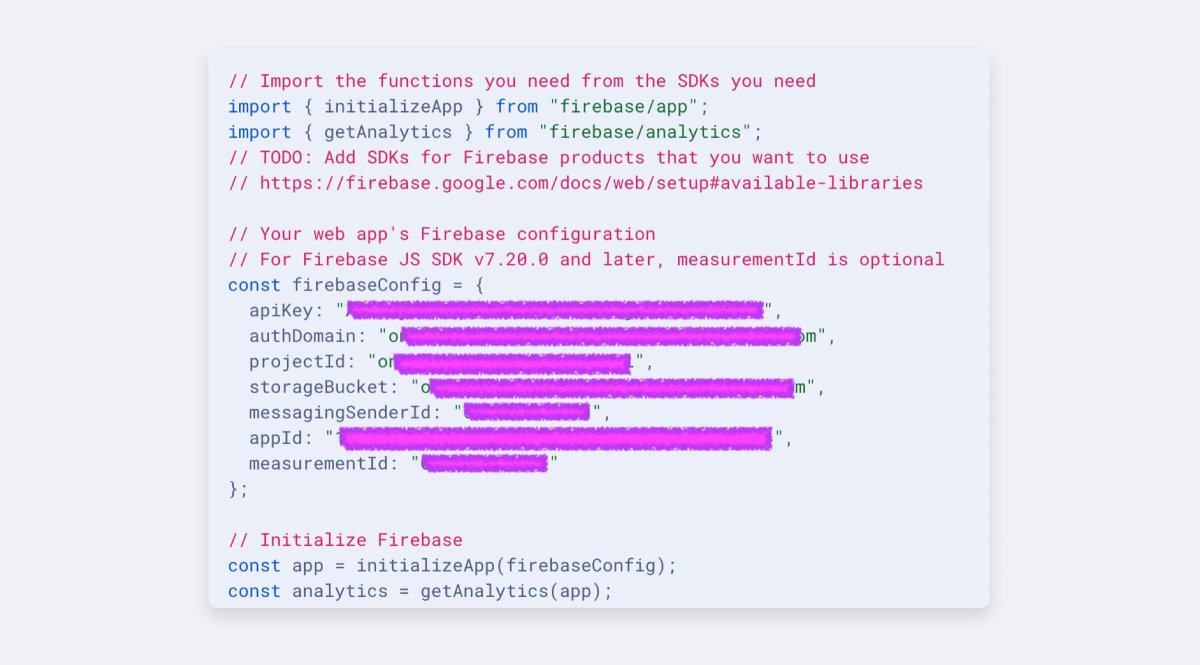
If you need to view this information again, in the dashboard, click on the project’s name and press the gear icon. This will lead you to the project’s settings where you can check the SDK configuration at the end of the page.

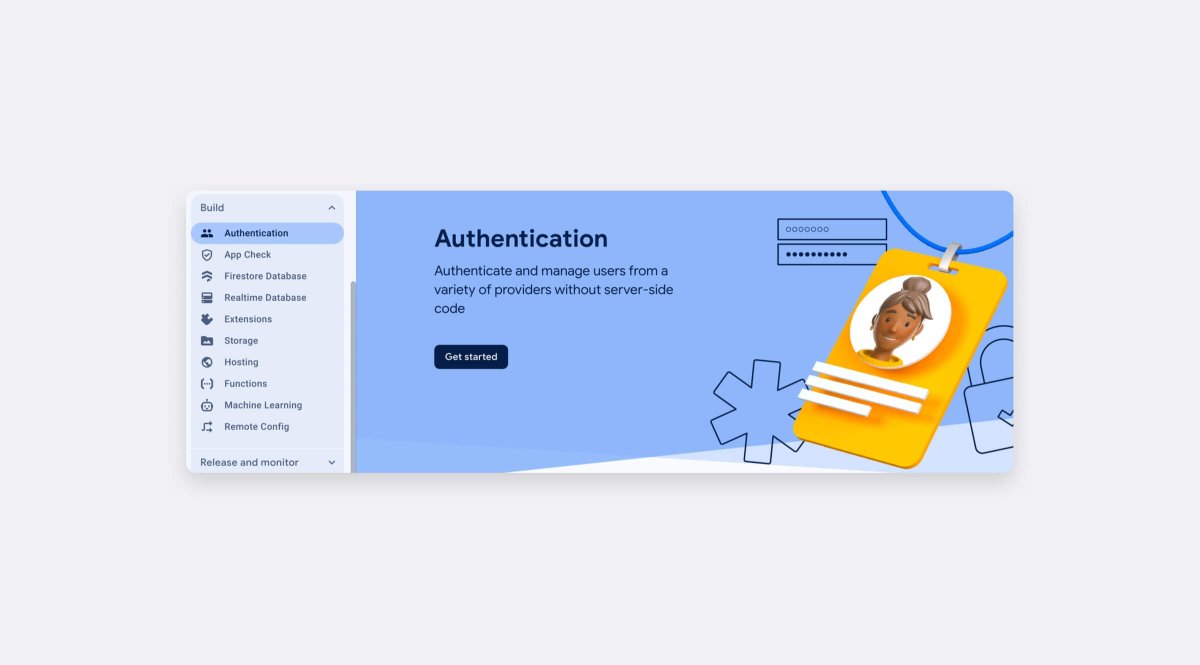
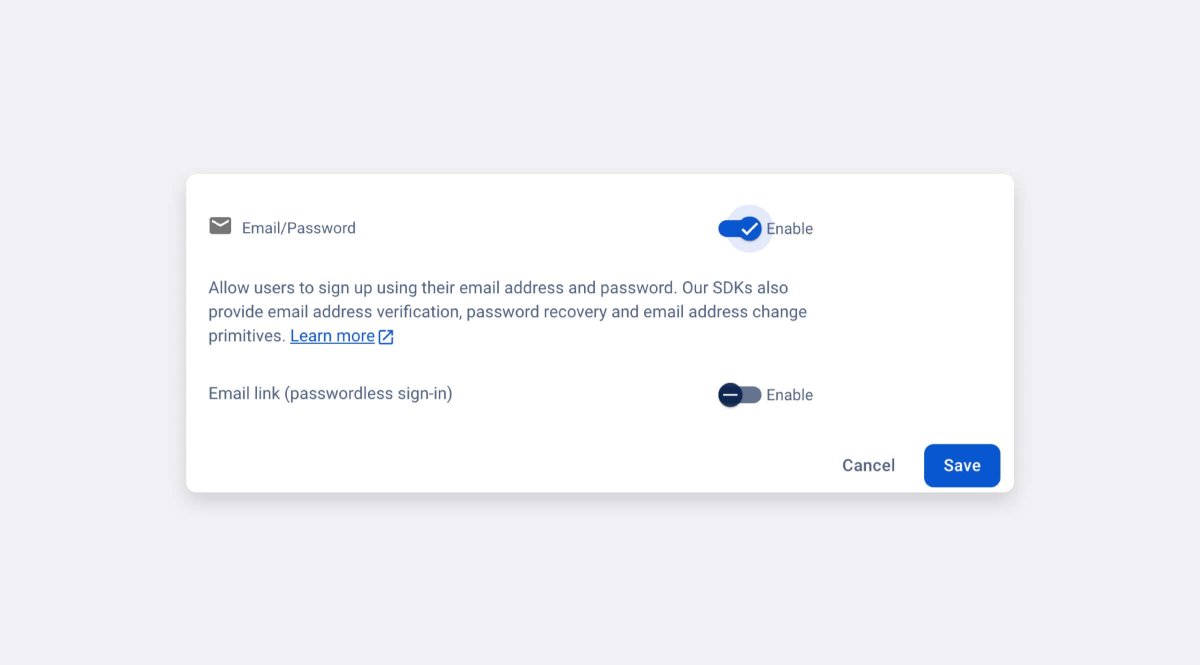
Set an authentication mode
Firebase also provides us with a complete system to authenticate our users. To activate it we have to go to Project Build -> Authentication
We will add "email / password" as authentication provider.
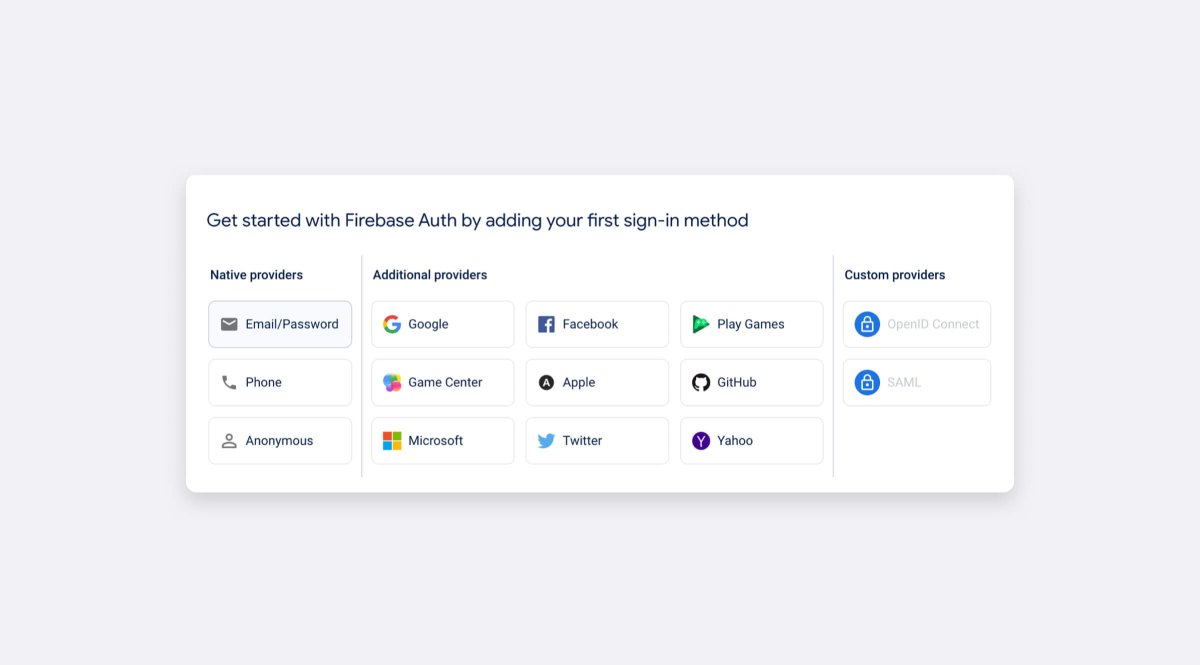
And activate "Email / password" as the user sign in way.
Create the database
Navigate to Firestore Database through the sidebar on the dashboard and select “Create database”. A creation wizard will appear, click next and select the desired location for you Cloud Firestore storage.
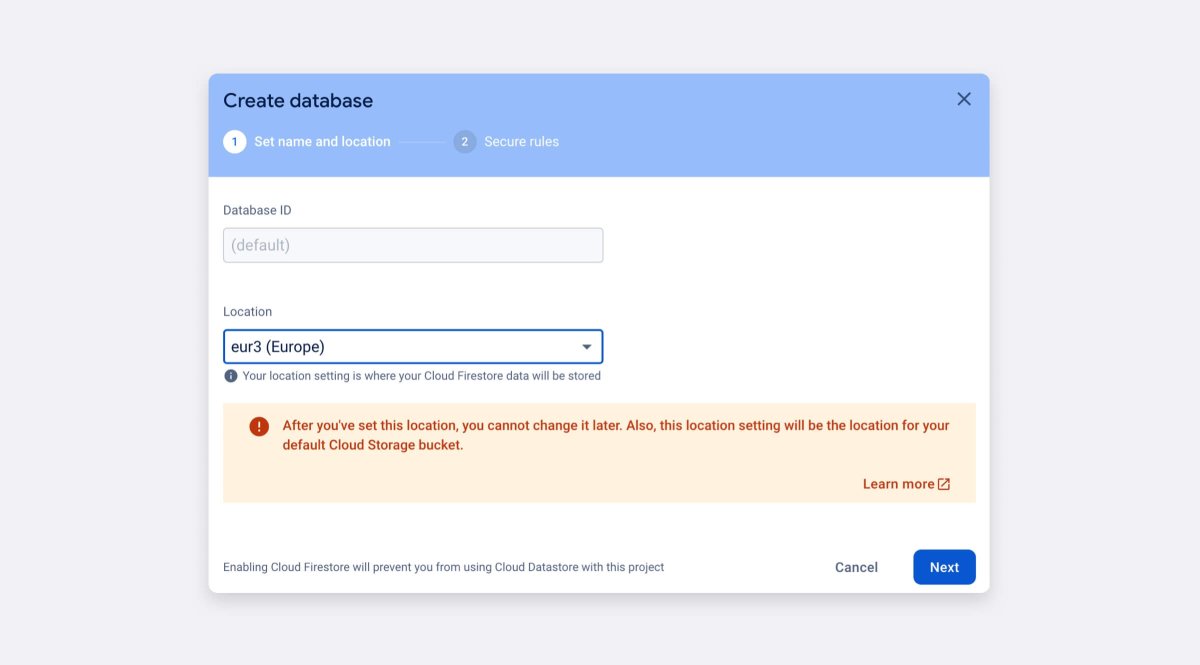
In this case the example was set up in europe-west, nevertheless you should choose your own region or the one where the project will be used. Click enable and after a short wait your database will be created.
Firestore rules
We must configure a number of rules in Firestore to improve the security and integrity of the data being stored.
Add this to Firestore -> rules tab:
service cloud.firestore {
match /databases/{database}/documents {
match /onx-leaderboard-tutorial/{documents=**} {
allow create: if true;
allow read: if
request.auth != null;
}

match /onx-leaderboard-tutorial/{userId}/{documents=**} {
allow write: if request.auth != null && request.auth.uid == userId;
allow get: if request.auth != null && request.auth.uid == userId;
}
}
}Important you have to replace onx-leaderboard-tutorial with the name of the collection you are going to use in your experience.

Collection index
Onirix Leaderboard shows the users sorted in descending order by the number of points obtained. To support this sorting we must create an index in Firebase that specifies the sorting we want to display.
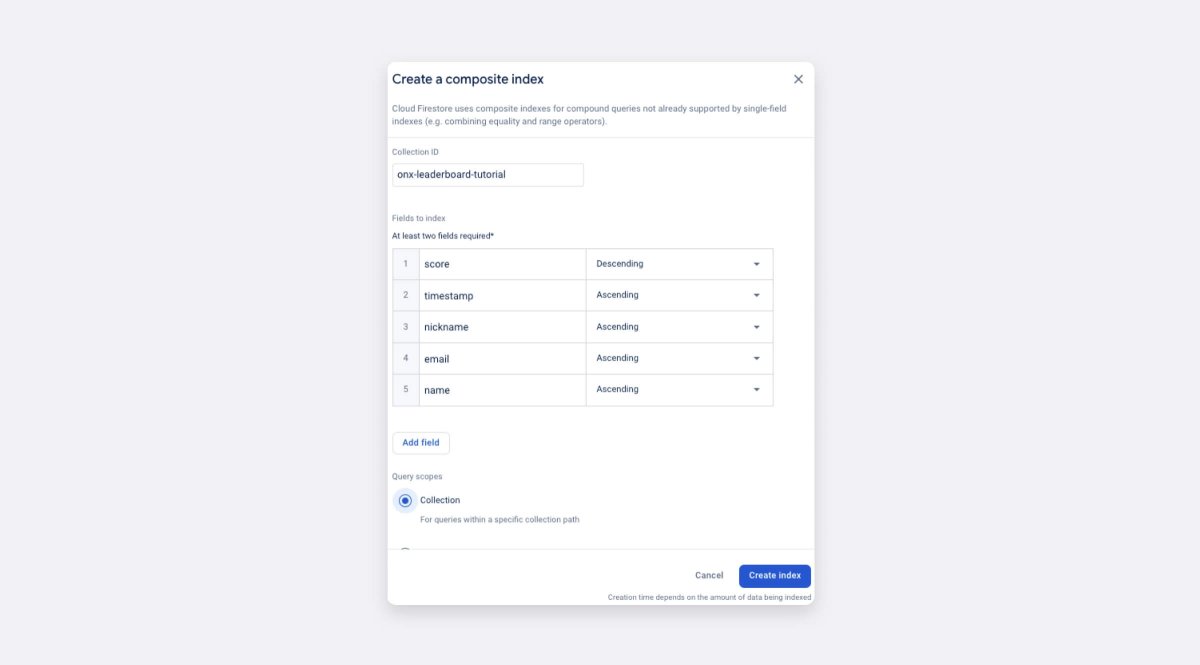
To create an index we must indicate the name of the collection concerned, the fields we want to use for sorting and the direction of the sorting of each field (ascending or descending).
Step 2: Use Onirix Leaderboard in your experience
Configure Onirix Leaderboard against your Firebase project
Go to your copy of Binball experience and open the online code editor. You have to import the Onirix Leaderboard experience, set the Firebase credentials, set the Firestore collection name (we choose "onx-leaderboard-tutorial" for this example) and Instantiate the leaderboard library.
Add this code at the beginning of the code or just before the import of the OnirixEmbedSDK.
import OnirixLeaderboardLib from "https://unpkg.com/@onirix/leaderboard@latest/dist/ox-leaderboard-lib.esm.js"

const firebaseConfig = {
    apiKey: "FIREBASE_API_KEY",
    authDomain: "FIREBASE_AUTH_DOMAIN",
    projectId: "FIREBASE_PROJECT_ID",
    storageBucket: "FIREBASE_STORAGE_BUCKET",
    messagingSenderId: "FIREBASE_MESSAGIN_SENDER_ID",
    appId: "FIREBASE_APP_ID",
    measurementId: "FIREBASE_MEASUREMENT_ID"
};

const oxLeaderboard = new OnirixLeaderboardLib(firebaseConfig, "onx-leaderboard-tutorial");
You can choose any name you want for the Firebase project collection where the experience data will be stored. You can use the same Firebase project for several experiences by simply using a different collection name for each one.
Welcome page and user authentication
At the start of the experience the Binball welcome screen is displayed.
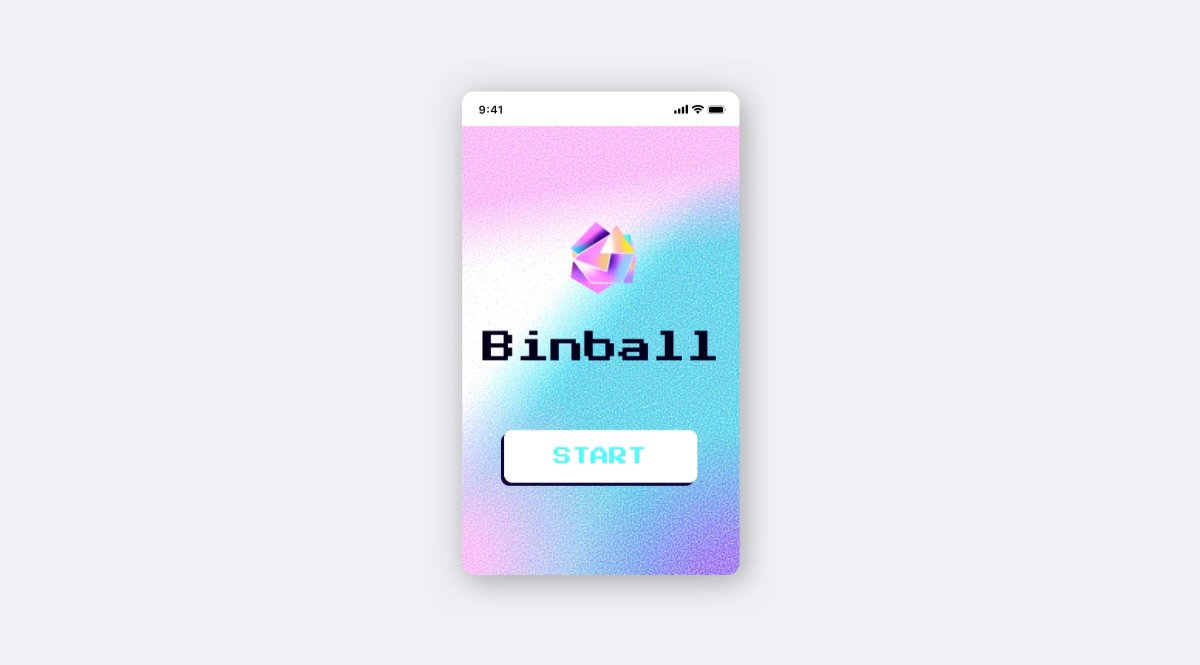
Let's change the code so that instead of showing that screen, the Onirix Leaderboard is launched. It's easy, just replace the experience UI initialization with the Onirix Leaderboard initialization.
oxLeaderboard.init();
// oxExperienceUI.initUI();
Now when we start the experience we see the Onirix Leaderboard welcome screen. Later we will see how to customize it to match the design of the rest of the experience.
After the welcome screen, if the user is not authenticated on that device, we go to the registration screen. If the user is already registered, he/she can authenticate through the "Login now" link at the bottom of the screen.
Start your experience
When the user is already authenticated Onirix Leaderboard will notify us by executing the startExperience method. We must define this method for our experience to start. In this case we will invoke the initUI method that we discussed in the previous point.
oxLeaderboard.startExperience = () => {
    oxExperienceUI.initUI();
}
oxExperienceUI.initUI() launches the initial Binball screen. As the library already offers a welcome screen, you may not want to show the experience screen. For it you must go to the initUI method and comment or delete the code that shows that screen.
 /**
   * Initializes UI elements.
   */
initUI() {
        /*
        this.show(this.TITLE_SCREEN);
        document.getElementById(this.START_BUTTON).addEventListener('click', () => {
            this.hide(this.TITLE_SCREEN);
            this.started = true;
            if (this.onStart) {
                this.onStart();
            }
        }, { once: true });
        */
        this.started = true;
        if (this.onStart) {
            this.onStart();
        }
    ...
}
Save user's score and show leaderboard
When our experience is finished we have to pass the score obtained by the user to the Onirix Leaderboard. Onirix Leaderboard takes care of persisting it in Firebase only if the user does not have a previous score higher than the one he just got. This is done by executing the method saveScore.
oxLeaderboard.saveScore(userPoints);Make sure that userPoints is a numeric value.
You can show the leaderboard whenever you want by calling the method showLeaderboard of the library
oxLeaderboard.showLeaderBoard();To integrate it in our experience, it is enough to modify the method that is in charge of the end of the game to call the methods of the library.
oxExperienceUI.onGameOver = async (score) => {
    await oxLeaderboard.saveScore(score);
    oxLeaderboard.showLeaderBoard();
}
Terms, conditions and privacy policy
You may need to show the user the terms and conditions and usage policy of your experience. For this purpose Onirix Leaderboard includes two links on the registration screen.
When the user clicks on "Terms and conditions" the method will be executed:
oxExperienceUI.onTerms = () => {
    // do some stuff
}
And when the user clicks on "Privacy Policy" the method will be executed:
oxExperienceUI.onPrivacyPolicy = () => {
    // do some stuff
}
You can use these functions to open a new tab with the url you want or to display some html element with the corresponding text.
Step 3: Customize Onirix Leaderboard
We have already integrated the Onirix Leaderboard functionality into our experience. Now it's time to modify its appearance to match the rest of the experience.
Let's start with the texts.
Use your own texts
When we create the library object we can add a parameter with the texts we want to use. This parameter is a JSON object structured according to the library screens.
With this code we are going to modify the texts of the welcome screen:
const CUSTOM_UI_TEXTS = {
    welcome: {
        title: "Let's waste some time!",
        text: "It's not all about work. Spend some time throwing paper balls into the wastebasket. Be careful! The fans will try to push your ball away from its target.",
        close: "Start"
    }
}

const oxLeaderboard = new OnirixLeaderboardLib(firebaseConfig, "onx-leaderboard-tutorial", CUSTOM_UI_TEXTS);
oxLeaderboard.init();
You can consult all customizable texts in our GitHub repository.
Use your own styles
To modify the look and feel of the Leaderboard you can add all the CSS you need to your experience through Onirix Studio's online code editor.
All leaderboard screens are annotated with the ox-lib-code css class. By styling that class you can apply changes to all the Leaderboard screens. Let's add some code to change the white background of the screens and the font.
.ox-lib-code {
     filter: contrast(150%) brightness(105%);
    background: center / 768px url('https://www.onirix.com/ox-experiences/binball/noise.svg'), radial-gradient(circle at bottom right, #6d3bd8 10%, transparent 30%), linear-gradient(170deg, #FF92E0 20%, transparent 35%), radial-gradient(circle at left 90%, #FF92E0, transparent 35%), linear-gradient(130deg, #FFFFFF 35%, #20b0ca 50%);
    color: #2c1844;
    font: unset;
}
And now let's change our buttons:
.ox-lib-code button {
    display: block;
    font-weight: bold;
    color: #3FDADA !important;
    border: none;
    border-radius: 11px !important;
    background: #FFFFFF !important;
    box-shadow: -4px 4px #391F58;
    font-family: 'Press Start 2P', display;
    font-size: 14px;
    font-smooth: never;
    -webkit-font-smoothing: none;
    text-transform: uppercase;
    line-height: 14px;
    transition: transform 0.1s ease-in, box-shadow 0.1s ease-in;
    pointer-events: all;
}
Each screen in the library has its own identifier and a specific CSS class for it: 'ox-leaderboard', 'ox-welcome', 'ox-register' and 'ox-login'. We can use these identifiers to modify a specific screen. Let's remove the Onirix logo from the Welcome page, change the main image and remove the button background.
.ox-lib-code.ox-welcome .ox-welcome__img::before {
    display: none;
}

.ox-lib-code.ox-welcome .ox-welcome__img {
    border: none;
    background-size: contain;
    background-image: url(https://www.onirix.com/ox-experiences/binball/logo-big.png);
}

.ox-lib-code.ox-welcome > p::after {
    display: none;
}
This is our new customized welcome screen:

Do you want full customisation?
You can make infinite changes to the interface by adding the appropriate CSS selectors. Through your browser's development tools you can explore the names of the css classes used by the library and add your own custom selectors and rules.
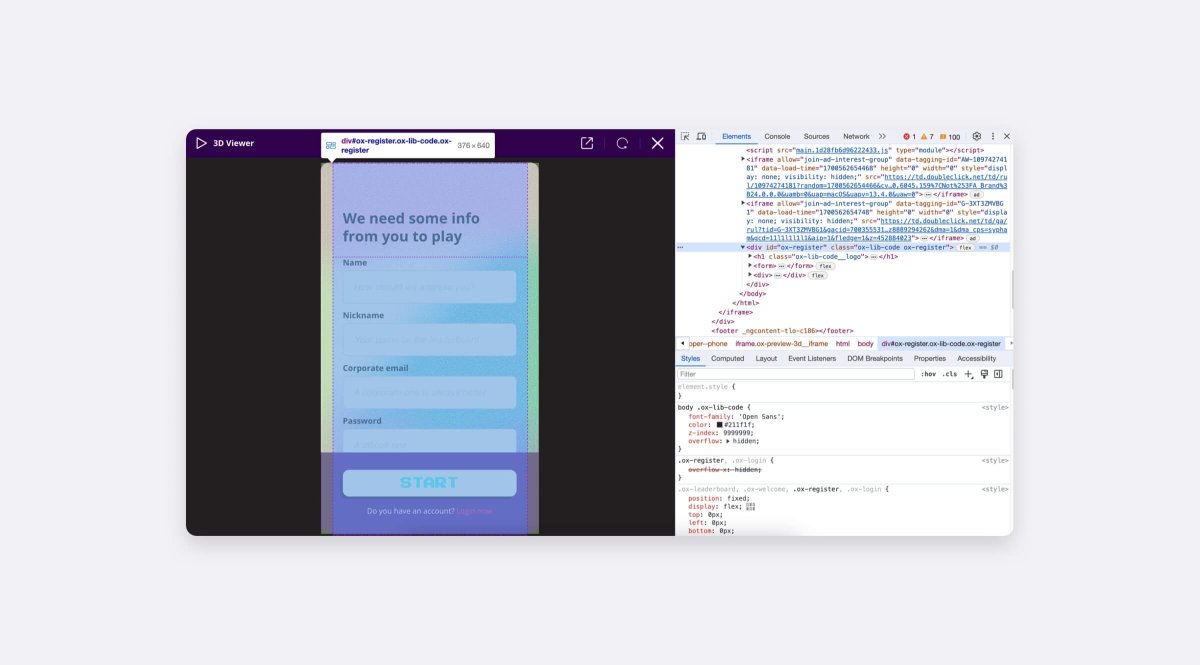
If you want to make deeper changes you can clone the Onirix Leaderboard code from our GitHub repository and create your own Leaderboard.