Onirix internationalisation: i18n module
Onirix i18n allows you to internationalise your experiences with Labels in a simple way. From the Onirix Studio editor you can define the text to be displayed on the labels of your experiences in different languages. You can either create data structures with our Datastore to manage the translation of the labels, or include inline code in the JavaScript part of our online code editor. Here we will show both options.
Since version v2.0.0 the module provides a way for internationalization of the UI implemented in HTML and CSS.
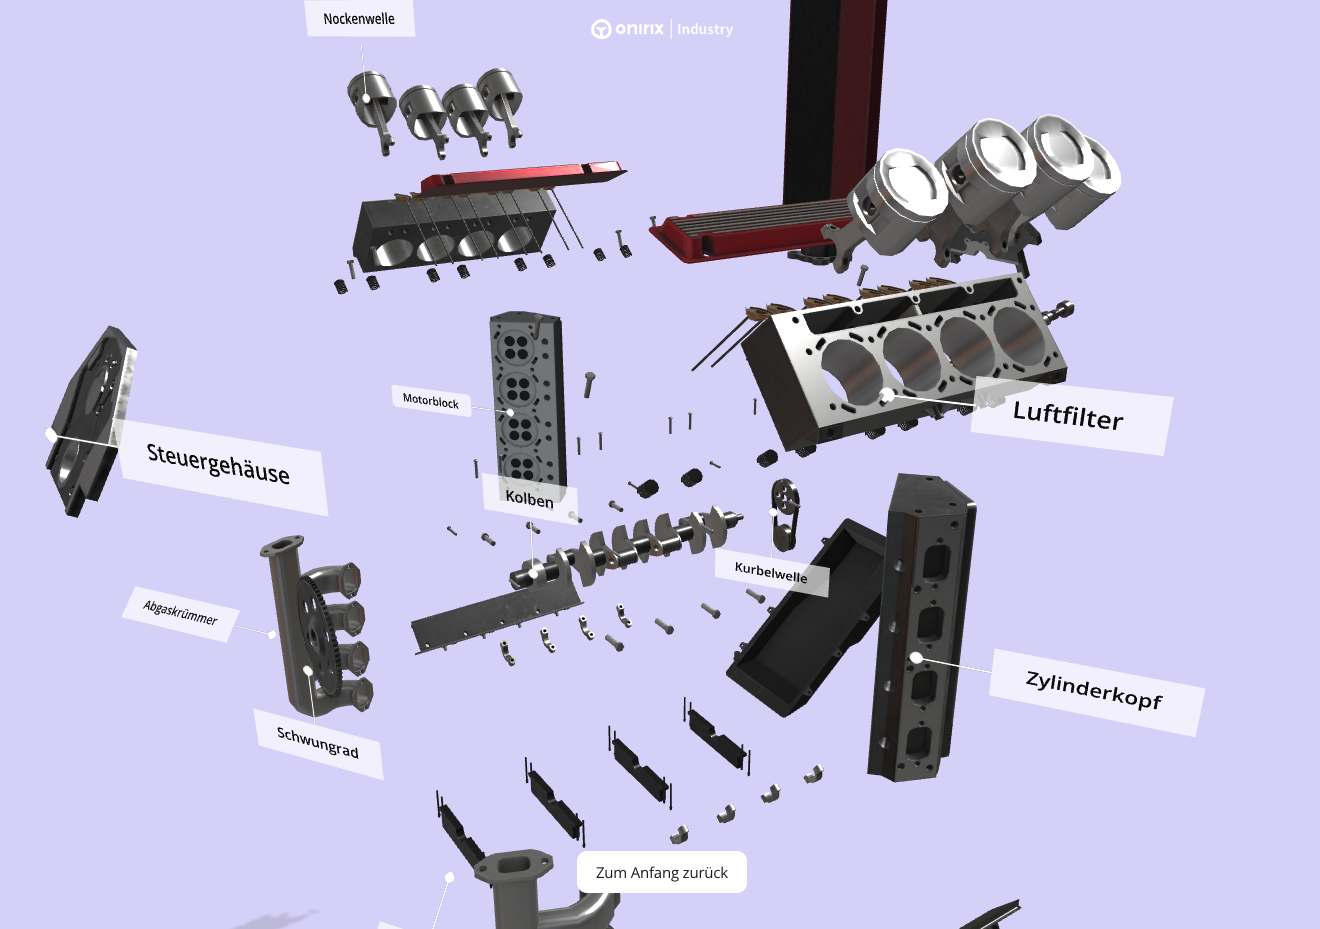
Here you can see an example with labels an UI in several languages:
- https://player.onirix.com/exp/3Ax7k5?locale=en opens your experience in English.
- https://player.onirix.com/exp/3Ax7k5?locale=es opens your experience in Spanish.
- https://player.onirix.com/exp/3Ax7k5?locale=de opens your experience in German.
- https://player.onirix.com/exp/3Ax7k5?locale=fr opens your experience in French.
- https://player.onirix.com/exp/3Ax7k5?locale=pt opens your experience in Portuguese.
Module import with code editor
To use this module, the minimum necessary is to import it from the code editor, and connect it with our Embed SDK. This part will be shared in both options, with or without Datastore, so let's begin with this step. This is all the code you will need:
import OnirixEmbedSDK from "https://cdn.jsdelivr.net/npm/@onirix/embed-sdk@1.17.1/+esm";
import OnirixI18nModule from "https://cdn.jsdelivr.net/npm/@onirix/i18n-module@2.0.1/+esm";

const embedSDK = new OnirixEmbedSDK();
embedSDK.connect();

const useLanguage = "en";

const oxI18n = new OnirixI18nModule(embedSDK, useLanguage);
This example uses "en" as the language but you can use another Iso code present in the data structure instead. If the selected language is not among the available languages (specified in the template), the first language defined in the template will be used.
If instead of our default template you have created a new one with different languages you must indicate it to the module in this way:
import OnirixEmbedSDK from "https://cdn.jsdelivr.net/npm/@onirix/embed-sdk@1.17.1/+esm";
import OnirixI18nModule from "https://cdn.jsdelivr.net/npm/@onirix/i18n-module@2.0.1/+esm";

const embedSDK = new OnirixEmbedSDK();
embedSDK.connect();

const oxI18n = new OnirixI18nModule(embedSDK, "fr", {template: "custom-data-structure-name"});
Internationalisation AR options: Datastore or Inline code
Datastore option: Data Sheets associated to the labels
In order to define the texts to be displayed on each label, we use a connection to our Datastore functionality. In this component we can create Data Structures, and fill them with the text corresponding to each language using Datasheets.
Data Strucrure predefined
Within our Onirix i18n module we offer a data structure already created and called ox-i18n.
To be able to include this module in your account you will need to create a new Structure in the Datastore with this exact fields in it.
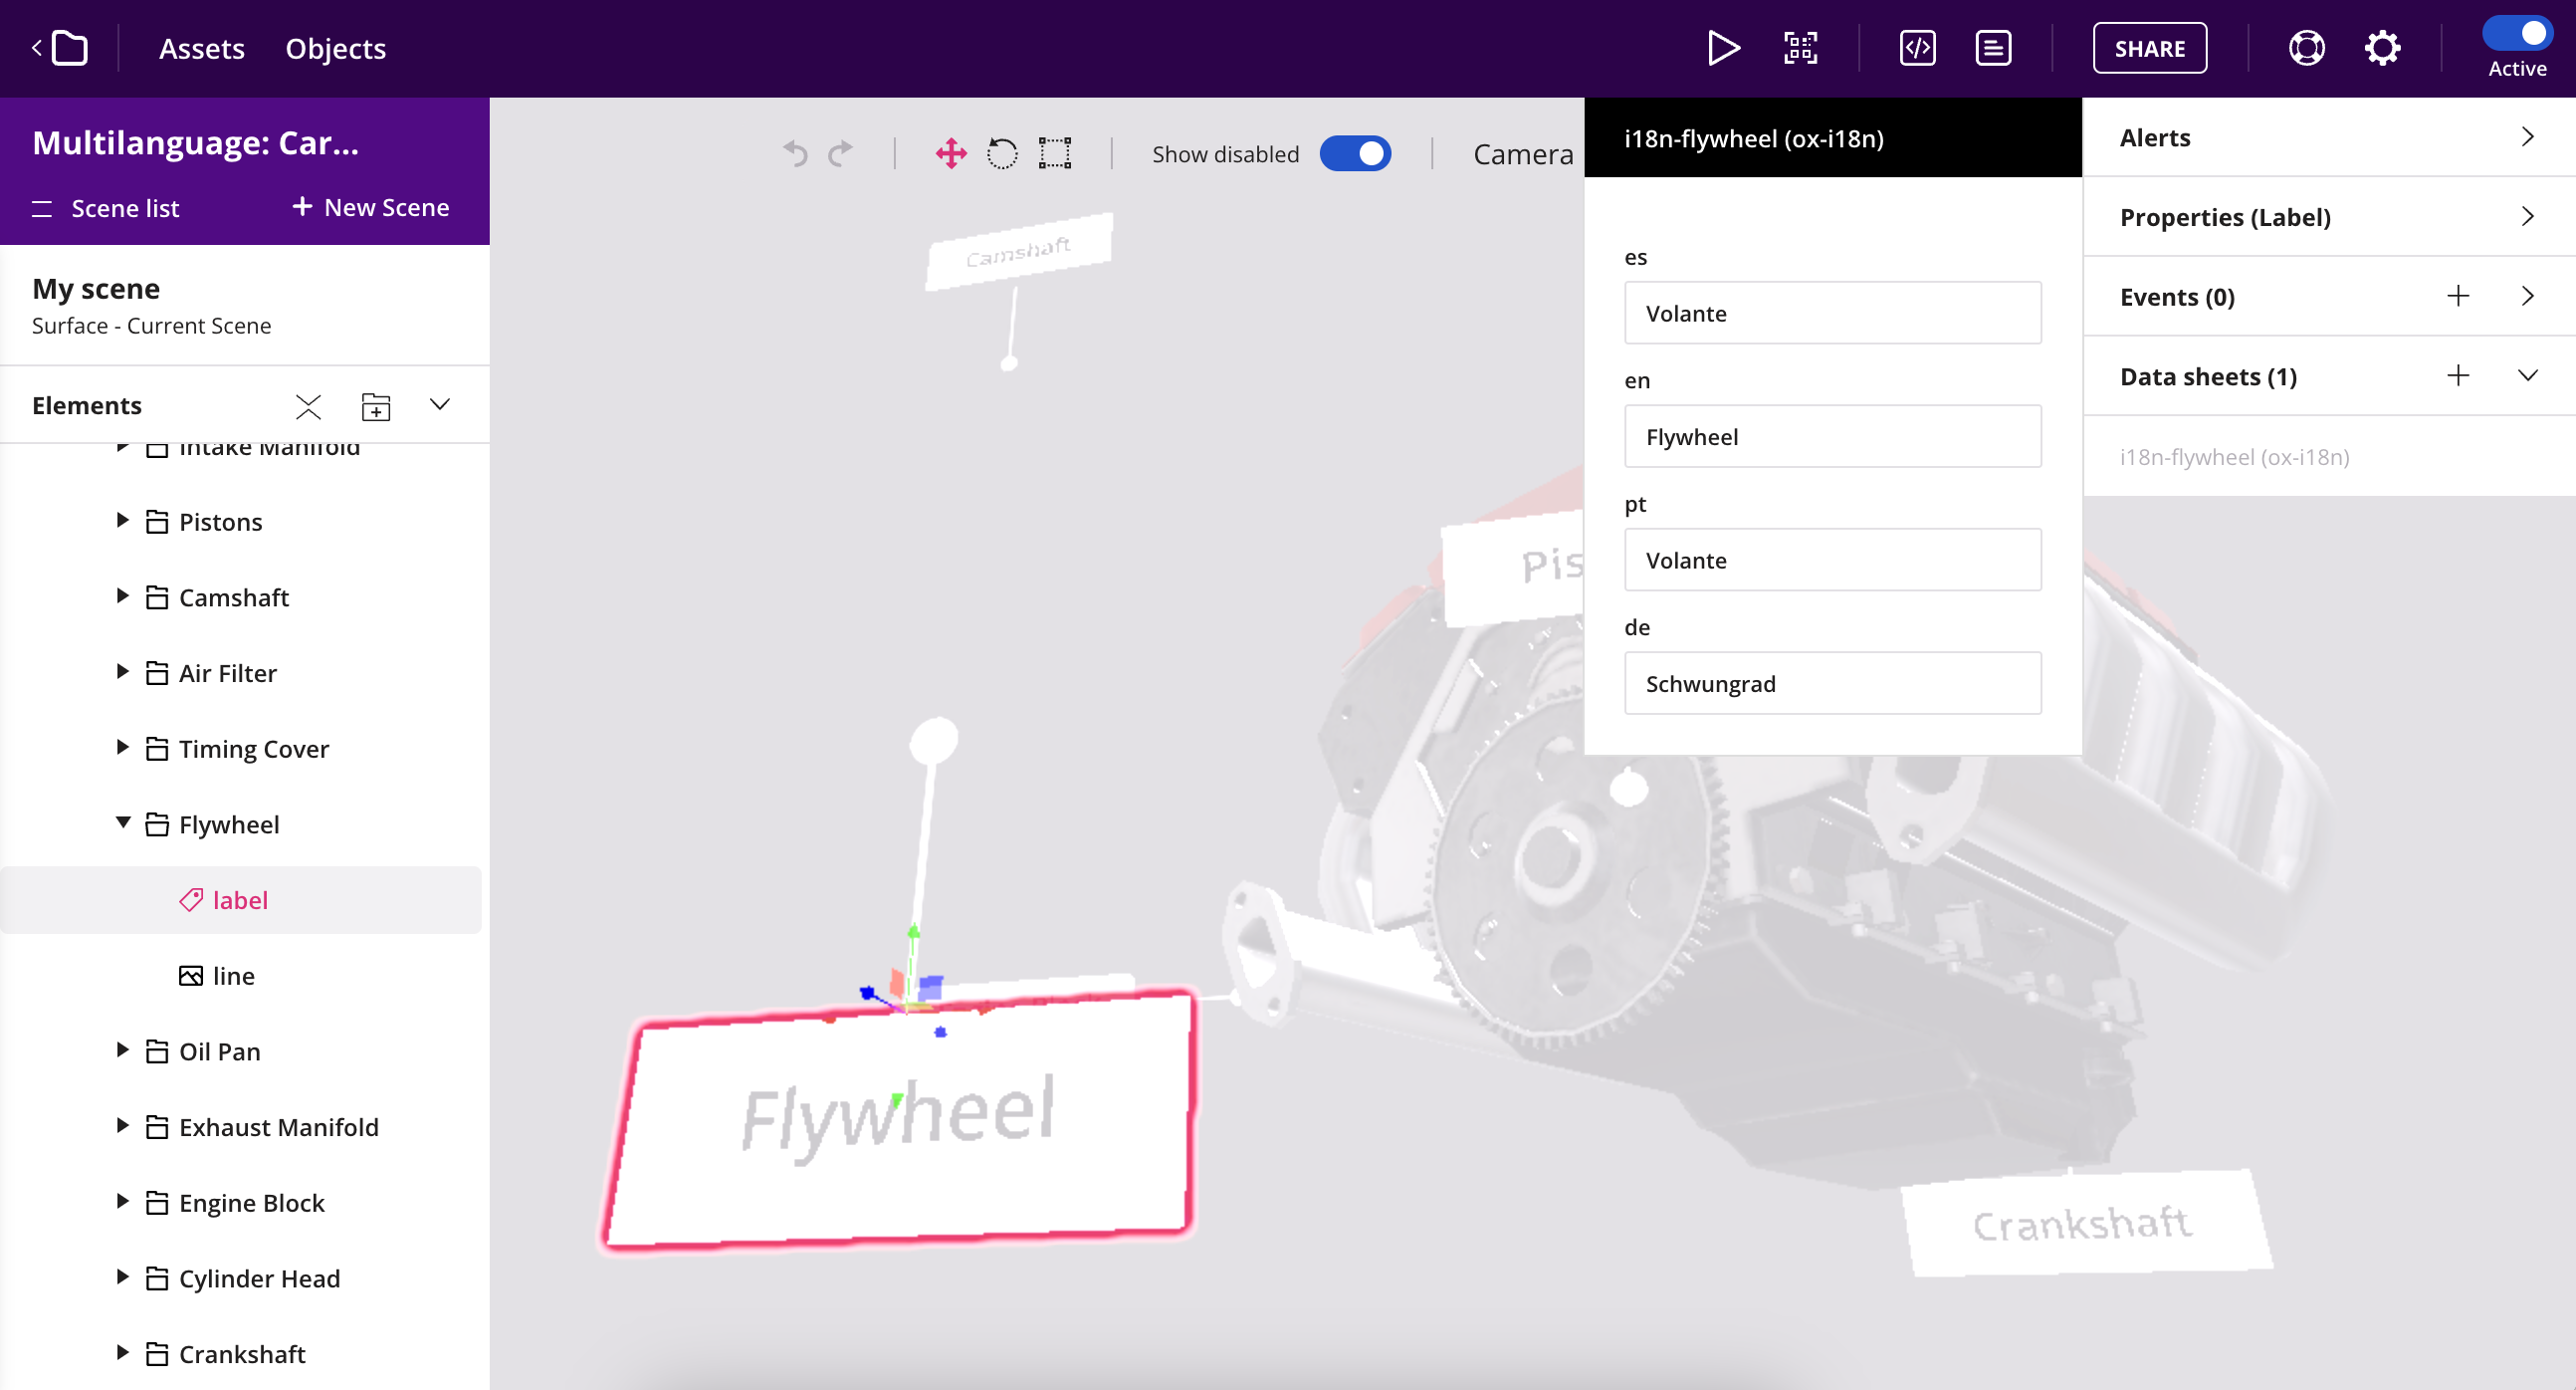
The structure in question has the following fields (one for each language):
- es: string for Spanish text.
- en: string for English text.
- pt: string for Portuguese text.
- de: string for German text.
Remember that you can create your own structures using our Datastore and add more languages. The field for each language must be named with the corresponding ISO code (Set 1).
Data Sheets associated with each step
In the Data Sheets section, inside the scene editor, is where you can associate the content with our sheet editor in an intuitive way.
Here you can relate each of the labels to its specific content, and provide them with the corresponding text for each language:
Inline object option
If you don't want to use the Datastore for this case, you can just create an array that contains information about the labels, the languages and the texts that each of them will show. Following this same structure in the code you can include easily your internationalization texts as we show in this snippet:
import OnirixEmbedSDK from "https://cdn.jsdelivr.net/npm/@onirix/embed-sdk@1.17.1/+esm";
import OnirixI18nModule from "https://cdn.jsdelivr.net/npm/@onirix/i18n-module@2.0.1/+esm";

const embedSDK = new OnirixEmbedSDK();
embedSDK.connect();

const i18nTexts = [
    {
        labelOid: "c6c4f5de-84c0-470a-b31e-a64e104afc23",
        i18n: [
            {
                es: "Spanish text"
            },
            {
                fr: "Texte en français"
            }
        ]
    }
]

const oxI18n = new OnirixI18nModule(embedSDK, language, {i18nLabelsTexts: i18nTexts});
Internationalisation UI (html and css)
Body data attribute
When the internationalisation module is instantiated, a new data attribute data-ox-i18-locale is automatically added to the document body. The value of this attribute will be the ISO code of the language used to call the module constructor.
<body data-ox-i18-locale="es">
    ...
</body>
From this attribute of the body we can create css rules that allow us to adapt the design and images of the UI to the selected language.
/* Styles and resources specific to Spanish */
body[data-ox-i18-locale="es"] {
    background-color: #e0f7fa; /* Change background color */
    color: #00796b; /* Change text color */
}

body[data-ox-i18-locale="es"] .locale-image {
    content: url('image-es.jpg'); /* Change image based on language */
}

/* Styles and resources specific to English */
body[data-ox-i18-locale="en"] {
    background-color: #f3e5f5; /* Change background color */
    color: #6a1b9a; /* Change text color */
}

body[data-ox-i18-locale="en"] .locale-image {
    content: url('image-en.jpg'); /* Change image based on language */
}
HTML Content
Each HTML element that need to be internationalised will have a data-ox-i18n attribute that acts as a key for identifying the text to display.
<h1 data-ox-i18n="your_key_title"></h1>
...
<p data-ox-i18n="your_key_1"></p>
...
<span data-ox-i18n="your_key_2"></span>
The internationalisation inline object
The i18nUITexts array contains the internationalisation data for each text element. Each object in the array includes an oxi18n key that matches the data-ox-i18n attribute in the HTML and an i18n array with translations for different languages.
The i18nUITexts array must be added to the constructor's parameters.
const i18nUITexts = [
    {
        oxi18n: "your_key_title",
        i18n: [
            { en: "This is the English title" },
            { es: 'Este es el título en Español' }
        ]
    },
    {
        oxi18n: "your_key_1",
        i18n: [
            { en: "In the bustling town of Cookieville, every Friday was a celebration of the beloved chocolate chip cookie." },
            { es: 'En el bullicioso pueblo de Galletilandia, cada viernes era una celebración de la querida galleta con chispas de chocolate.' }
        ]
    },
    {
        oxi18n: "your_key_2",
        i18n: [
            { en: "a curious cat named Whiskers" },
            { es: "un curioso gato llamado Bigotes" }
        ]
    },
];

const oxI18n = new OnirixI18nModule(embedSDK, "es", { i18nUITexts: i18nUITexts });
Ways of obtaining the language as a parameter
Using the browser language
In many cases you will want the experience to load in the same language that the user has configured for their web browser. This code takes that language and passes it directly to the module:
import OnirixEmbedSDK from "https://cdn.jsdelivr.net/npm/@onirix/embed-sdk@1.17.1/+esm";
import OnirixI18nModule from "https://cdn.jsdelivr.net/npm/@onirix/i18n-module@2.0.1/+esm";

const embedSDK = new OnirixEmbedSDK();
embedSDK.connect();

const userLanguage = navigator.language || navigator.userLanguage;
const locale = userLanguage.split('-')[0];

const oxI18n = new OnirixI18nModule(embedSDK, locale);
Define the language with a parameter in the url
You can set your experience to load a language based on a parameter. This will allow you to have a different link for each audience you have.
import OnirixEmbedSDK from "https://cdn.jsdelivr.net/npm/@onirix/embed-sdk@1.17.1/+esm";
import OnirixI18nModule from "https://cdn.jsdelivr.net/npm/@onirix/i18n-module@2.0.1/+esm";

function getLocaleFromUrl() {
  const urlParams = new URLSearchParams(window.location.search);
  return urlParams.get('locale');
}

const locale = getLocaleFromUrl();

const embedSDK = new OnirixEmbedSDK();
await embedSDK.connect();

const oxI18n = new OnirixI18nModule(embedSDK, locale);

