Embed in your website
This section covers installation and configuration steps in order to display Onirix WebAR experiences in custom domains. Both to embed your experiences in Web AR mode (full screen) and to embed them as a block inside a web, 3D web mode, you need to follow the following steps.

Step 1: Set up your domain as a trusted request origin
In order to allow your domain to make requests to Onirix servers, it needs to be added to an internal whitelist.
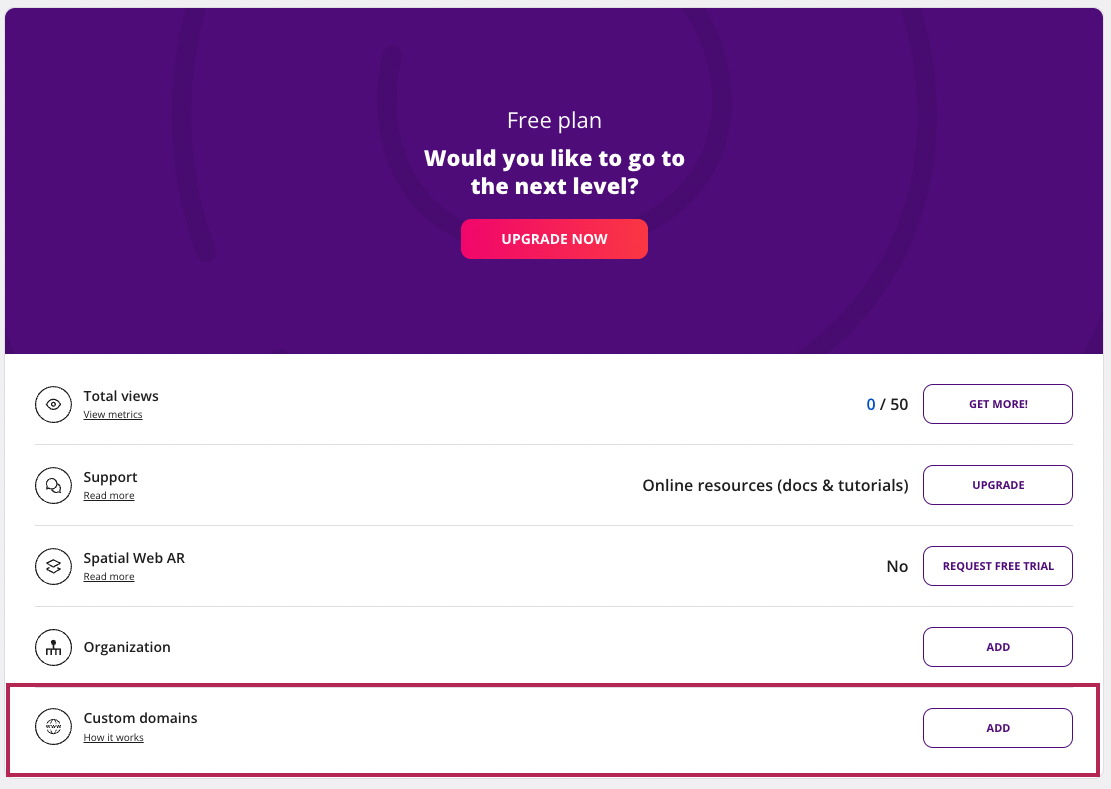
You can manage your custom domains in Onirix Studio from Plan & Billing section of your Account:
When opening an Onirix WebAR project, the browser makes requests to Onirix Servers to download asset files and resources in order to load the experience. Because these requests come from an external and unknown source (your domain), the browser blocks them by default. This security mechanism is called Cross-Origin Resource Sharing (CORS).
Testing with a local domain
In case you want to test the access to the scene embedding on your website without including a custom domain to start with, one method you can follow is to set up a local server in order to use one of the domains accessible for testing. Onirix allows the following domains and addresses are whitelisted for development:
- localhost:*
- 127.0.0.1:*
- *.ngrok.io
- *.ngrok-free.app
- *.ngrok-free.dev
- *.ngrok.app
- *.ngrok.dev
- *.lhr.life
- *.glitch.me
If you use this option it is mandatory you serve your files through HTTPs. There are plenty of tools out there that may help you with this by generating an self-signed certificate and serving your files with a single command. Take a look at http-server utility.
Step 2: Get your project's embed HTML code
You can copy the embed HTML code from the Share options within the Scene editor. For more information about the sharing options in Onirix visit the specific documentation page: Sharing options in Onirix.

Note that the HTML blocks change when switching from Onirix Clip and web exclusive modes. For Onirix Clip visualization, you must also include the head section in order to make users get prompted to open the experience.
Establish your settings: Web AR or Web 3D block
Depending on the purpose you want to give to the insertion of the iframe within the web, you may need some settings or others. As explained in this section, by default the default sharing mode is web AR, but you can easily modify the settings to insert it as an embedded block in web 3D: Access to embed modes options.
Step 3: Insert the code in your website
Web AR mode: full screen
In order to include the code in your website you can just paste it at any place inside the HTML body tag of your desired page.
If you are curious and inspect the HTML code, you'll see it consists of two different html elements, an iframe and an external script.
Using an iframe is an easy way to embed external HTML content in your website.
The iframe element includes some hard-coded styles so the experience is displayed full-screen. Feel free to modify them if required.
The external script (ox-devicemotion.min.js) is required to allow running surface-tracking experiences on iOS (Safari).
Starting with iOS 9.2, Safari blocked deviceorientation and devicemotion event access from cross-origin iframes. This means the iframe wouldn’t be able to access device motion data by itself, so it would have to be requested externally (from your site) and passed to the iframe. ox-devicemotion.min.js script sets up all of this for you.
Embedding a unique Scene from Onirix (not the whole project)
If at some point you want to insert a scene included in one of your projects, in an isolated way, for example to assign a url to each of the different scenes, you can get the Scene url in order to do this. Here we explain how to get this url within the scene editor.
Web 3D mode: example embedding in a Wordpress post
If you want to insert your scene as part of a pre-existing website, you can simply place the inserted HTML code block in the corresponding part, and modify the styles to your liking. For a plain HTML web you can just use the HTML code Onirix provices in the Embed menu. For a markup website like this one, you can include HTML blocks on top of the code provided, to get something like this:
Markup HTML Web example:
Plain HTML website example (like Wordpress):
Here you can also see the same example in a wordpress web page: https://www.onirix.com/example-embedded-scenes-with-iframes-web-3d/
More info of how to embed your experiences in web 3D mode in the sharing options menu page.
Step 4: Modify the styles and behavior inside the iframe
Iframes are protected by the same-origin policy. This means the browser won’t allow an external site to inject CSS or JS code inside the iframe. This is a critical security mechanism to avoid malicious attacks.
However, from Onirix we have set up a way to internally inject CSS and JS code to WebAR experiences so the iframe already comes bundled with that, and thus, there are no restrictions from the browser.
This feature is called Code Editor and is available for all plans in Onirix.
Special considerations for Onirix Clip
Onirix Clip uses Apple’s App Clip technology to launch a native Onirix experience as quickly and seamlessly as possible—almost like a web application. However, this approach can introduce challenges when you want to use a custom domain. Below are various options for integration so you can choose the one that best fits your use case.
Option 1. Integrate using a Smart Banner (default)
By default, Onirix adds a Smart Banner to your site. A Smart Banner appears at the top of the page in iOS and links to the app. To enable this, include the HTML head code block from the sharing options’ “embed” section in your website’s head element.

Pros:
- The same embed code works for both Android and iOS.
Cons:
- Non-uniform user flow between Android and iOS.
- On iOS, launching isn’t immediate. Users see a Smart Banner and need to download the app before starting the experience.
Result:

Option 2. Use a URL redirect on iOS
Add a device-detection snippet to your site and automatically (or via a button) redirect iOS users to the Onirix experience URL (player.onirix.com…).
Pros:
- No app download needed for the user.
Cons:
- The domain change is visible momentarily (your-domain.com → player.onirix.com…).
- Non-uniform user flow between Android and iOS.
You can use the following code snippet to configure the URL redirect:
<!-- Include Bowser library for OS detection -->
<script src="https://cdn.jsdelivr.net/npm/bowser@latest/es5.js"></script>
<!--
   When page loads, this script detects whether user is on iOS and redirects it to the App Clip launch URL
   For other OS, it just embeds the experience.
-->
<script>
    (() => {
         const browser = bowser.getParser(window.navigator.userAgent);
         const isIOS = browser.parsedResult.os.name == "iOS";
         if (isIOS) {
             window.location.href = 'https://player.onirix.com/exp/3yYKO3';
         } else {
             document.body.innerHTML += '<iframe id="visor" style="position:fixed;top:0;left:0;right:0;bottom:0;z-index:999;max-width:100vw;width:100%;height:100%;display:block;border:none;" src="https://player.onirix.com/exp/3yYKO3?&background=%23e4e0f7&preview=false&hide_controls=true&ar_button=false" allow="web-share;camera;gyroscope;accelerometer;magnetometer;autoplay;fullscreen;xr-spatial-tracking;geolocation;"></iframe>';
         }
    })();
</script>
Option 3. Disable Onirix Clip (Web-Only Mode)
In the sharing options, you can enable “Disable use of Onirix Clip (web exclusive).” This forces the experience to load in a normal browser. Note that performance may be lower on iOS, and certain advanced features (e.g., Combined Tracking, Spatial AR) won’t be available.

Pros:
- Provides a uniform, browser-based user flow on both Android and iOS.
Cons:
- Reduced tracking performance on iOS.
- Limited feature set (no Combined Tracking or Spatial AR).
Enabling this option will change the embed code, so you will need to update it on your site to use it.