Sharing options
The purpose of creating AR web experiences is none other than to share, with a client, to validate internally with your team, or with the end-users. To share experiences in Onirix you can choose to simply send a link to the experience (for example in a social media post, by email, by Whats App...), or at a next level, sharing the experience on your website or a customer's website, by embedding a custom web iframe.
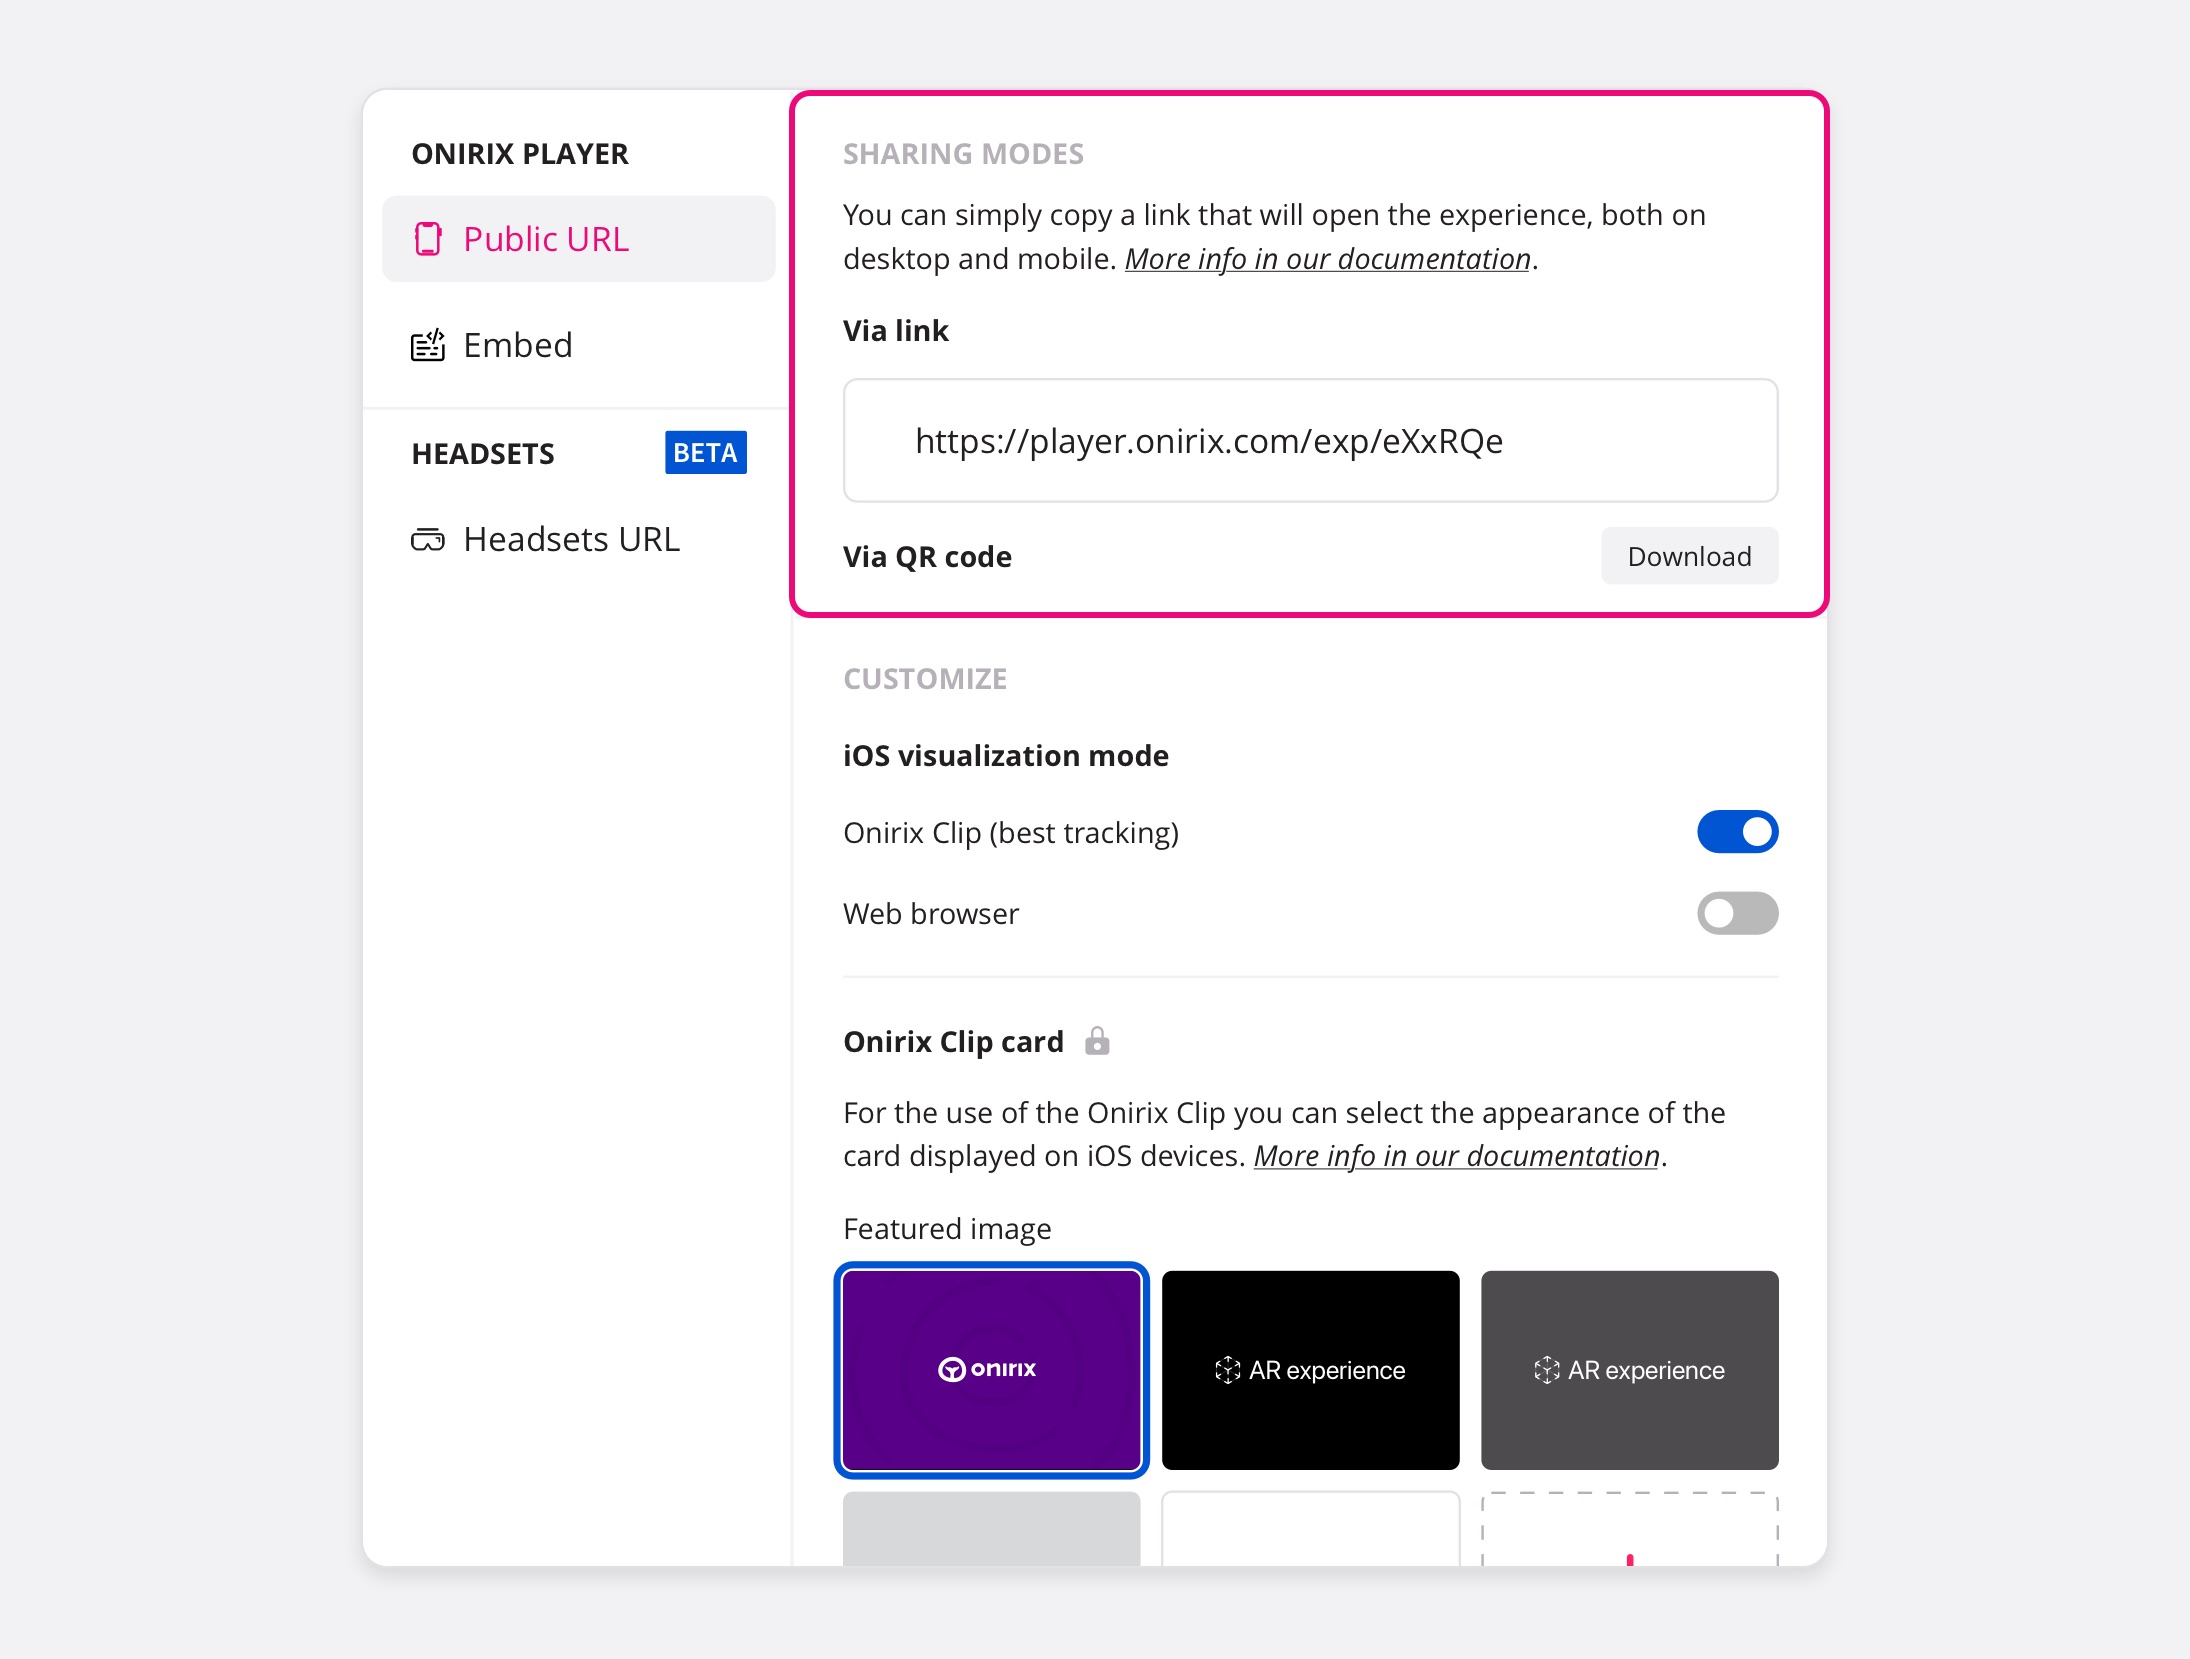
Access the sharing options from the top menu of the scene editor (also from the project card), section SHARE. Inside you will see a dialogue that shows you all these different options.
Sharing options: Public URL and QR
The main way to share an AR experience on Onirix is via the access link, or alternatively, the QR code that encodes the link itself.
In Onirix there are two types of links that can be used alternatively, and which respond to this pattern of structure:
- webar.onirix.com/exp/...
- player.onirix.com/exp/...
Depending on the following configuration setting, you can choose to display one or the other. The only difference between the two modes basically applies to iOS devices and access to the more robust tracking in Surface-type experiences (World tracking). In the case of Android, either of the two URLS can be used interchangeably.
More details on this customisation are given below.
Customization: iOS mode or web browser
As mentioned in the previous section, if we focus exclusively on Apple devices (iPhone devices), we have the ability to choose the display mode of the experiences between two options: Onirix Clip, or Web browser exclusively (in this case Safari).
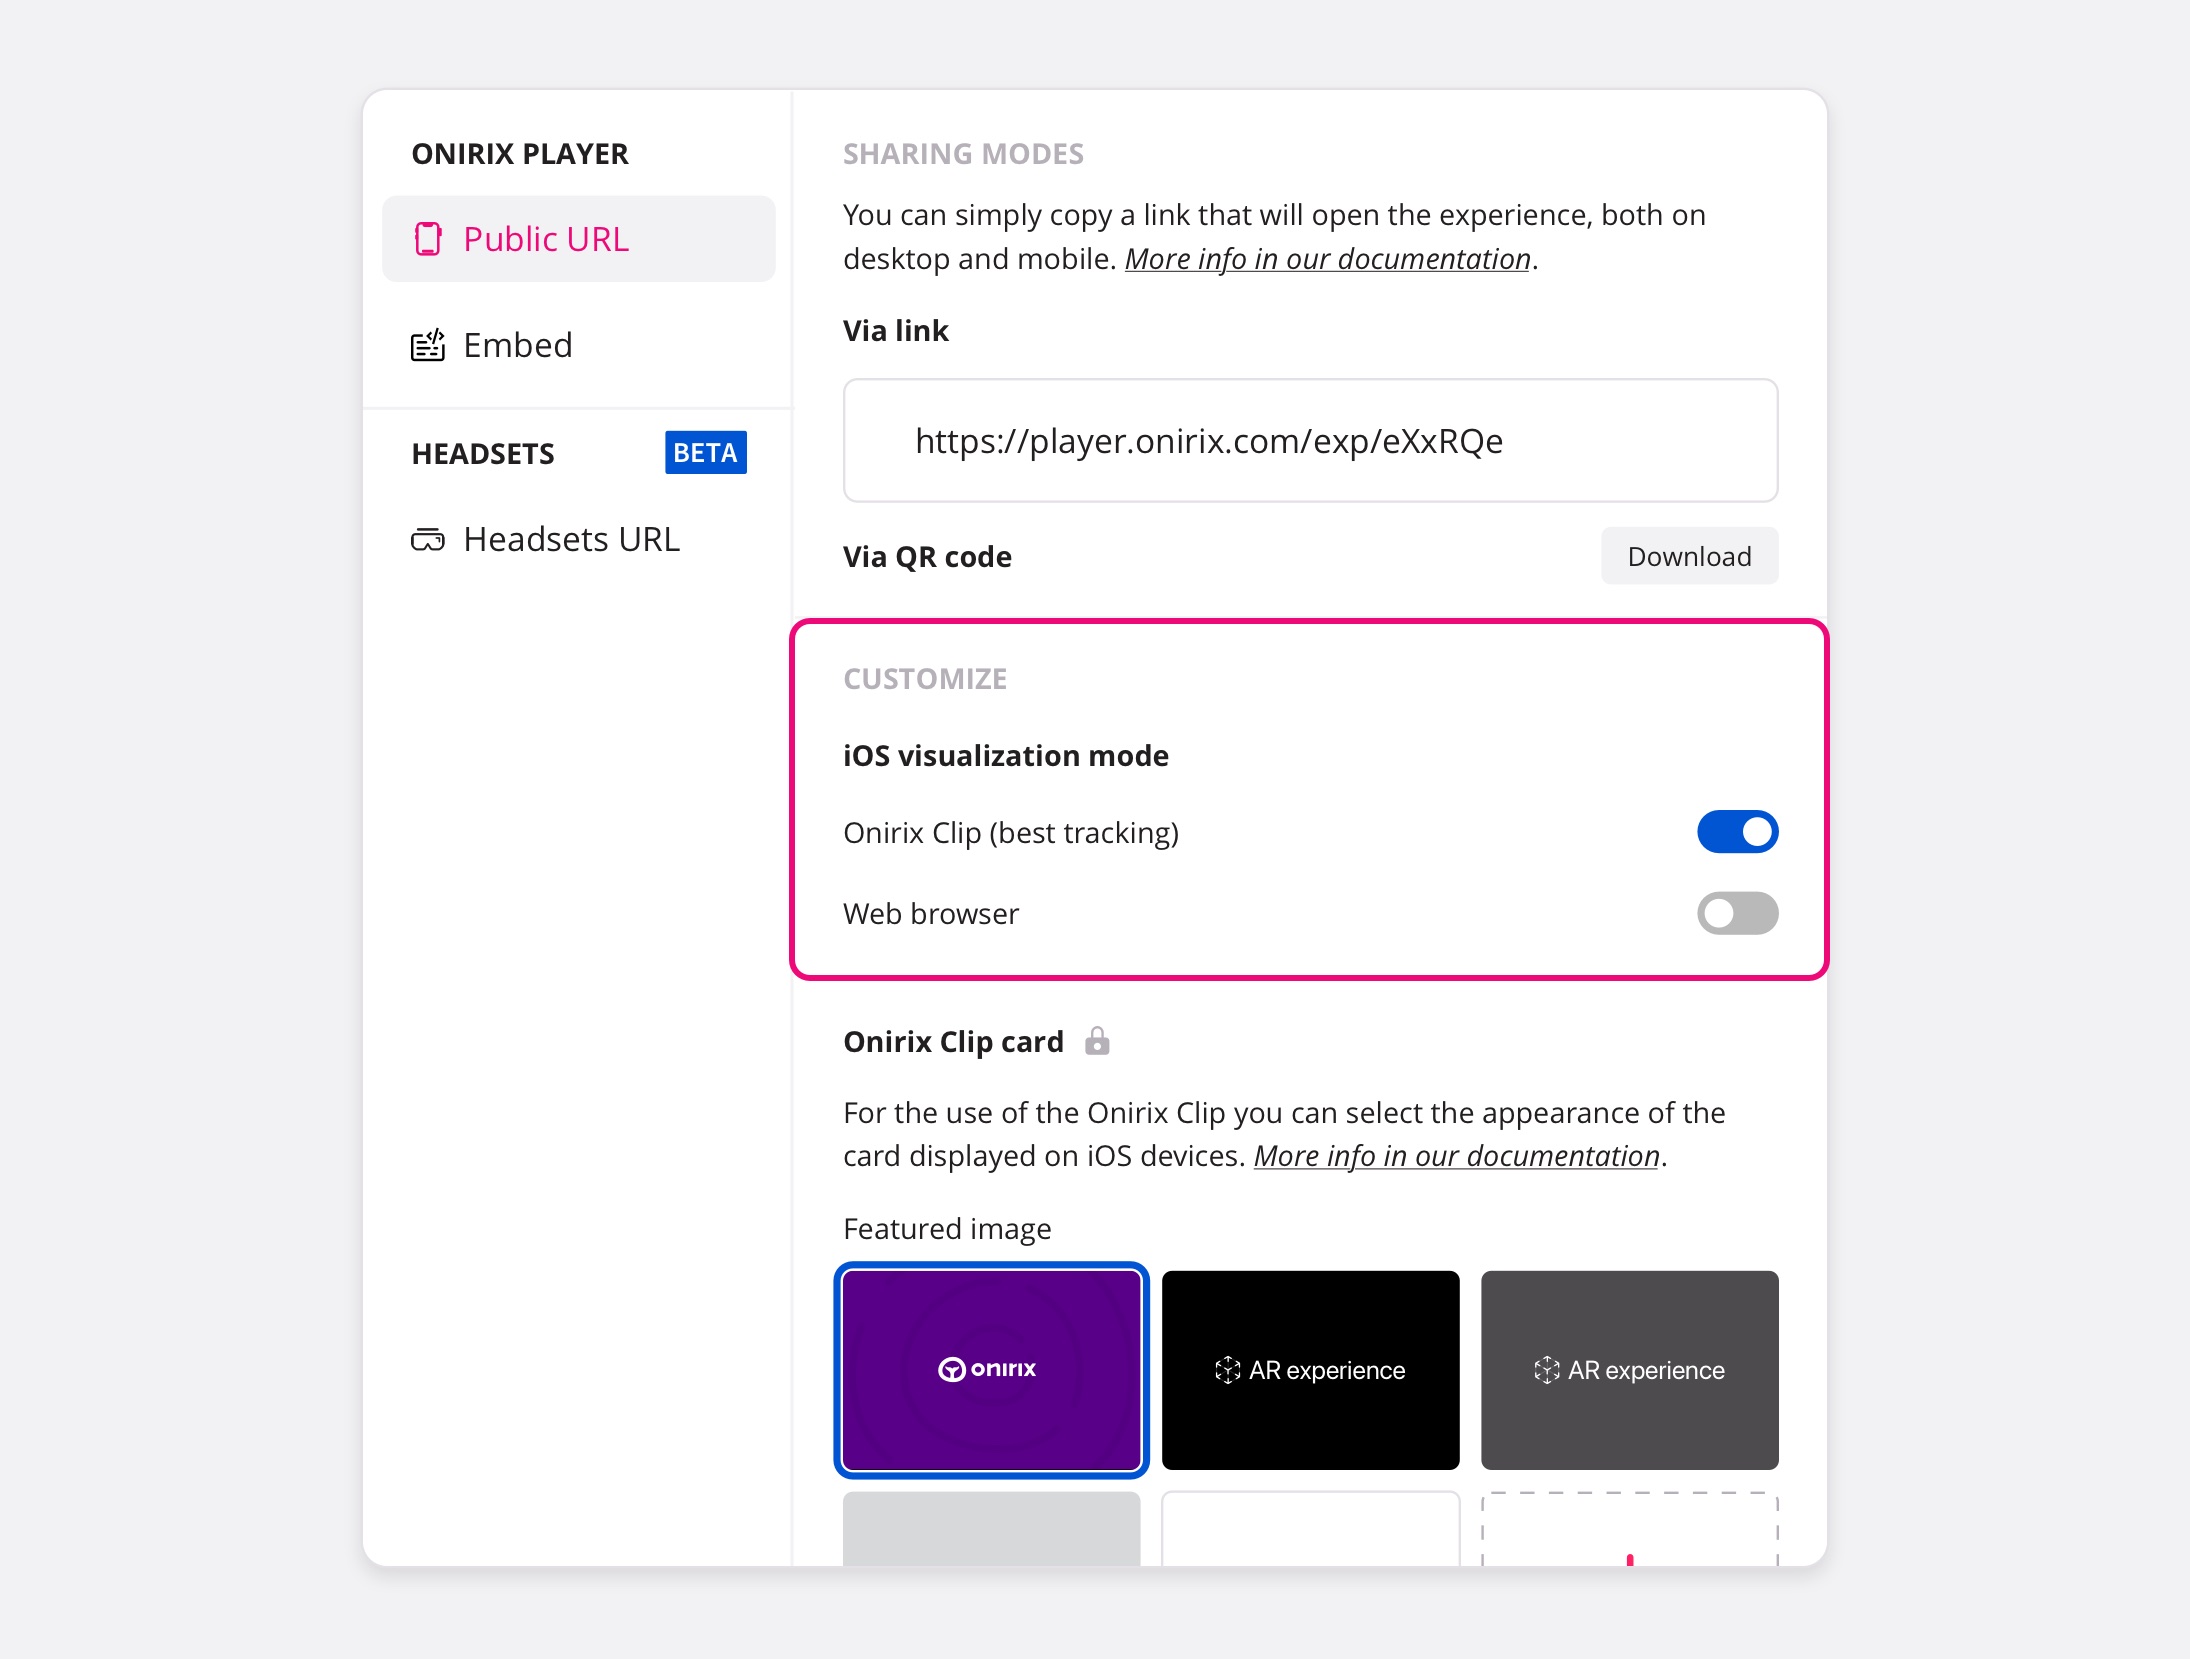
If you select Onirix Clip mode, you will have access to a web browser embedded in an app that launches "on the fly". There is no need to download it and it can be opened from these web links (player.onirix.com/exp/...) or from the associated QR.
The advantages of using this mode are:
- Access to the most robust tracking in World tracking type experiences, as we access the OS tracking (ARKit) capabilities to emulate WebXR API.
- Full screen operation, avoiding "extra" elements included by the browser itself (Safari).
For more info about the Onirix Clip and its features, please access the Onirix Clip documentation page.
Customization: Onirix Clip cards
The display mode via the Onirix Clip shows a tab with the opening of both the QR and the link. This tab has different display modes, which can be modified depending on the licence you have active in Onirix.
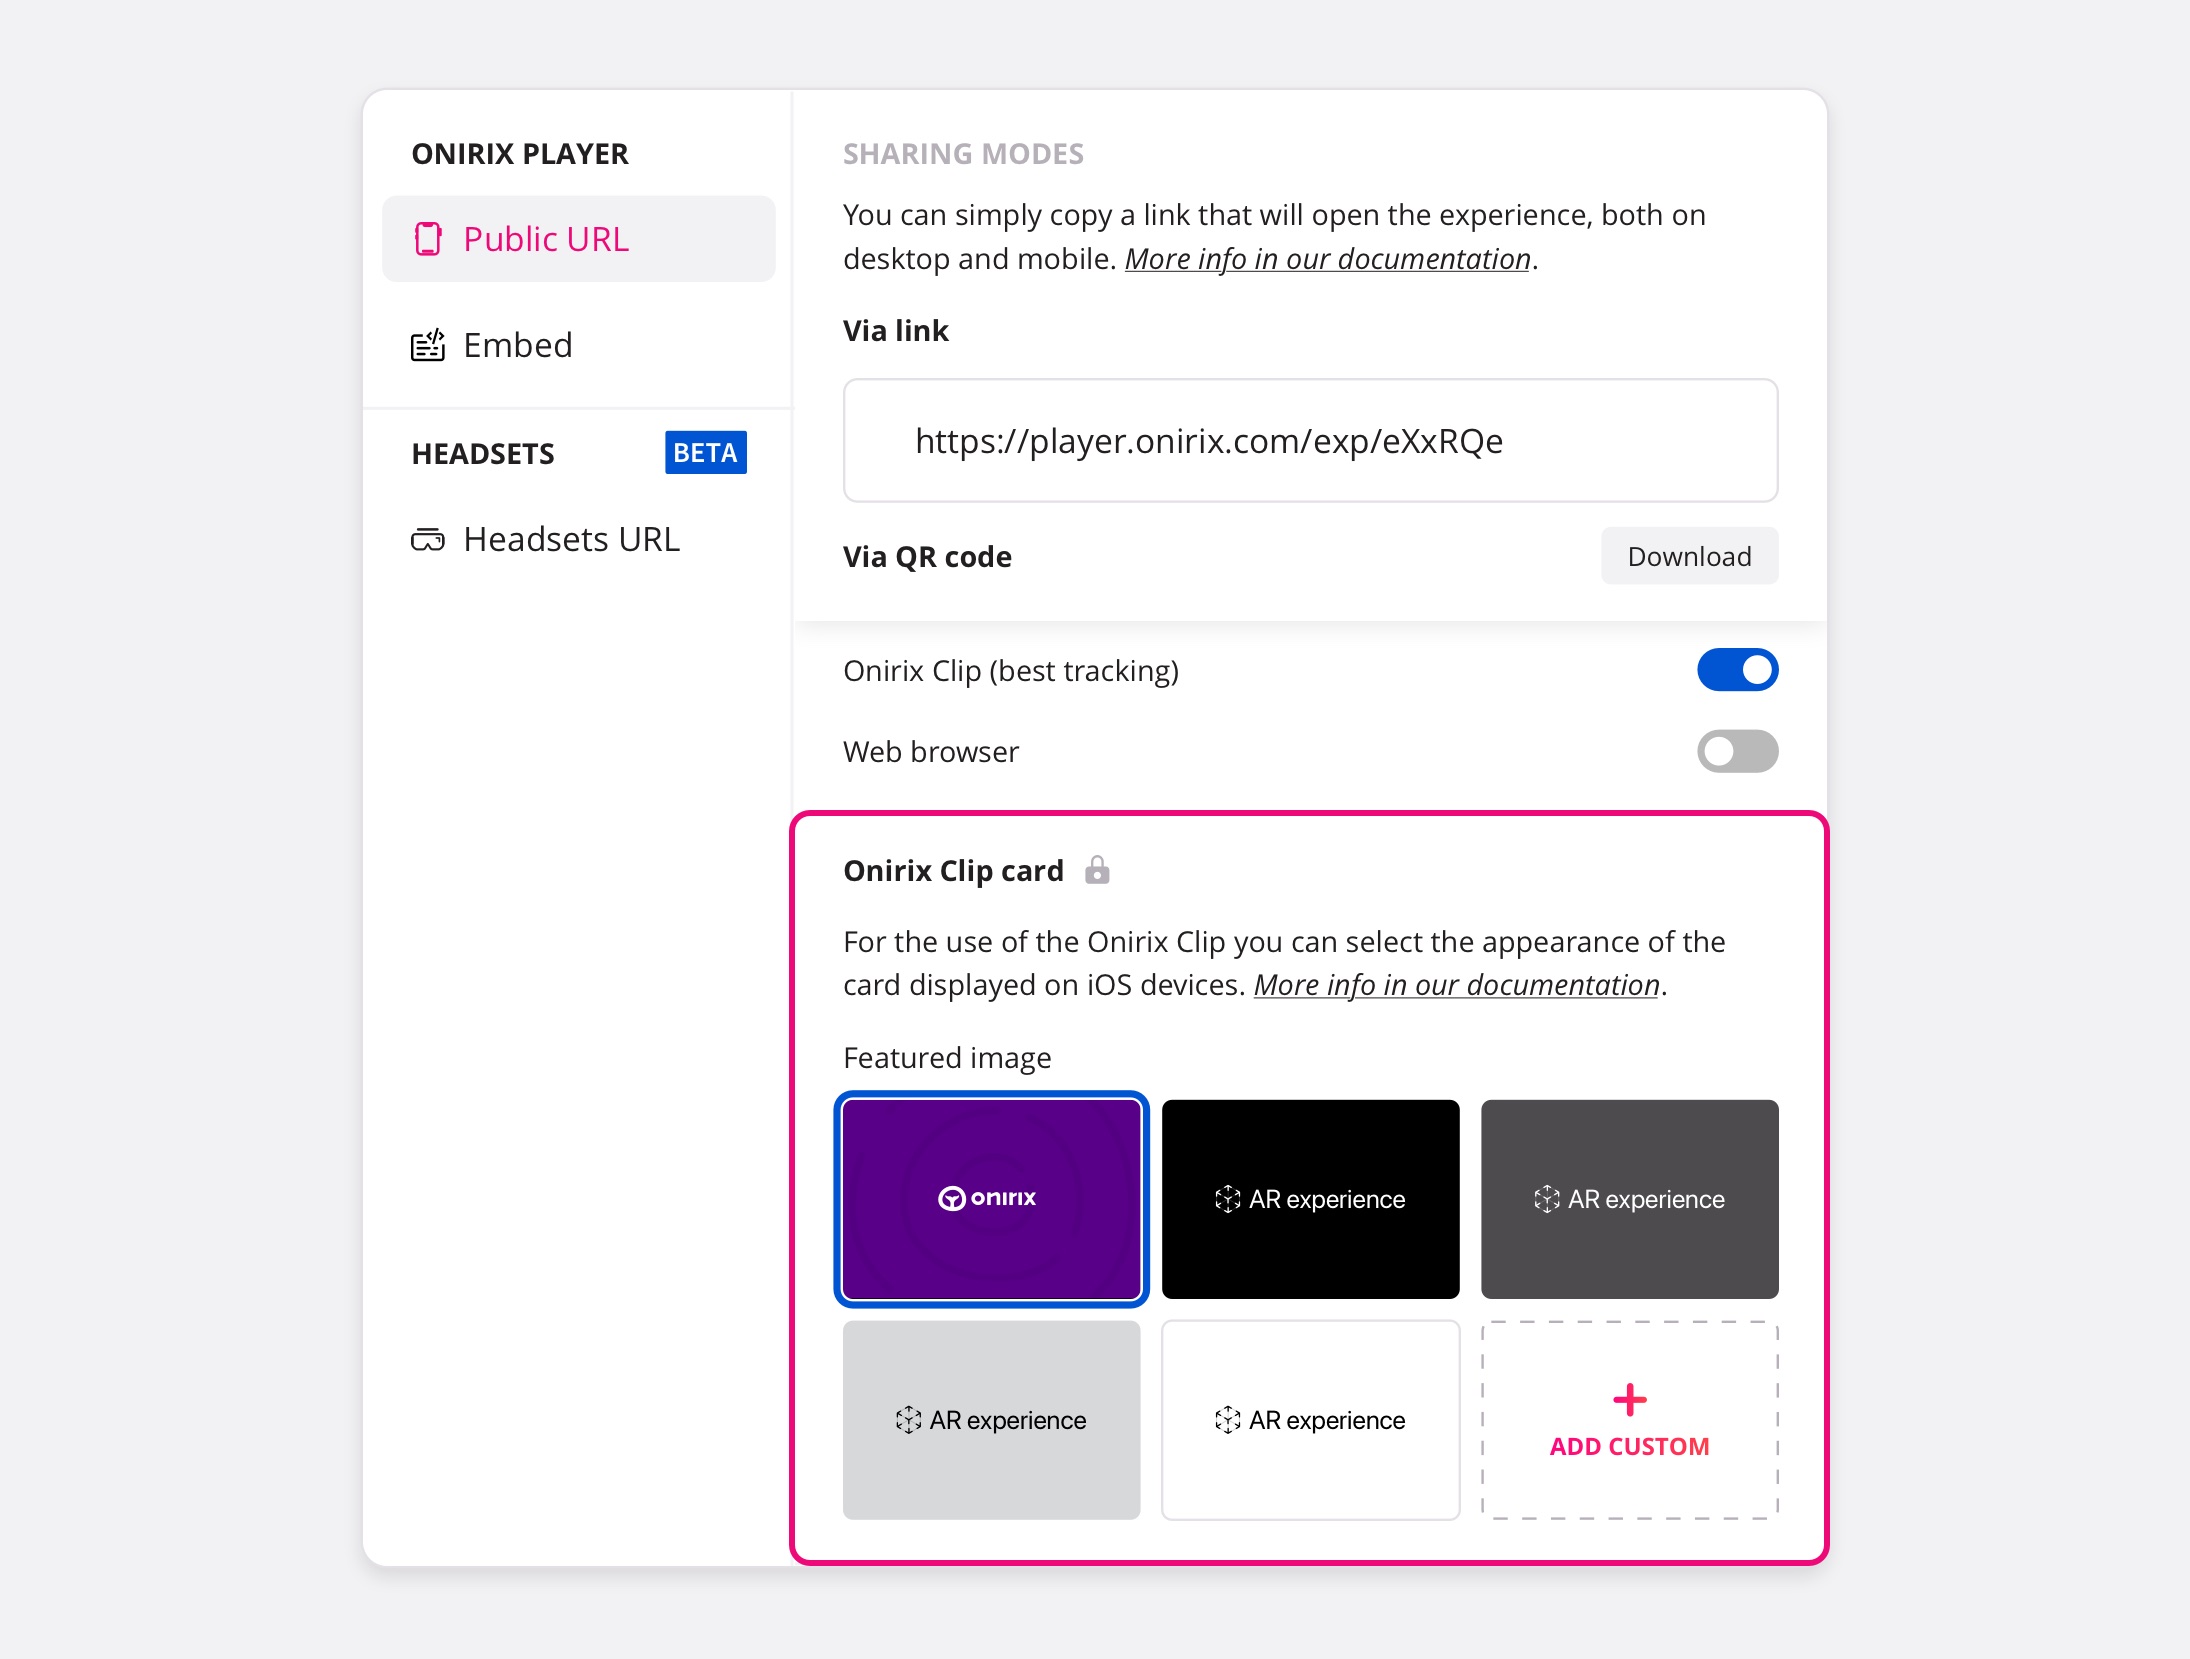
The generic mode is represented by the branded Onirix card, with the corporate purple colour. Then there are other more aseptic or generic styles, where you can choose between various types of images. It is also possible to associate a card and personalised text.
For more information, see our branding page, where we explain the different modes of Onirix branding removal.
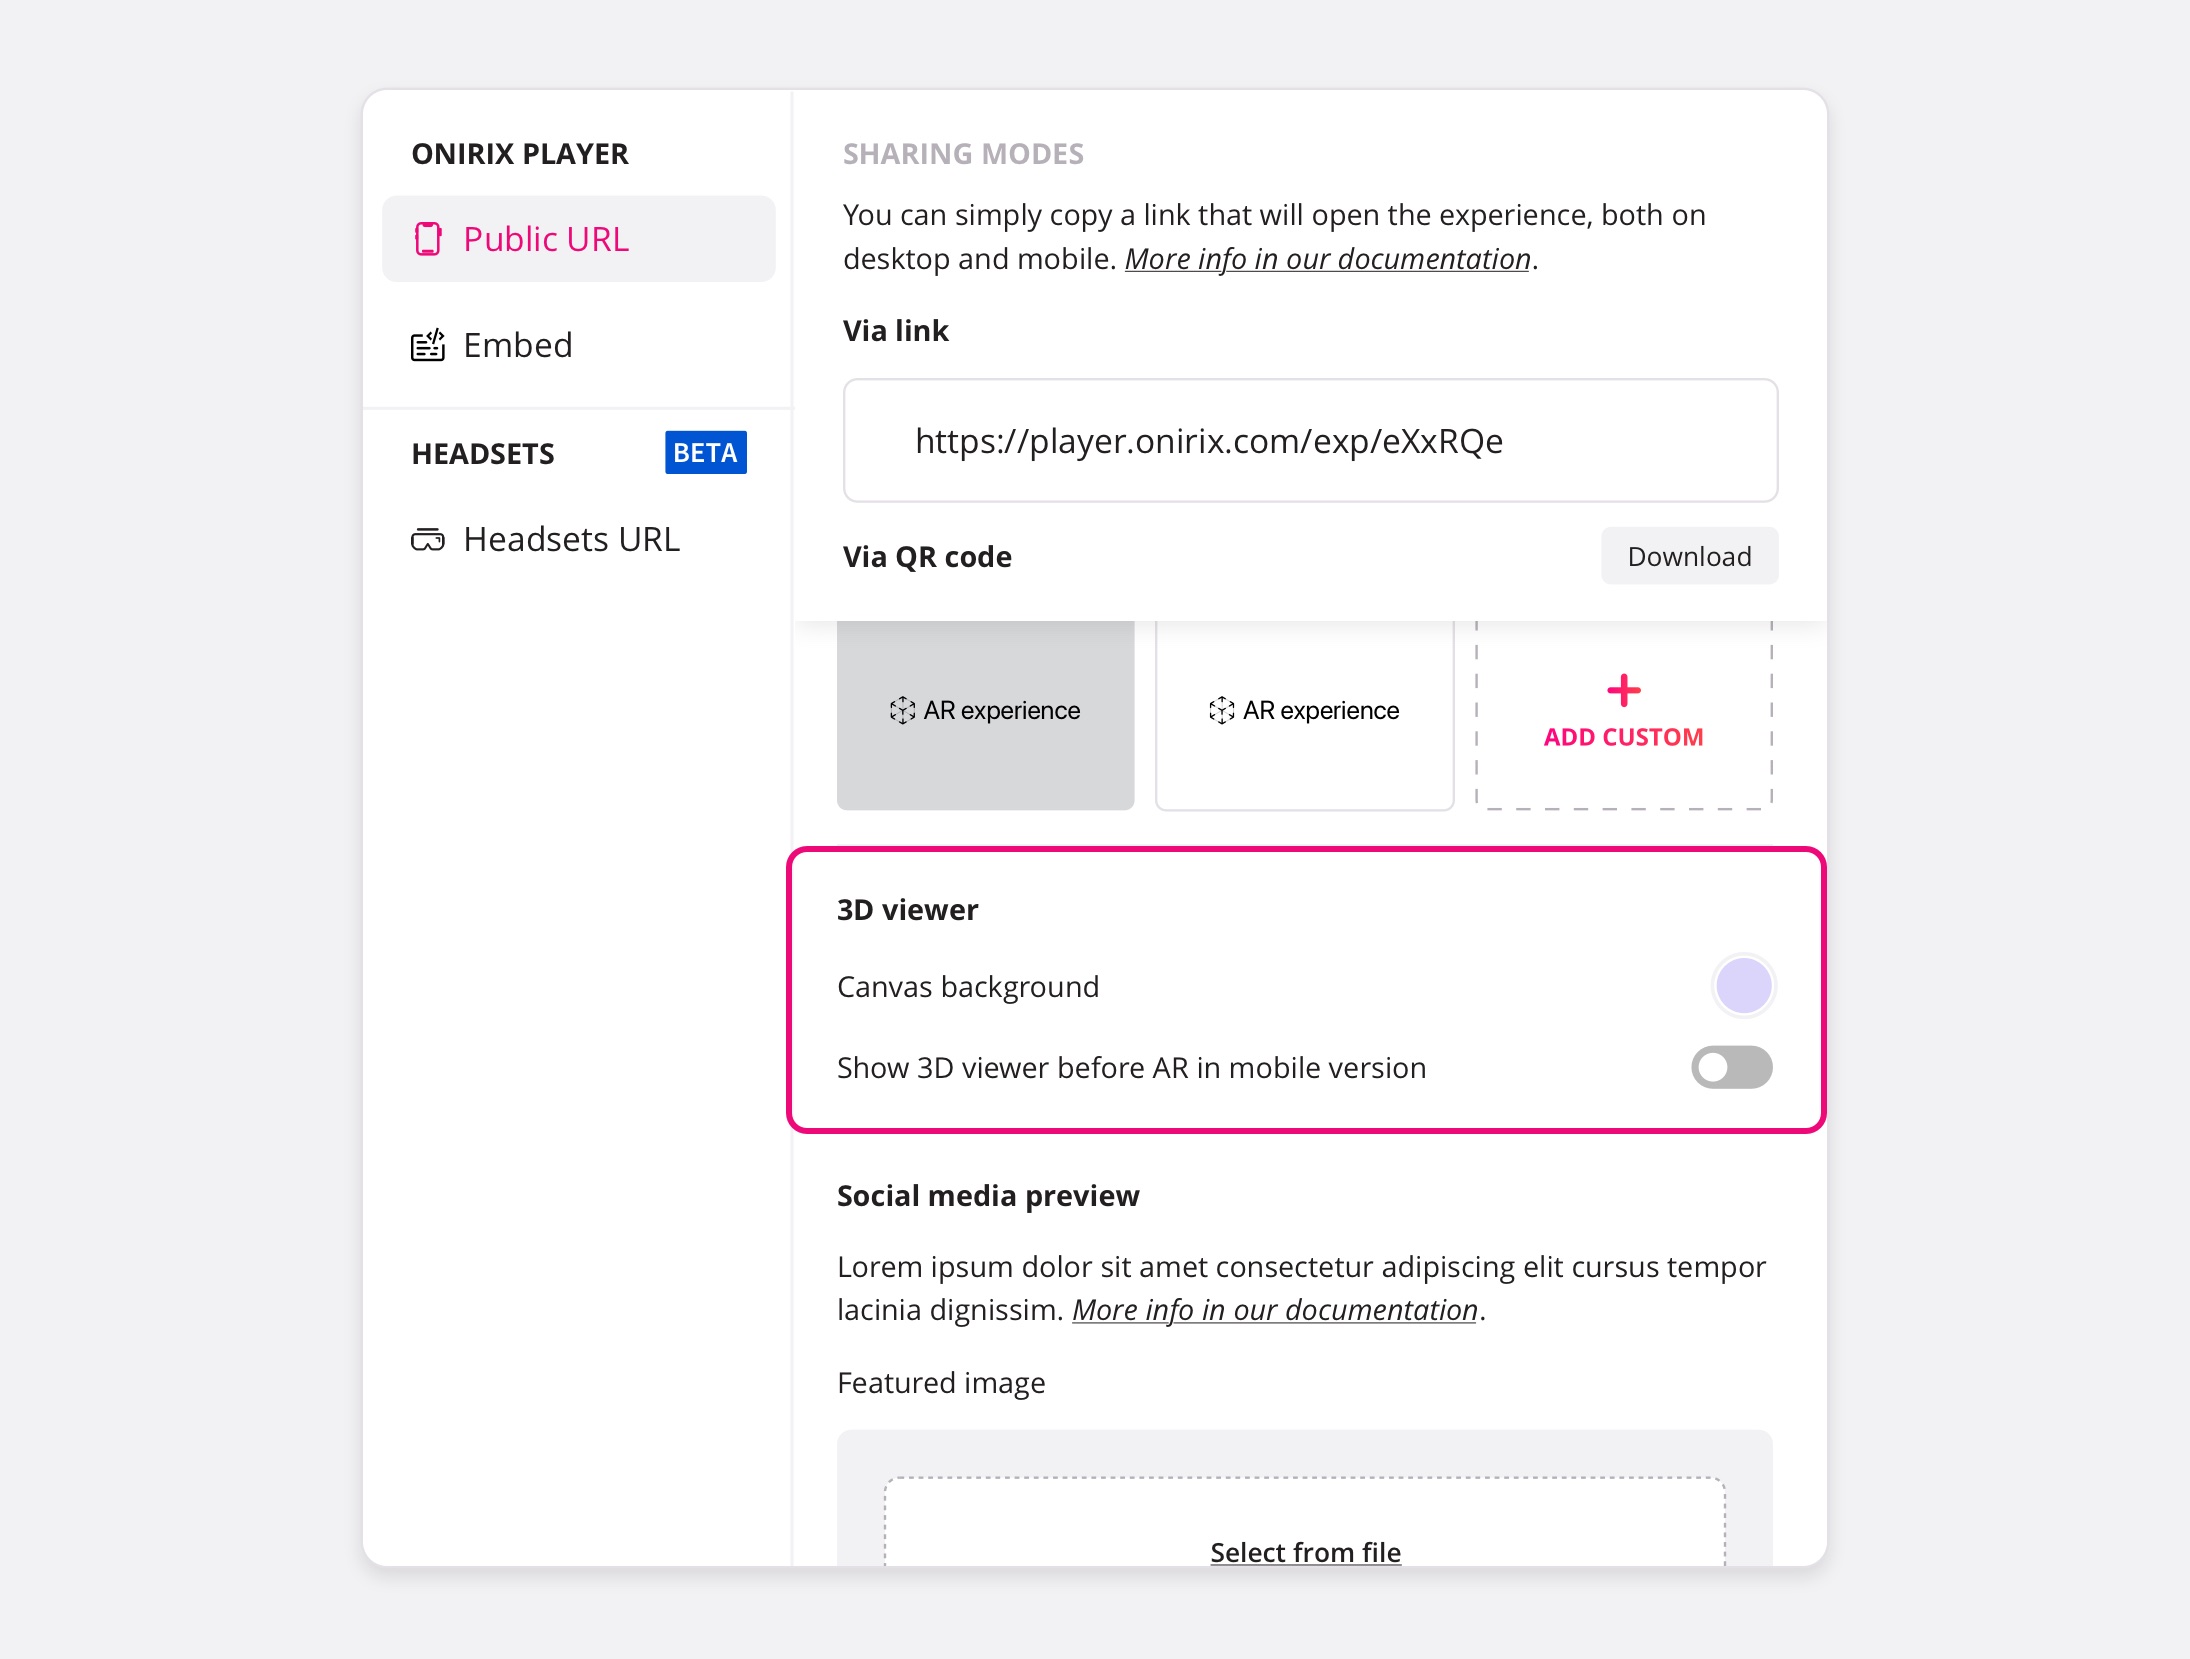
Customization: 3D viewer
When sharing a link to an AR experience, this block can be used to include a previous step, which would be to show a 3D preview of the scene to be visualised. This can be useful if we are sharing, for example, products in an e-commerce.
In addition, if we open this link from a computer, we can also visualise the same experience in 3D web, as we cannot see it in AR mode from the computer.
With this block of options we can:
- Select the background colour of our 3D previewer.
- Force the AR experiences to always show the previous step through this 3D previewer on mobile phones.
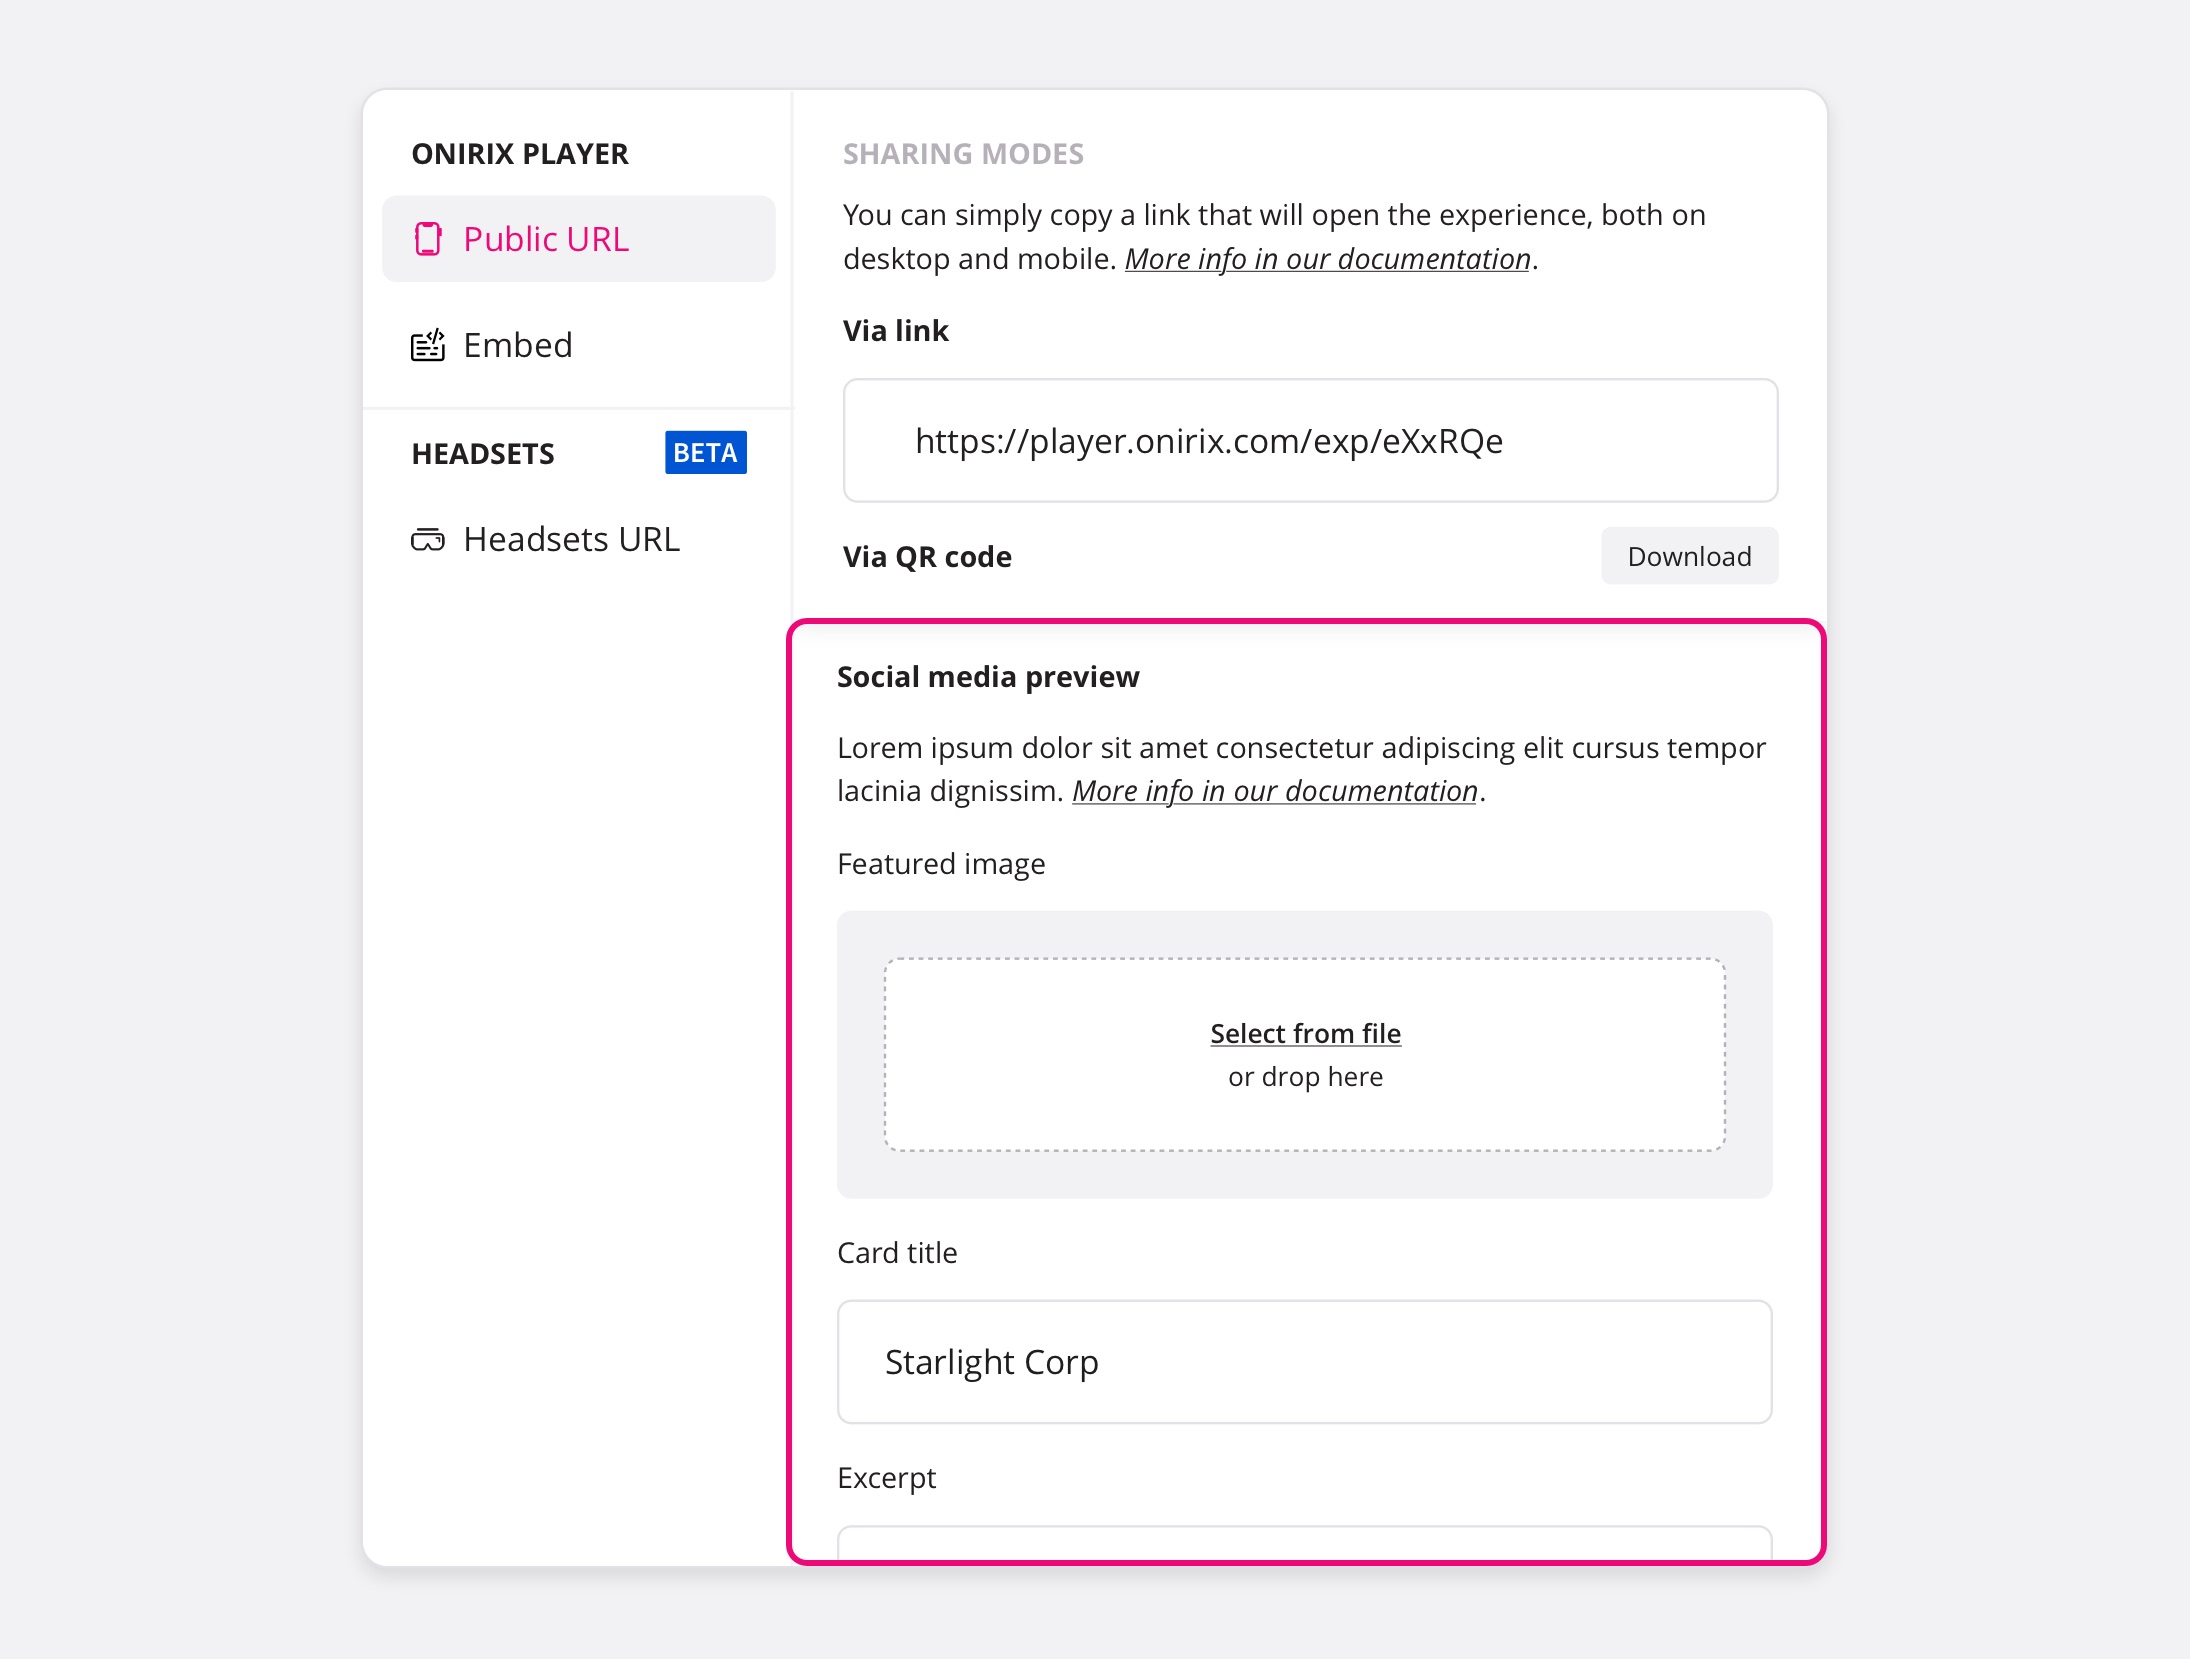
Customization: Social media preview
With these fields we can slightly edit the information that our interlocutor will see when receiving the experience in social media (WhatsApp, Facebook, Twitter, LinkedIn...). Basically you can modify the preview image, the title and a small description (excerpt) of the experience.
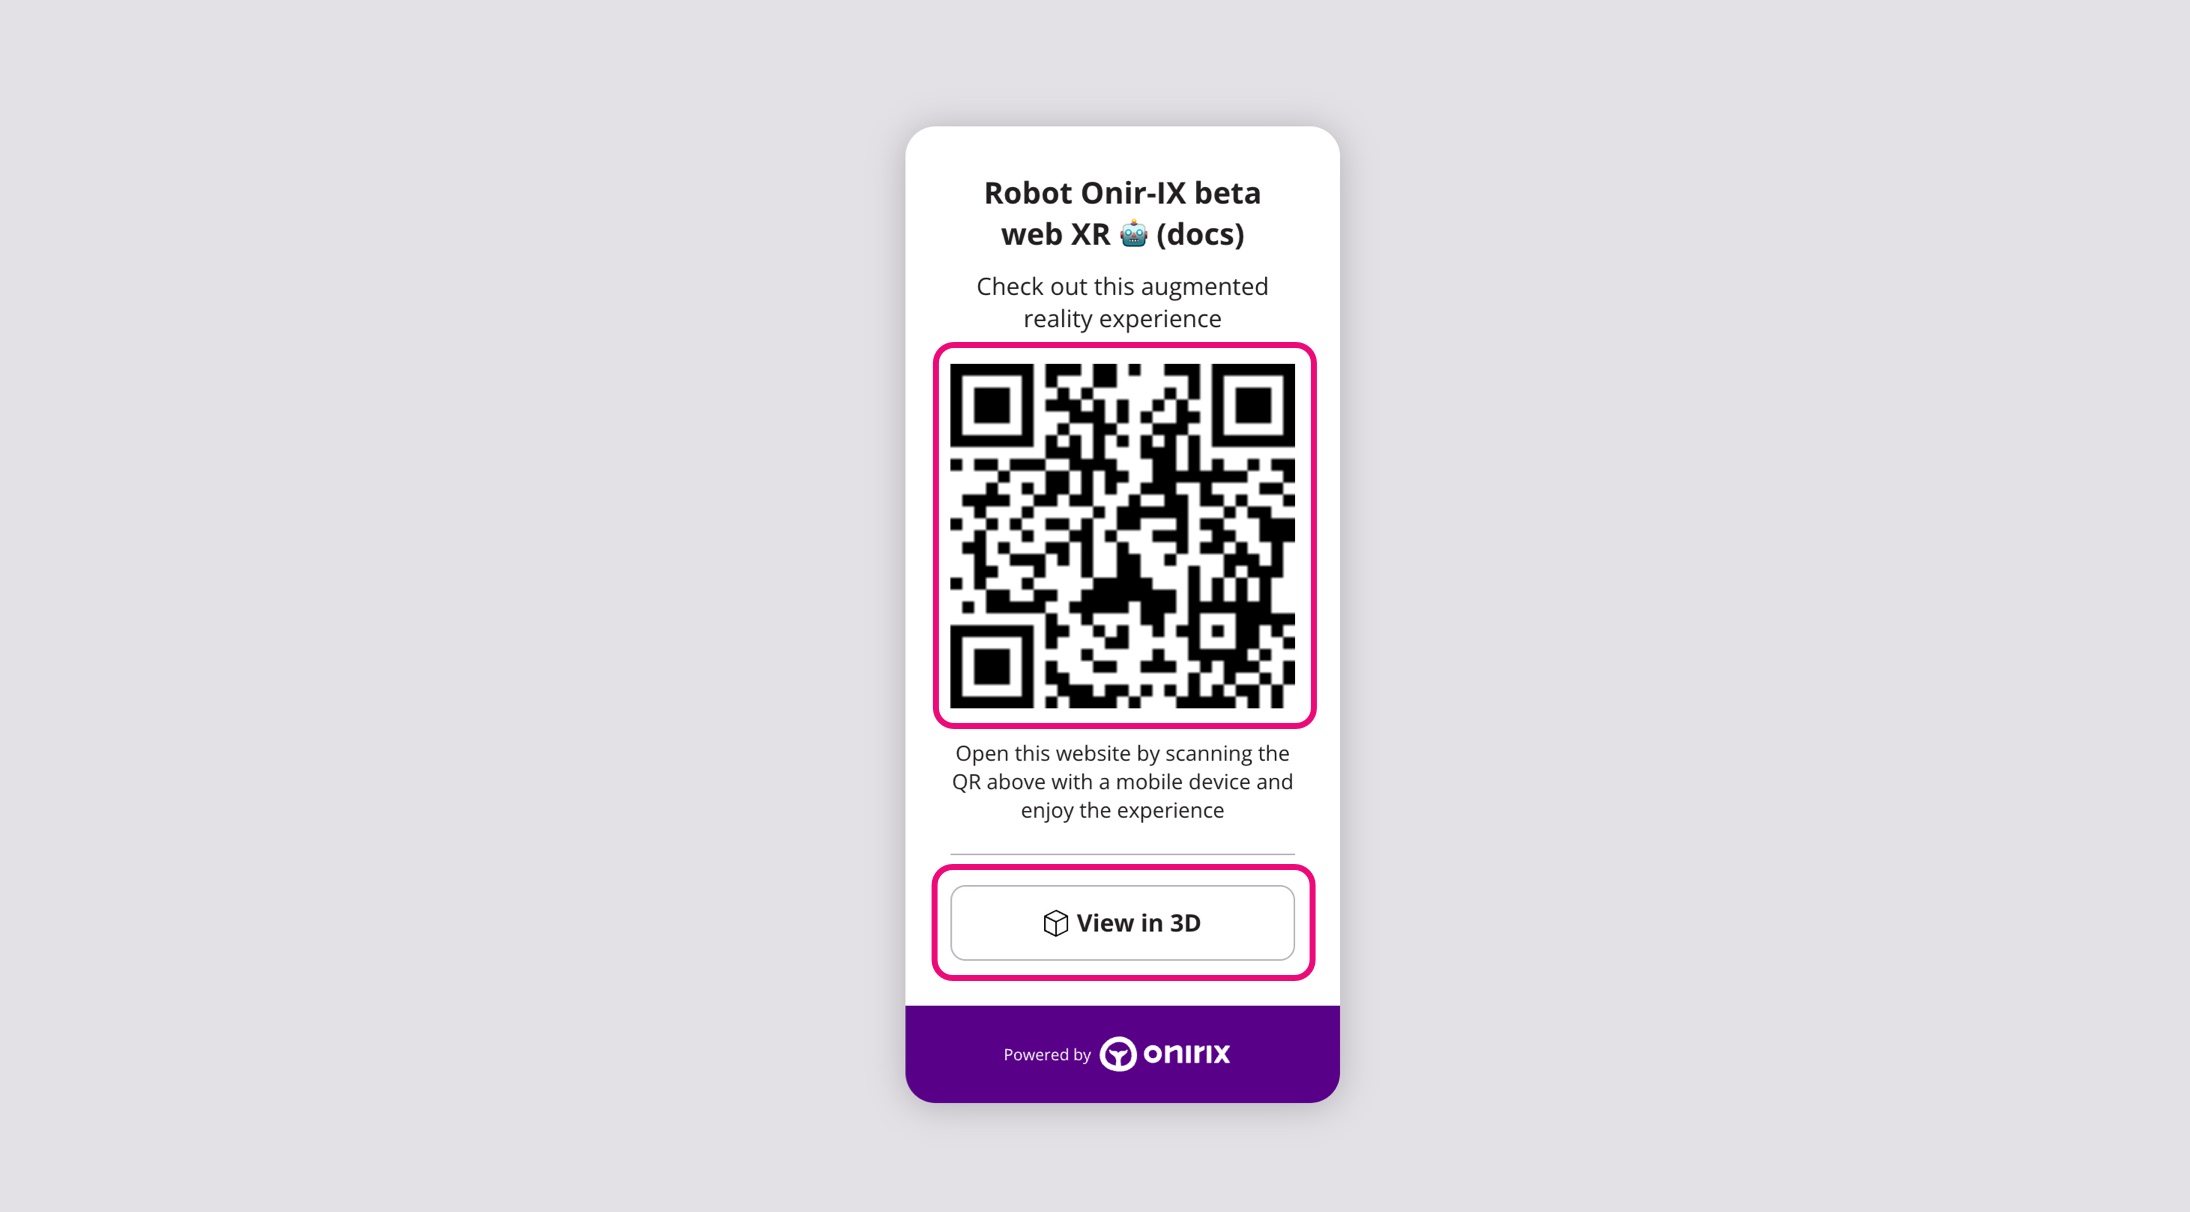
Opening the Public URL from a computer: Onirix Launchpad
Launchpad for Surface experiences
When you access a public link, in this case a Surface experience (World tracking), you can see the two ways to open an experience, if you do it from a desktop computer: the QR code to open from your mobile phone, and the 3D viewer link to see the experience in our 3D web.
Here you can access that same example if you want to test this experience: Robot picker game experience link.
Launchpad for Image experiences
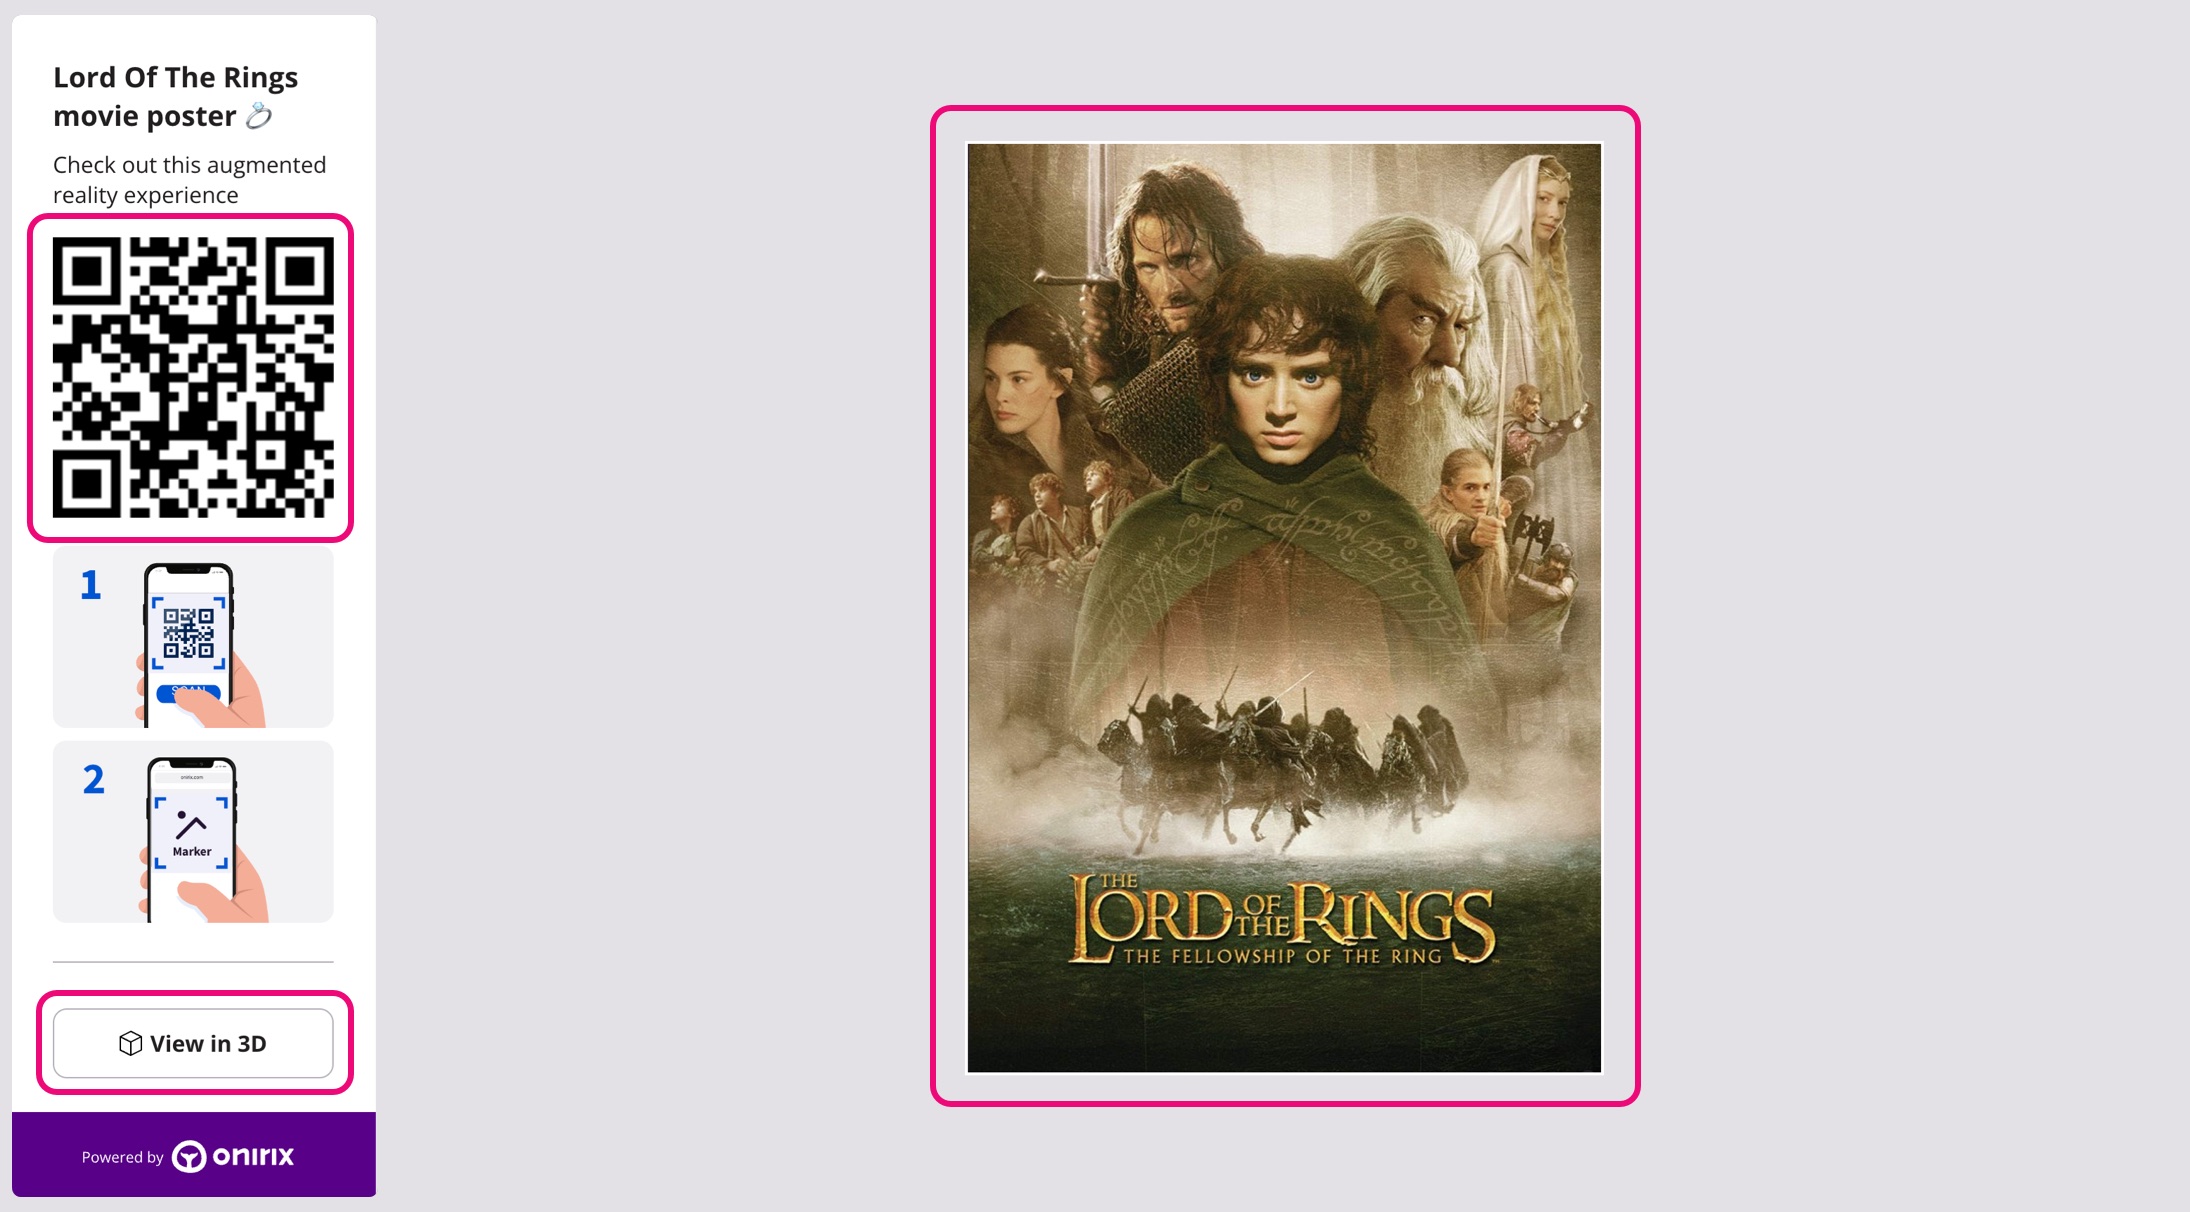
In the case of image tracking type experiences, in addition to the QR and access to the 3D previewer, the Onirix launchpad offers the image itself to be recognised, so that the user can launch the test directly from their computer using their mobile phone.
Here you can access that same example if you want to test this experience: Lord of the rings movie poster experience.
Sharing options: Embed
Once you have created your AR experiences you can easily integrate them into your own website or one of your clients' websites. Depending on the needs of the project, you can choose to embed the experience in fullscreen mode for mobile phones; or embed the experience in 3D web mode, in the case of viewing it from a computer, integrated into a website with more elements.
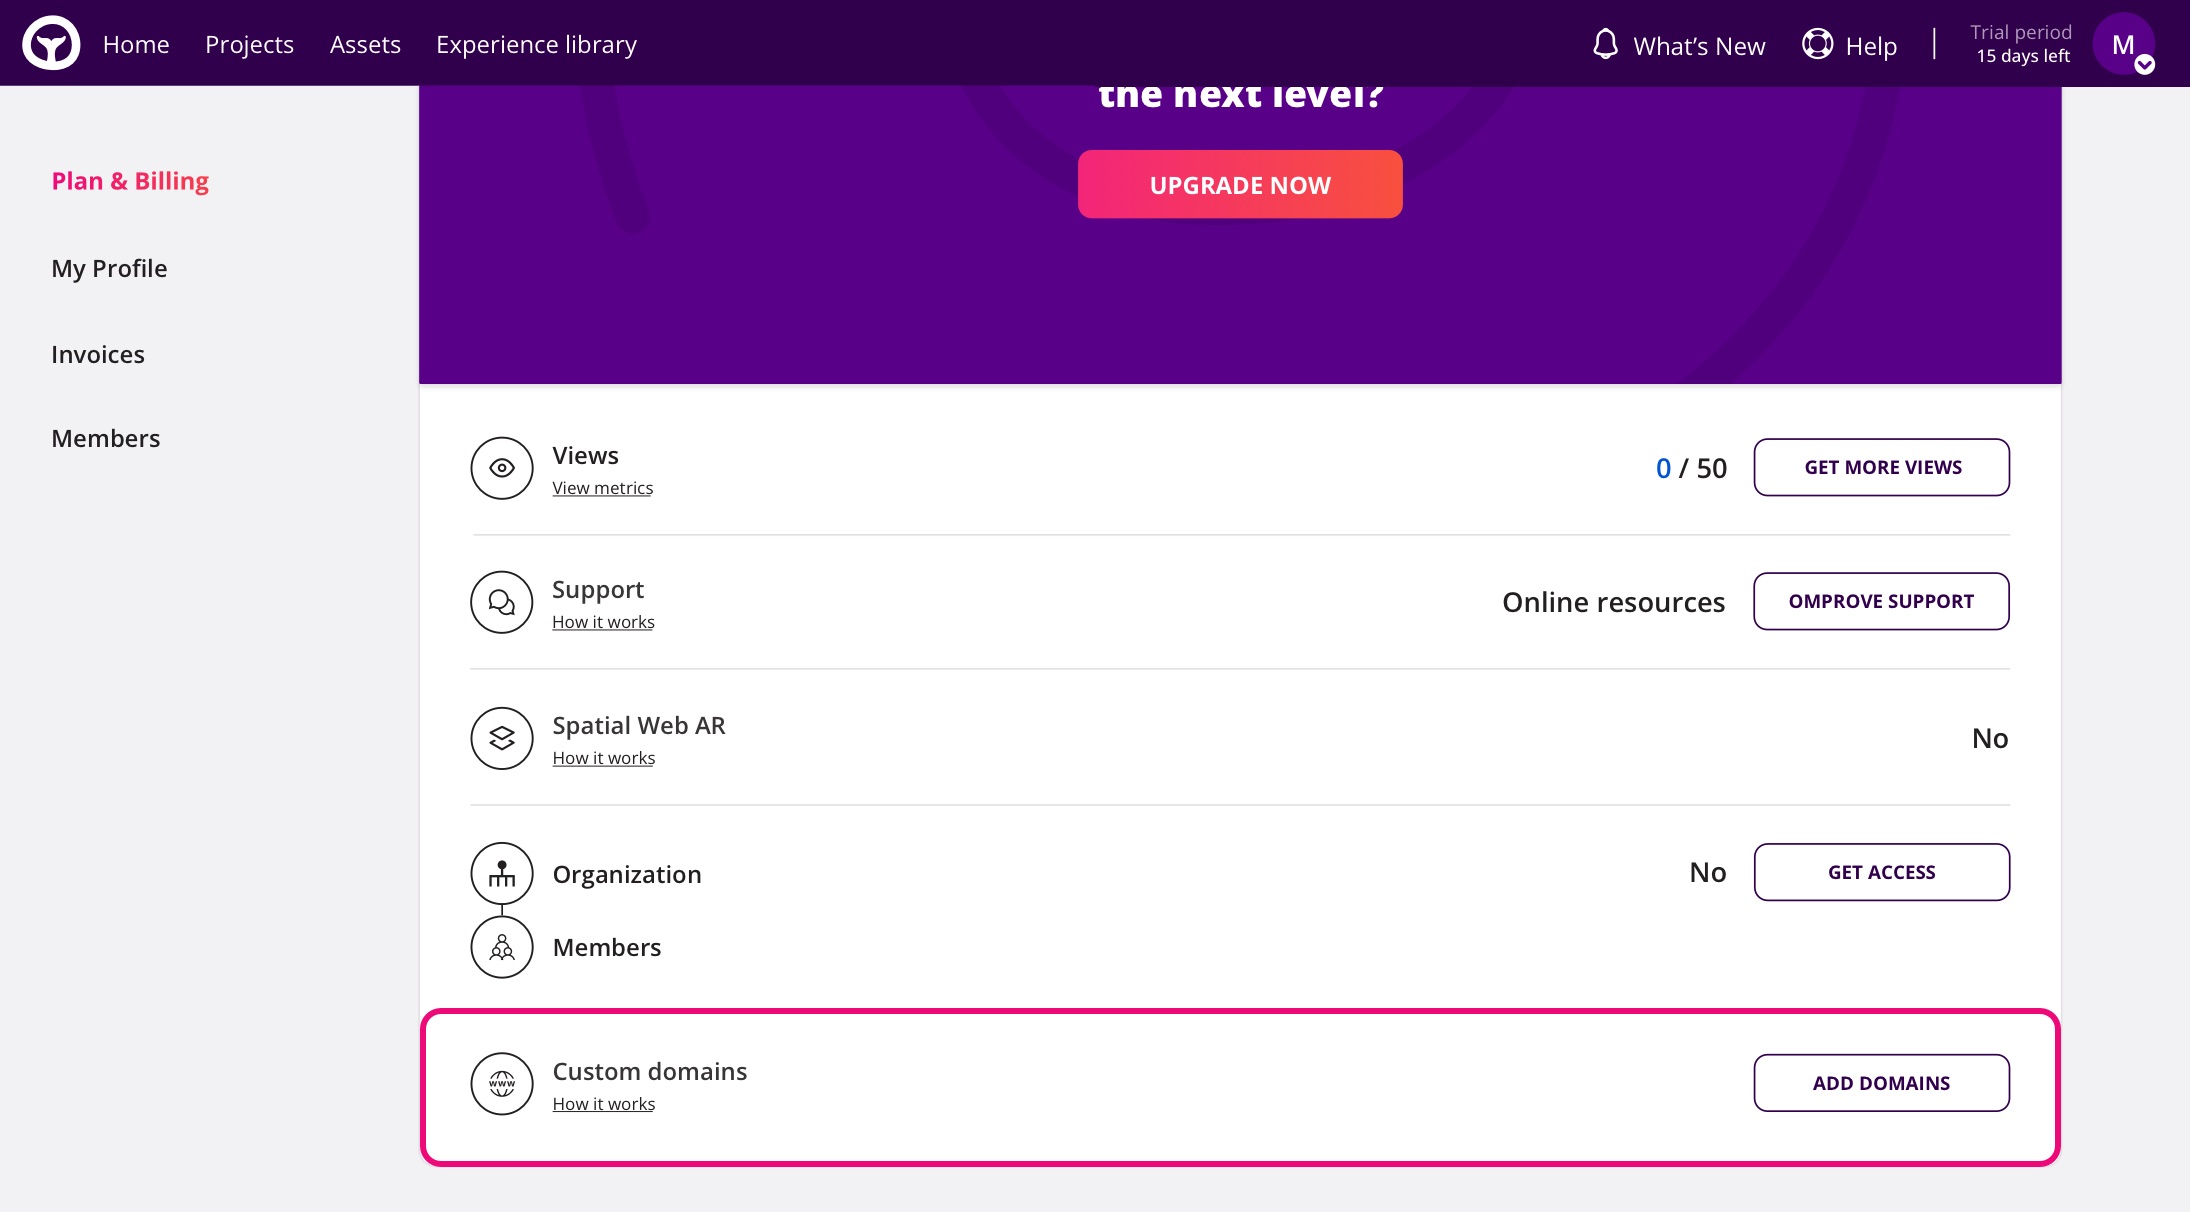
In any of the modes you need to have an active Custom Domain of that web where you want to host it. To do this simply add the domain from your account (studio.onirix.com/user/account):
Embed modes: web mobile or web desktop
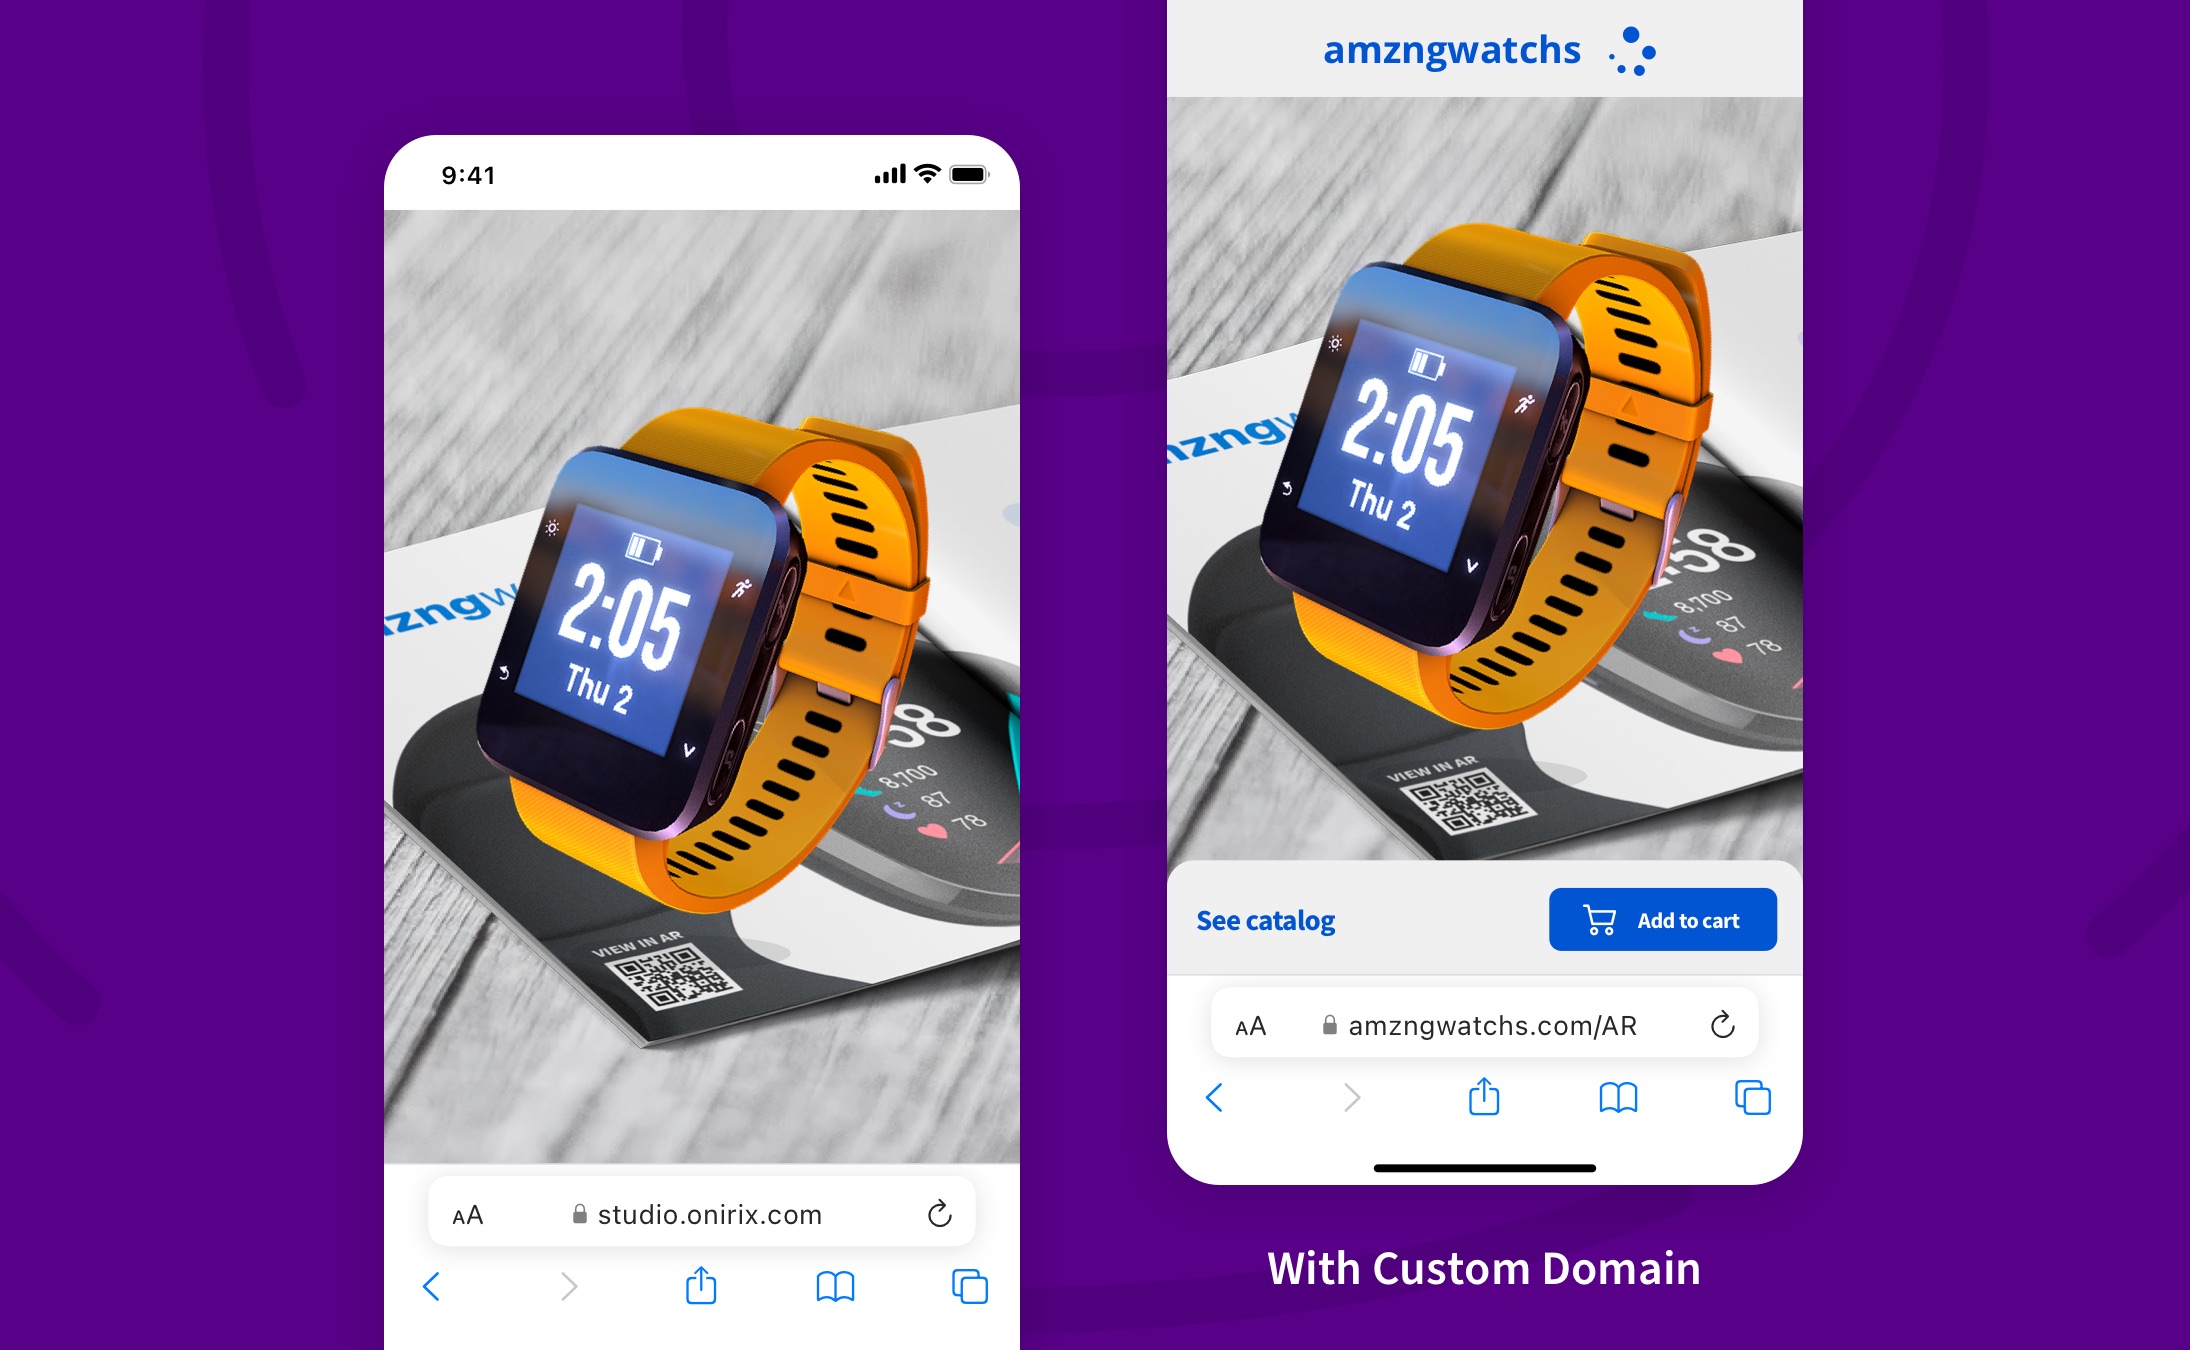
Fullscreen mobile mode: If what you want is that when you open your web page you can see directly the AR experience, full screen, with the interface elements that you have added (for this you can use our online code editor), this would be the main way to embed AR experiences.
In this example you can see the same experience (a watch catalogue) but in the second image you can see the customization of the experience, inserted in an external web (in this example, amznwatchs.com). In the embed for AR full screen section you can see the different possibilities you have to modify the HTML block to be used.
3D web component embedding mode:
On the other hand, if you want an ordinary website, visible on a computer, to contain a small block where an interactive 3D component can be displayed, including your 3D experience, you can also do it from Onirix. In this example you can see an experience where we show this interactive bicycle, a new way to show products in plain websites, where you can even include an access to the AR experience for mobile phones as well:
You can access to the configuration information to include these kind of blocks in your web, in the embed for web 3D section.
Embed: HTML code
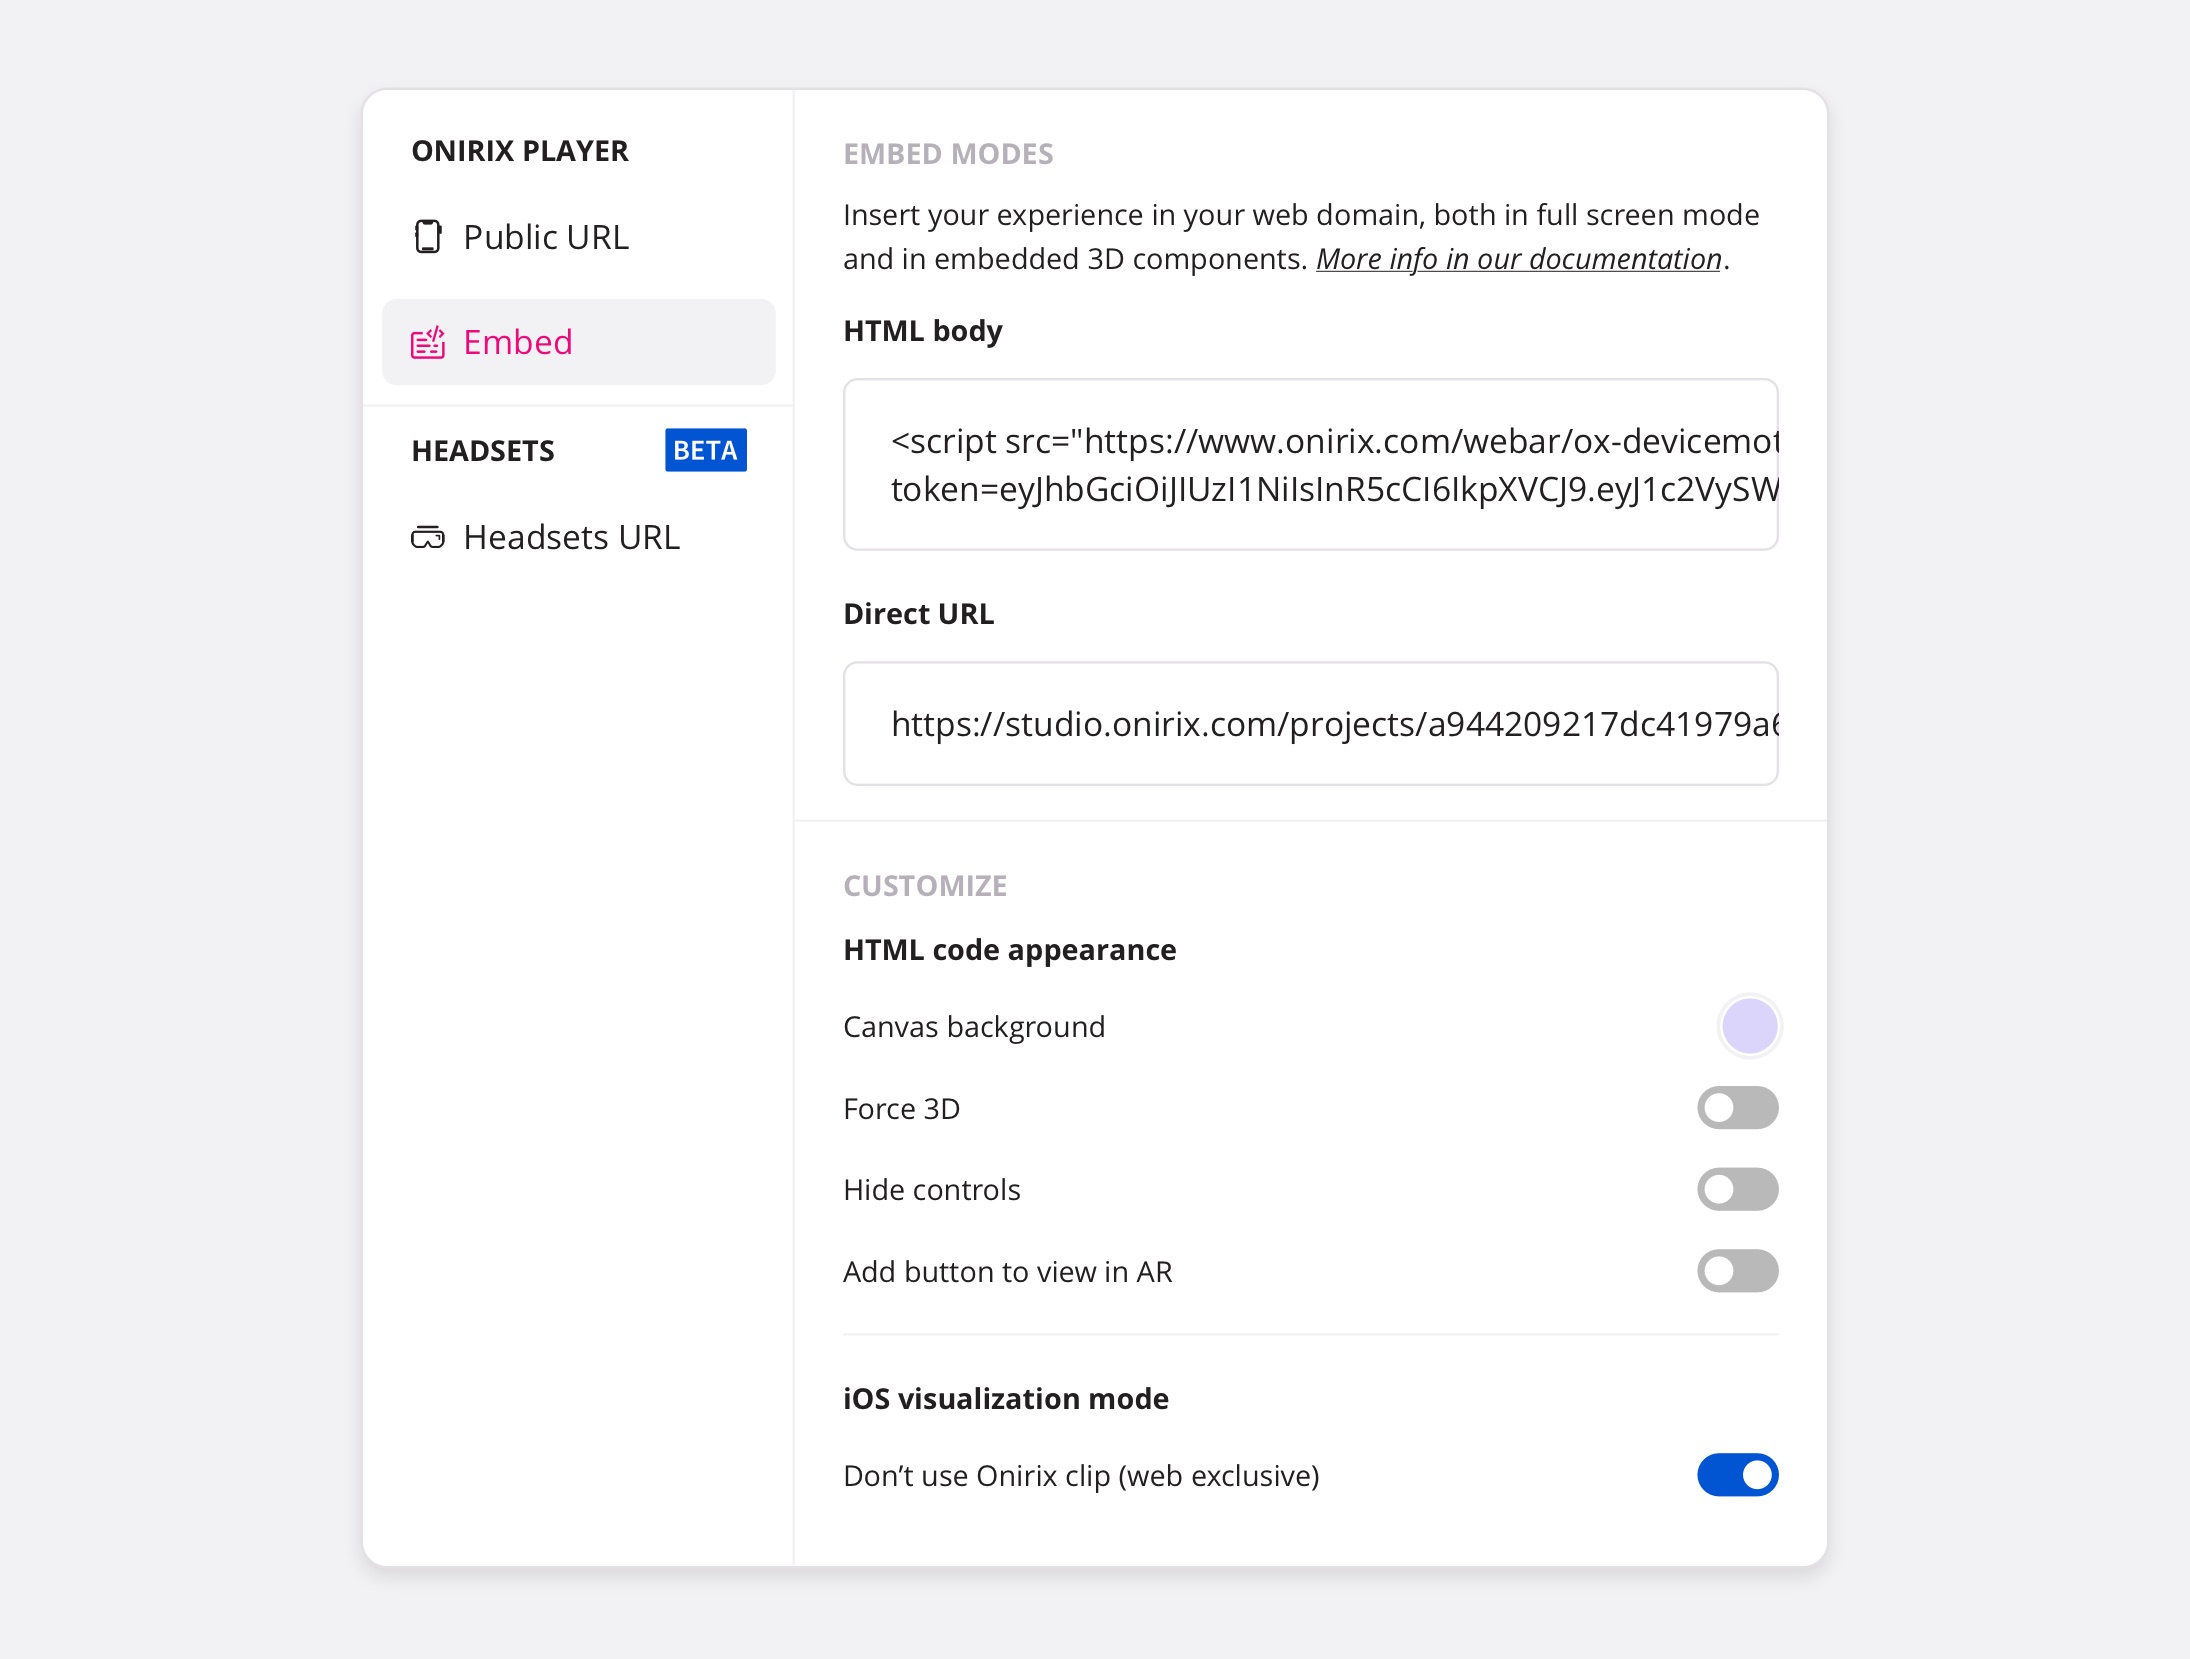
Within the sharing options, in the second tab of the left menu you can find the embed module. From here you can copy the HTML code needed to embed your experience on a website, both in fullscreen AR mode for mobile phones and in 3D web mode for computers.
Embedding for mobile AR fullscreen
To proceed with the embedding of HTML code in a website, step by step, we provide you with this specific documentation of the process: how to embed experiences in web AR
Important note: If you are targeting mobile browsers, it is necessary to add this meta tag inside the head block of your page. This sets the initial zoom level of the page, ensuring that the content fits within the screen size and is properly displayed, providing a better user experience in mobile browsers.
<head>
    <meta name="viewport" content="width=device-width, initial-scale=1">
</head>
Embed setting: iOS visualization mode (Clip or web exclusive)
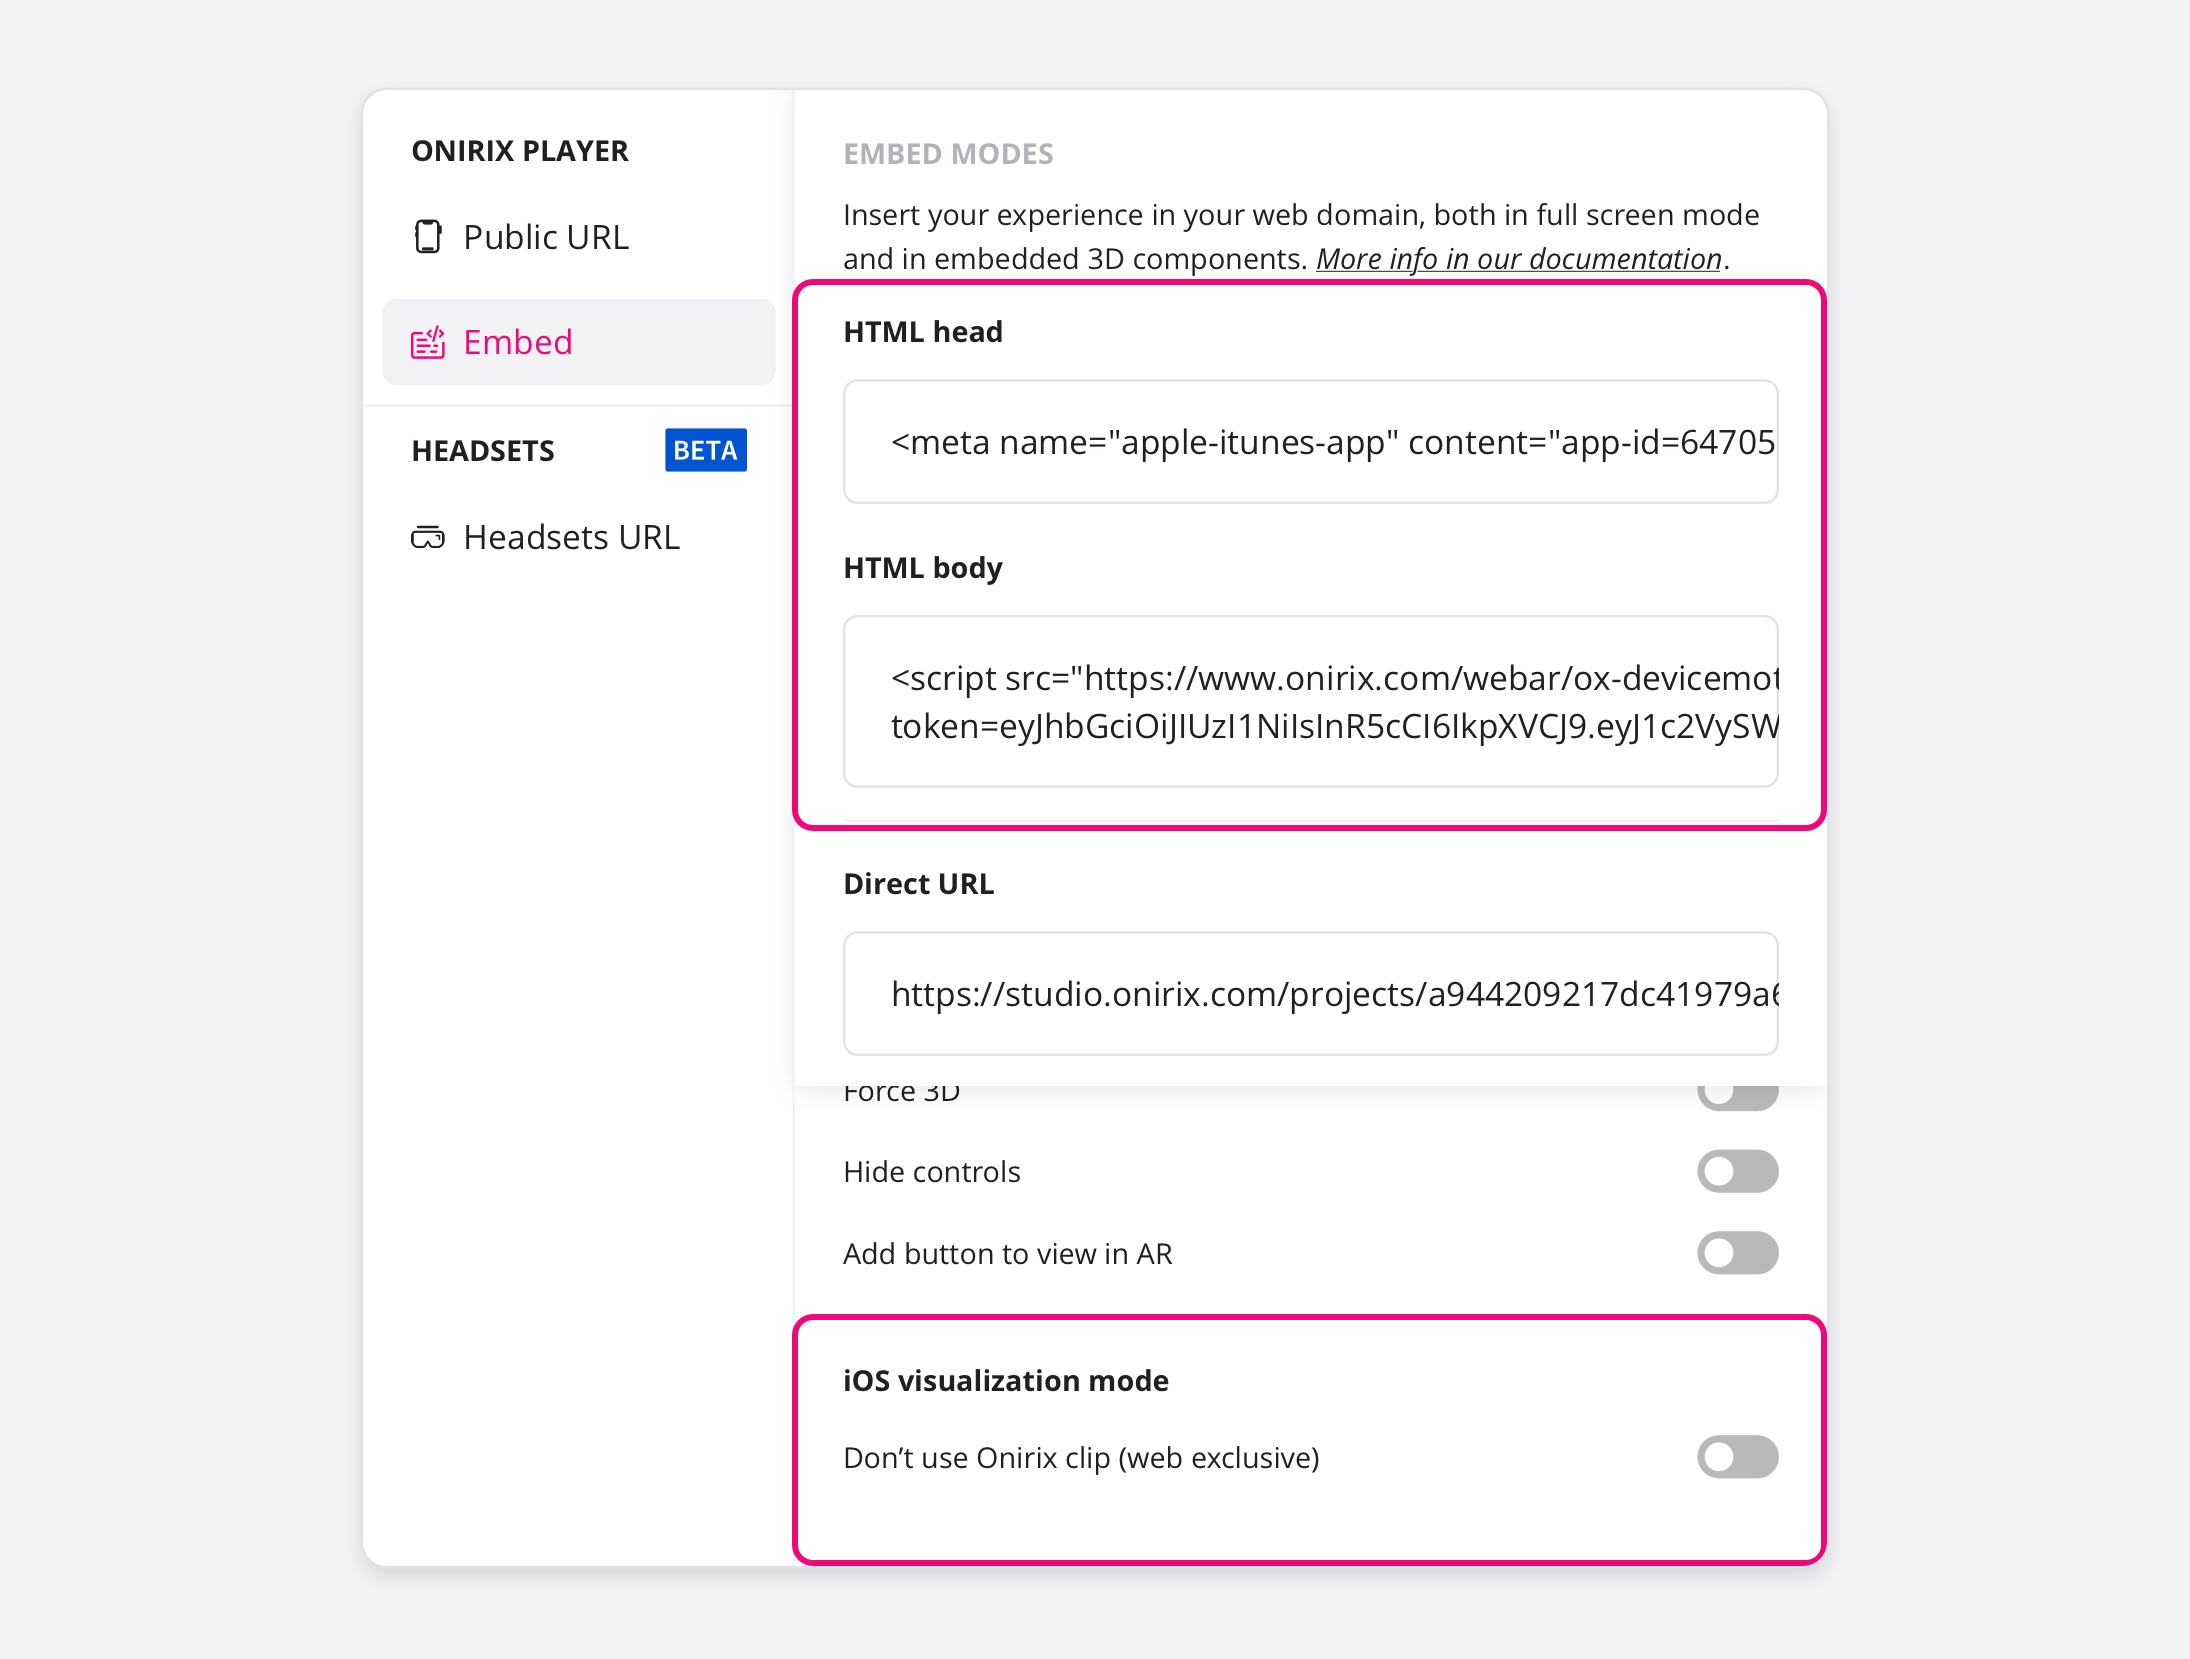
If your experience requires the use of Onirix Clip as it is essential to redirect to this mode, with this setting you can get the code necessary for your page to include the Onirix launchpad (which you can customise, more info on our branding page).
Opening your website from a computer will show the Onirix internal launchpad, so your users will be able to access directly to the QR that opens the Clip. On the other hand, if your website is opened from a phone, either from a QR or a direct link, it will redirect to a Safari page that will prompt the user to download or to open (if already downloaded) the Onirix Clip to view the experience. This is due to iOS internal limitations.
Take into account that for mobile devices you also need to include the head block we provide when this option is selected. Otherwise the page won't prompt users to open with the app.
For this mode you need to un-select the "do not use Onirix Clip" option to keep it activated.
On the other hand, if you don't require the use of the clip, because your experience is only for Android, or because you don't need to have robust tracking in world tracking. In these cases you can use the web exclusive embed.
Embedding for web 3D
When you copy the embed code into a desktop website, if you want to create a new block with a border for example, or if you are using a "markdown" website (no straight HTML), all you need to do is add an HTML with CSS styles block to insert the embed code. In the above example of the bicycle, the only extra code that is added to generate that embed block is something like this:
<div style="border:dashed 1px #CDCDCD;border-radius:5px;width: 100%; height: 350px; overflow: hidden">
    <!-- code copied from Onirix embed component -->
</div>
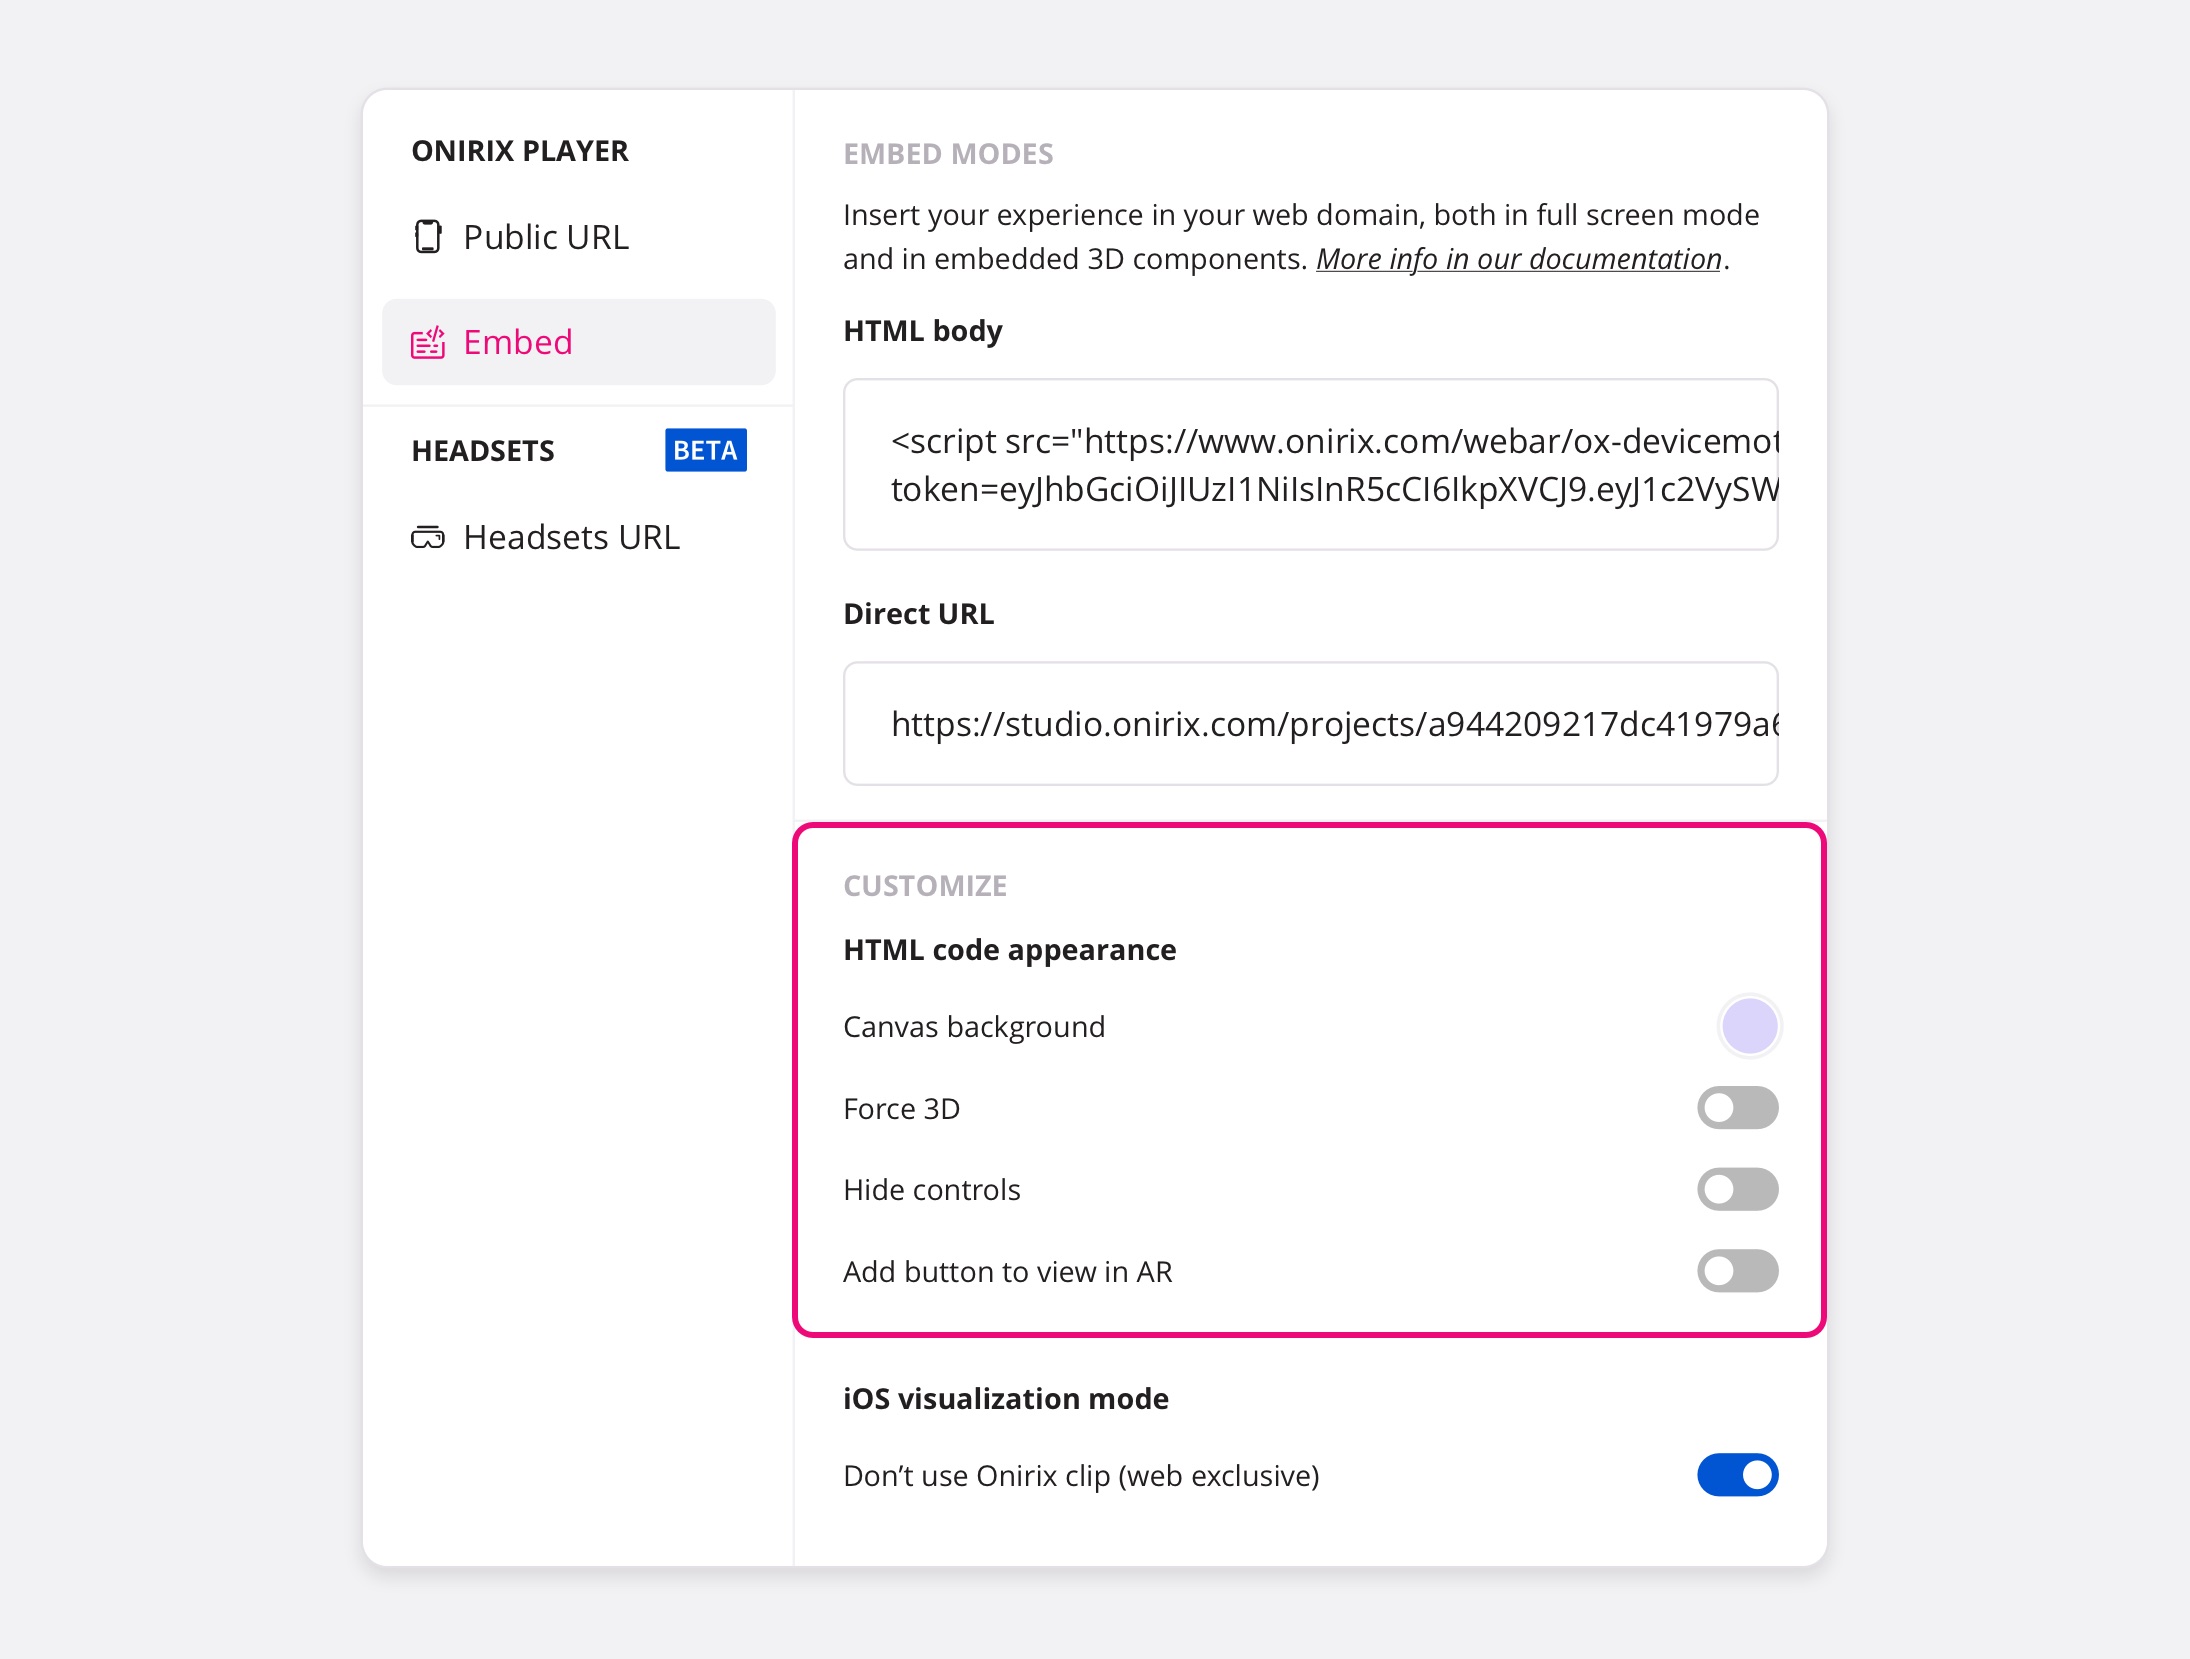
To obtain the code with the necessary changes for the 3D web mode, in the customisation part, we must select the Force 3D mode.
In addition, if we want to include the AR view button, or the Onirix scene reset menu, we can use the other settings included ("add button to view in AR" and "Hide controls" respectively). Also we can set the background color of the canvas for the 3D viewer (or just leave it transparent).
Embed: Direct URL
If you want to get a direct URL to the experience that opens our Onirix web AR player without any previous redirection, you can use this URL. It is very useful for embedding your experiences inside an app for example, as it is the direct access to the experience without the embedding web code.
Sharing options: Headsets
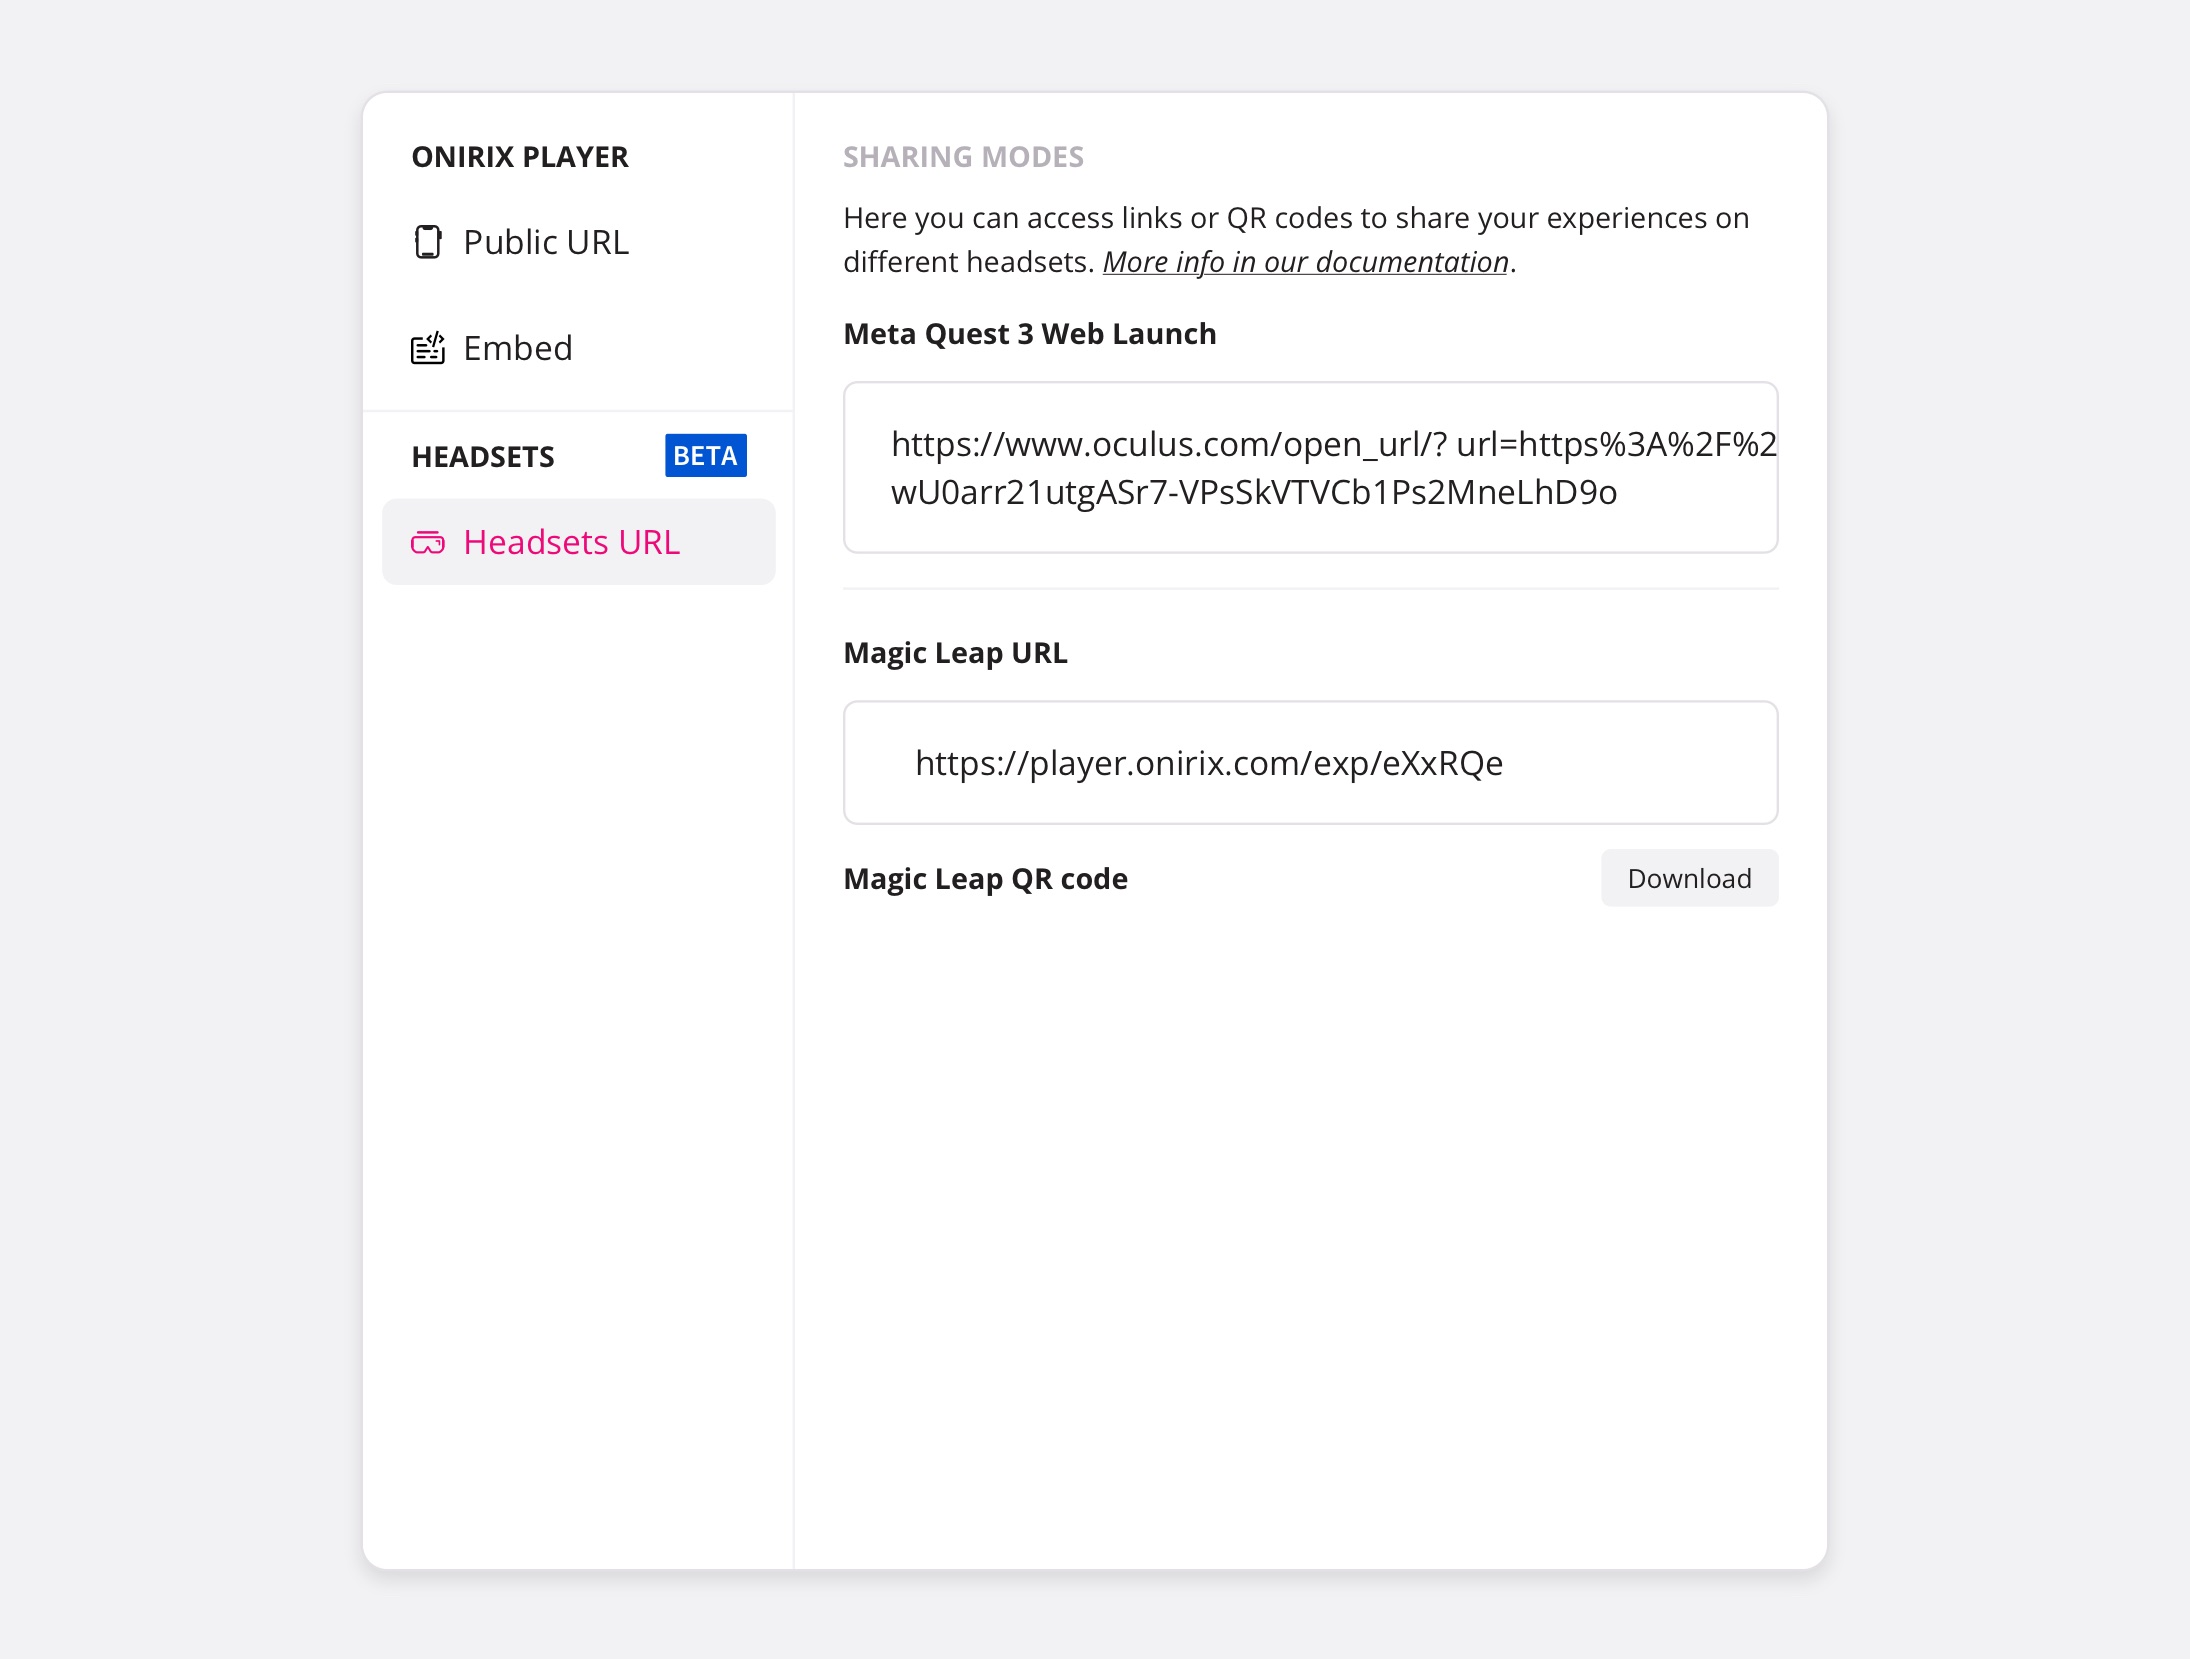
Recently, since Onirix v.2.56.0, you can access your Surface experiences (World tracking) from the Meta Quest 3 glasses, and also from version v.2.66.0 with Magic Leap 2. Within the share menu you have access to the url of the meta browser to open directly from the headset, sharing via the pairing app.
For more information about this device please visit our headsets page.
Sharing options: sharing scene link
Suppose you have created a project with several scenes, and you want to share links to access a particular scene of the project in a specific way. You can do so by accessing the url of each scene from its context menu:
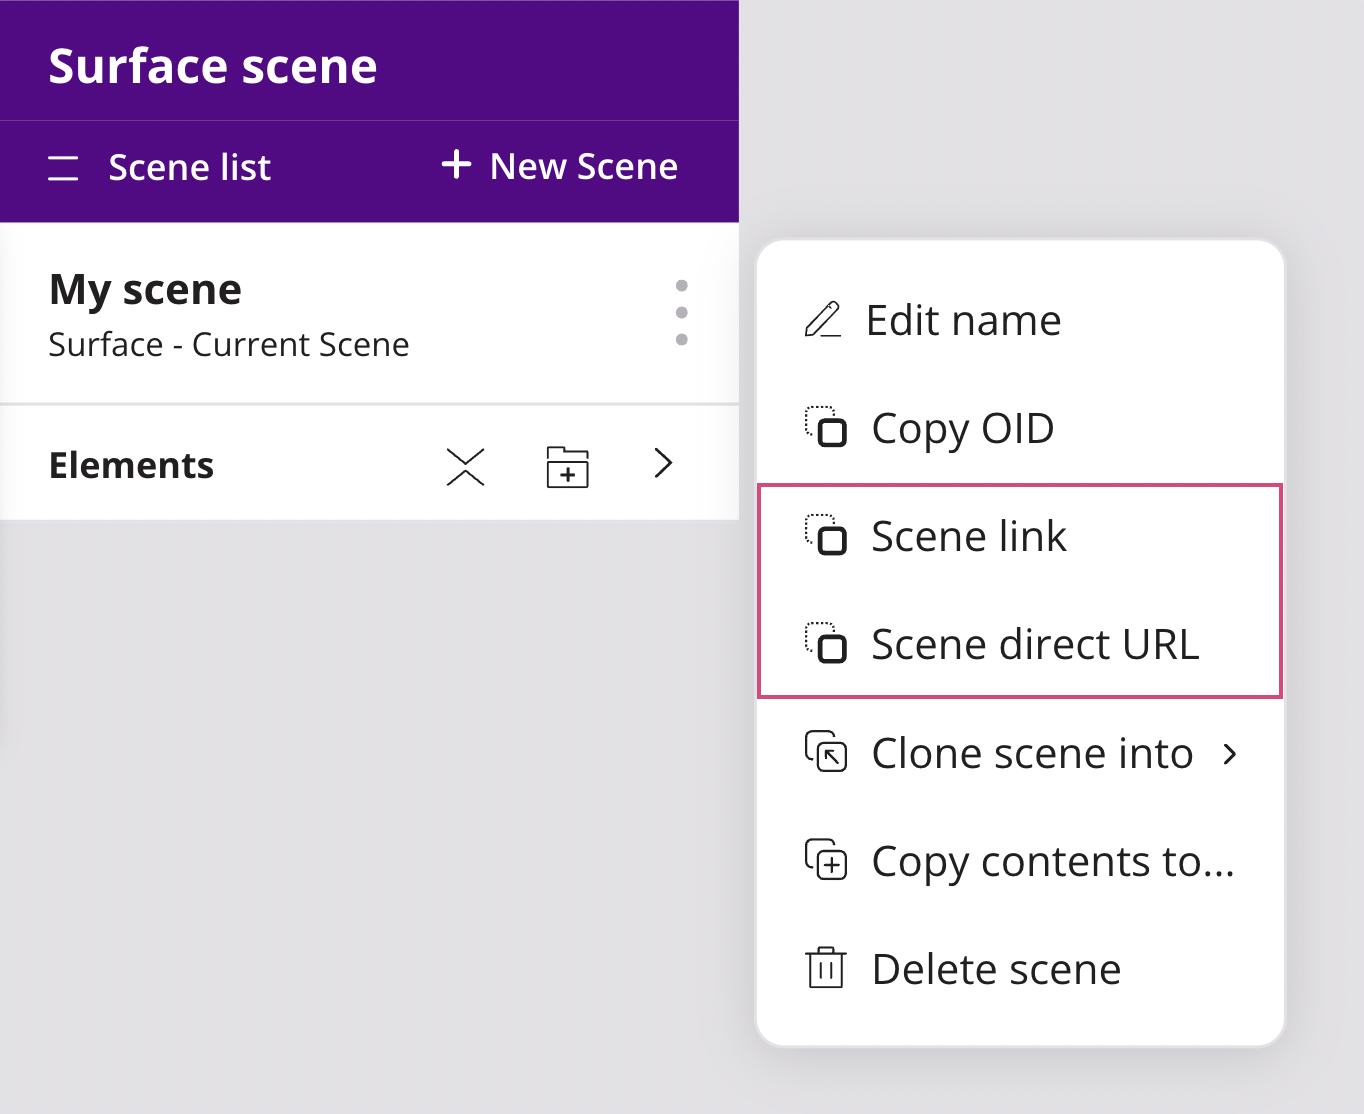
From this menu you will have the option to copy two types of access links to the scene:
- Scene link: which loads the Launchpad and then does the redirection and would correspond to the project link.
- Scene direct URL: it will copy a direct url without access to Launchpad and without redirection, and therefore it would be the link to use in case you want to embed a single scene in your website.
In addition, in the case of image tracking projects, when sharing a specific scene, only the preview of the marker of that scene will be displayed, and Onirix will only recognize the content associated with that image.
