Spatial tracking
Spatial Tracking allows to scan a whole room, facility or rigid objects to create a 3D representation of the environment, that will be uploaded and processed within Onirix Studio. There you will be able to configure the AR content that will be anchored to the real world.
Onirix Studio also allows you to identify areas of interest and create paths and routes to guide users of the experience to them. Take a look at our Wayfinding.
Start creating awesome Web AR experiences with Spatial tracking and its Visual Positioning System.
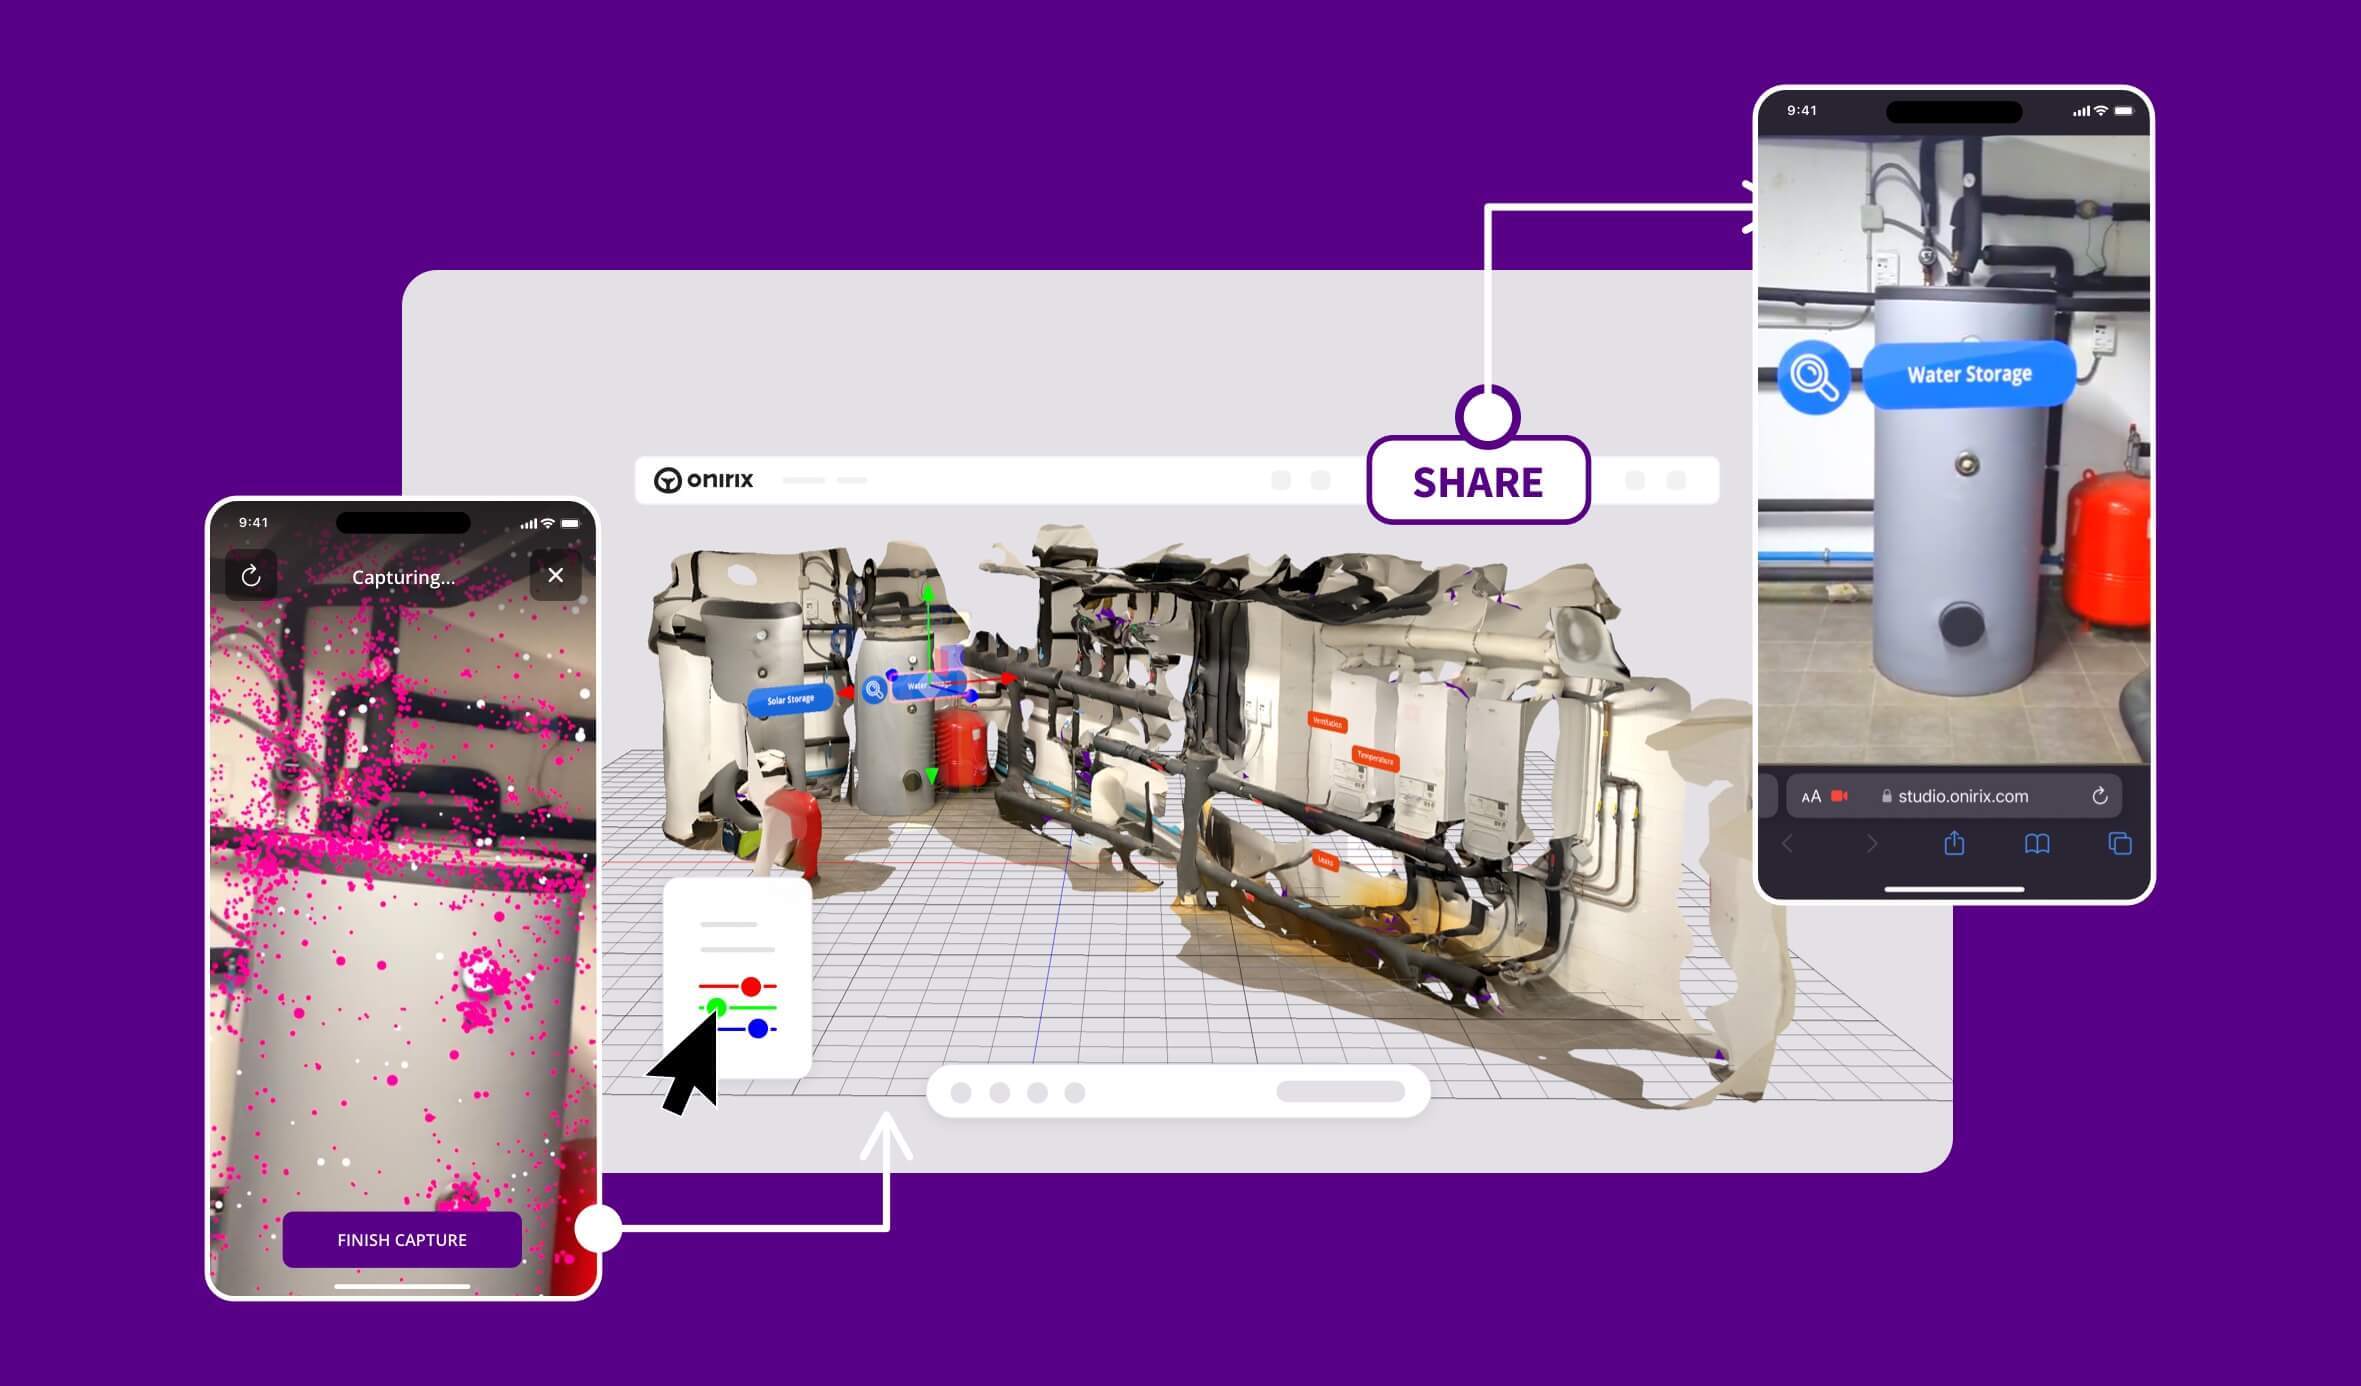
Spatial AR: steps for creation
The steps for creating these kind of contents are:
- Construction: Scan the environment with our Onirix Constructor app. More info about the construction process here.
- Processing: Upload the captured space to Onirix Studio. Here our system will process the visual information to create the 3D virtual reference of the real world.
- Configuration: Access to your Onirix account to include all the AR anchored content and element interactions you want to be available in your experience.
- Visualization: first, a visual location process will detect and recognize the environment around the user; and then the tracking will start, locating all the AR content perfectly placed in the real world.
How to create a new scene
The first step to create a new spatial-tracking scene is to scan the environment with the Constructor app. You will only need to take a walk around the environment you want to capture, as if you were recording a video.
Try to use rich texture regions for creating your scans. For example, a simple door won't work well if there are other doors with the same shape in the same enviroment as the system won't be able to distinguish one door from another. More tips about scanning here.
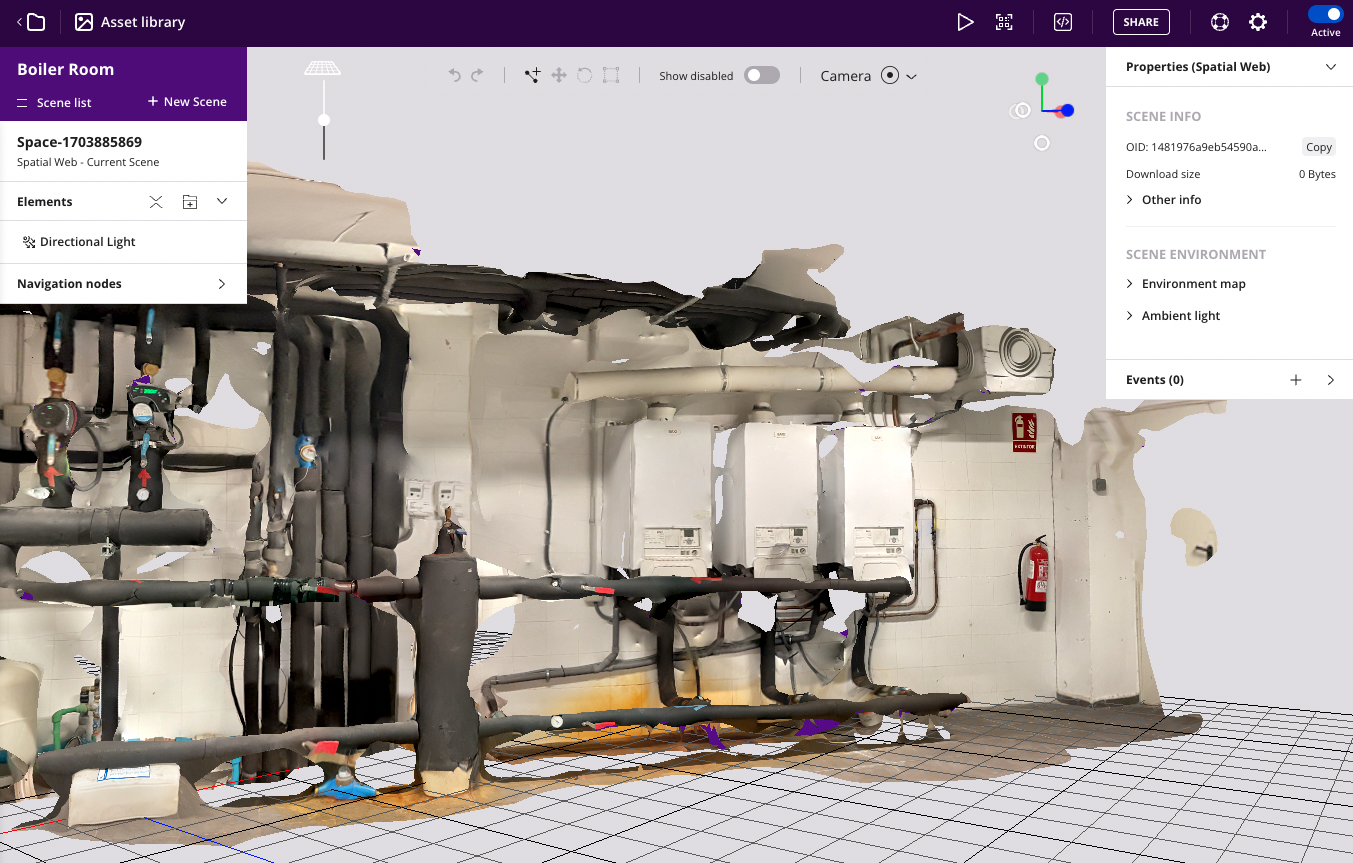
This will generate a 3D model with textures that represents visually the real environment. Something like this example:
Here there are some tips to make a good scene capture:
- Scan your environment slowly around the area you want to capture from a distance of about 1 meter.
- Moving (walking) around an area is required, just rotating or looking around from the same place won't capture the environment correctly.
- Avoid hard illumination changes. Entering a dark room or capturing the sky in a sunny day would break scanning.
- Avoid textureless regions like empty walls, they won't be able to generate info for the point cloud, as there is no way to generate depth with just textureless images.
A good internet connection is required for scene capturing
Space reconstruction process
The states currently sent by the service are as follows:
- SFM → Triangulation and generation of basic scene structure.
- DENSIFICATION → Scene densification.
- MESHING → 3D mesh generation.
- REFINING → Simplification and mesh refinement.
- TEXTURIZING → Applying texture to the mesh (visual aspect and pictures).
- OSF_GENERATION → Generating localisation file (internal descriptor to locate the end-user in the real world).
Configure your scene
The next step is to add visual content to the scene from Onirix Studio. You can add virtual elements, and add interaction through events.
Location areas: visual tips for end-users to launch de experience
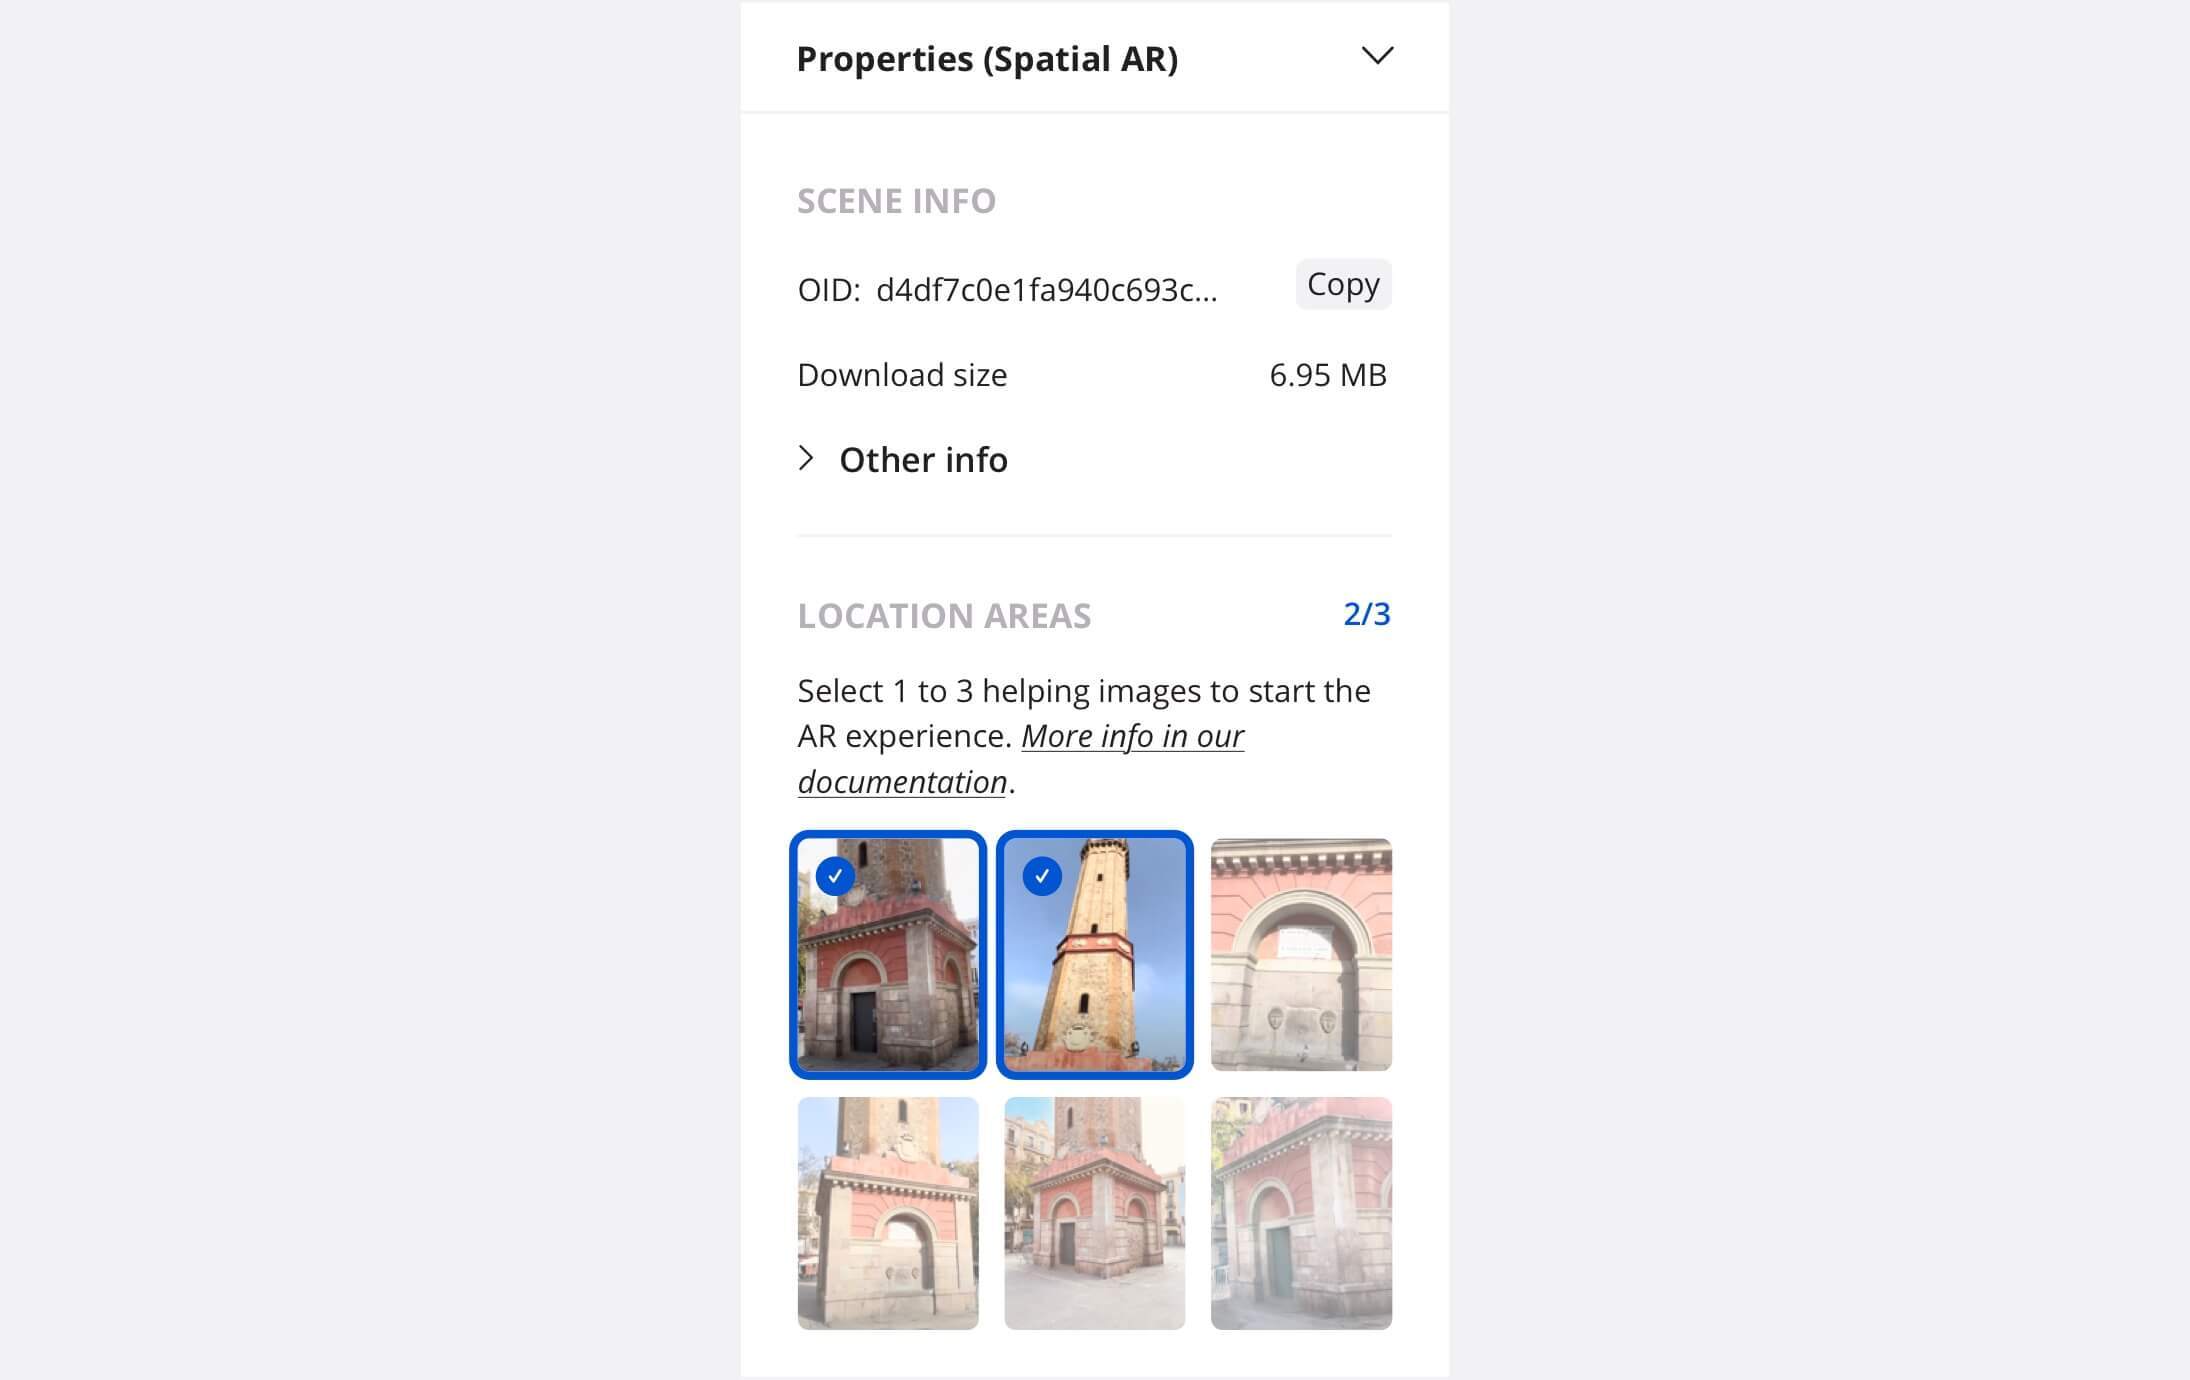
Location areas are the areas where we want to indicate to the end-user that they can start their AR experience. From Studio we can select between 1 and 3 help images to visually indicate this concept to the user. These images are automatically generated during the scanning and reconstruction process and will be available to you when your space is complete.
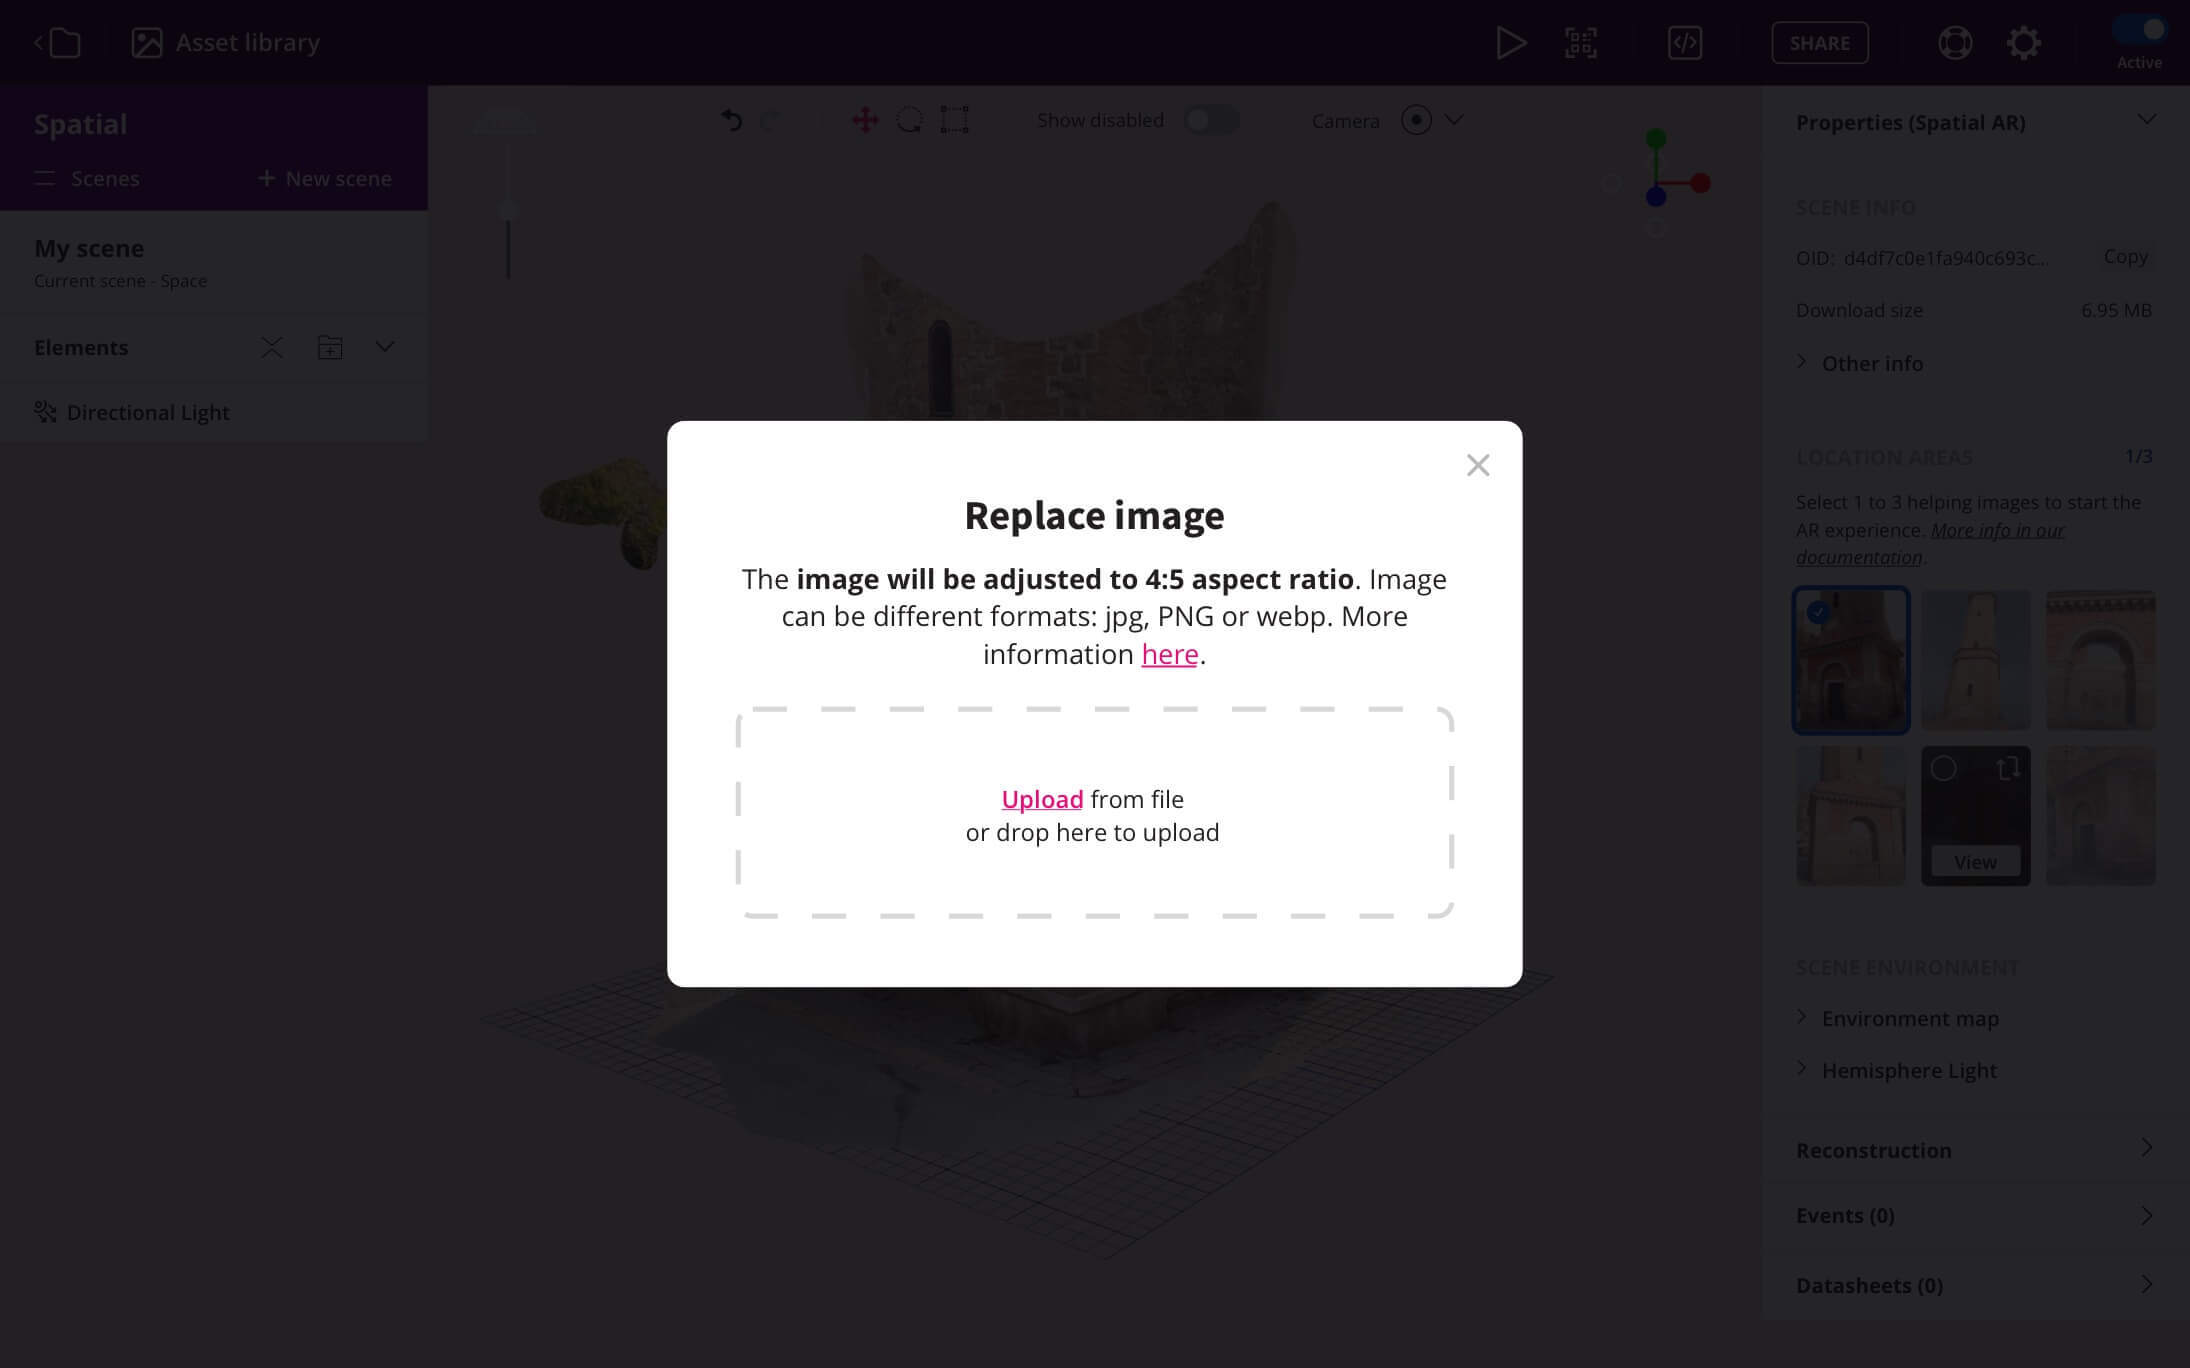
You can also replace any of the automatic images with your own, if they are not quite clear. You can simply upload a photo.
Please note that in order to look good on any device the image must have an aspect ratio of 4:5, otherwise Onirix will automatically resize the image to fit the aspect ratio.
Set up your space with occlusion
Since Onirix v.2.66.0, any new space created in Studio can be set as a mesh with occlusion. This will generate the ability to include the transparent mesh as part of the experience, and therefore use the boundaries of the scan to act as occlusion planes of the experience.
View your experience
Last, but no least, you will be able to access the experiences as any other kind of experience in Onirix: using the QR code associated, or the web link, to open the browser. This options are included in our Sharing options feature.
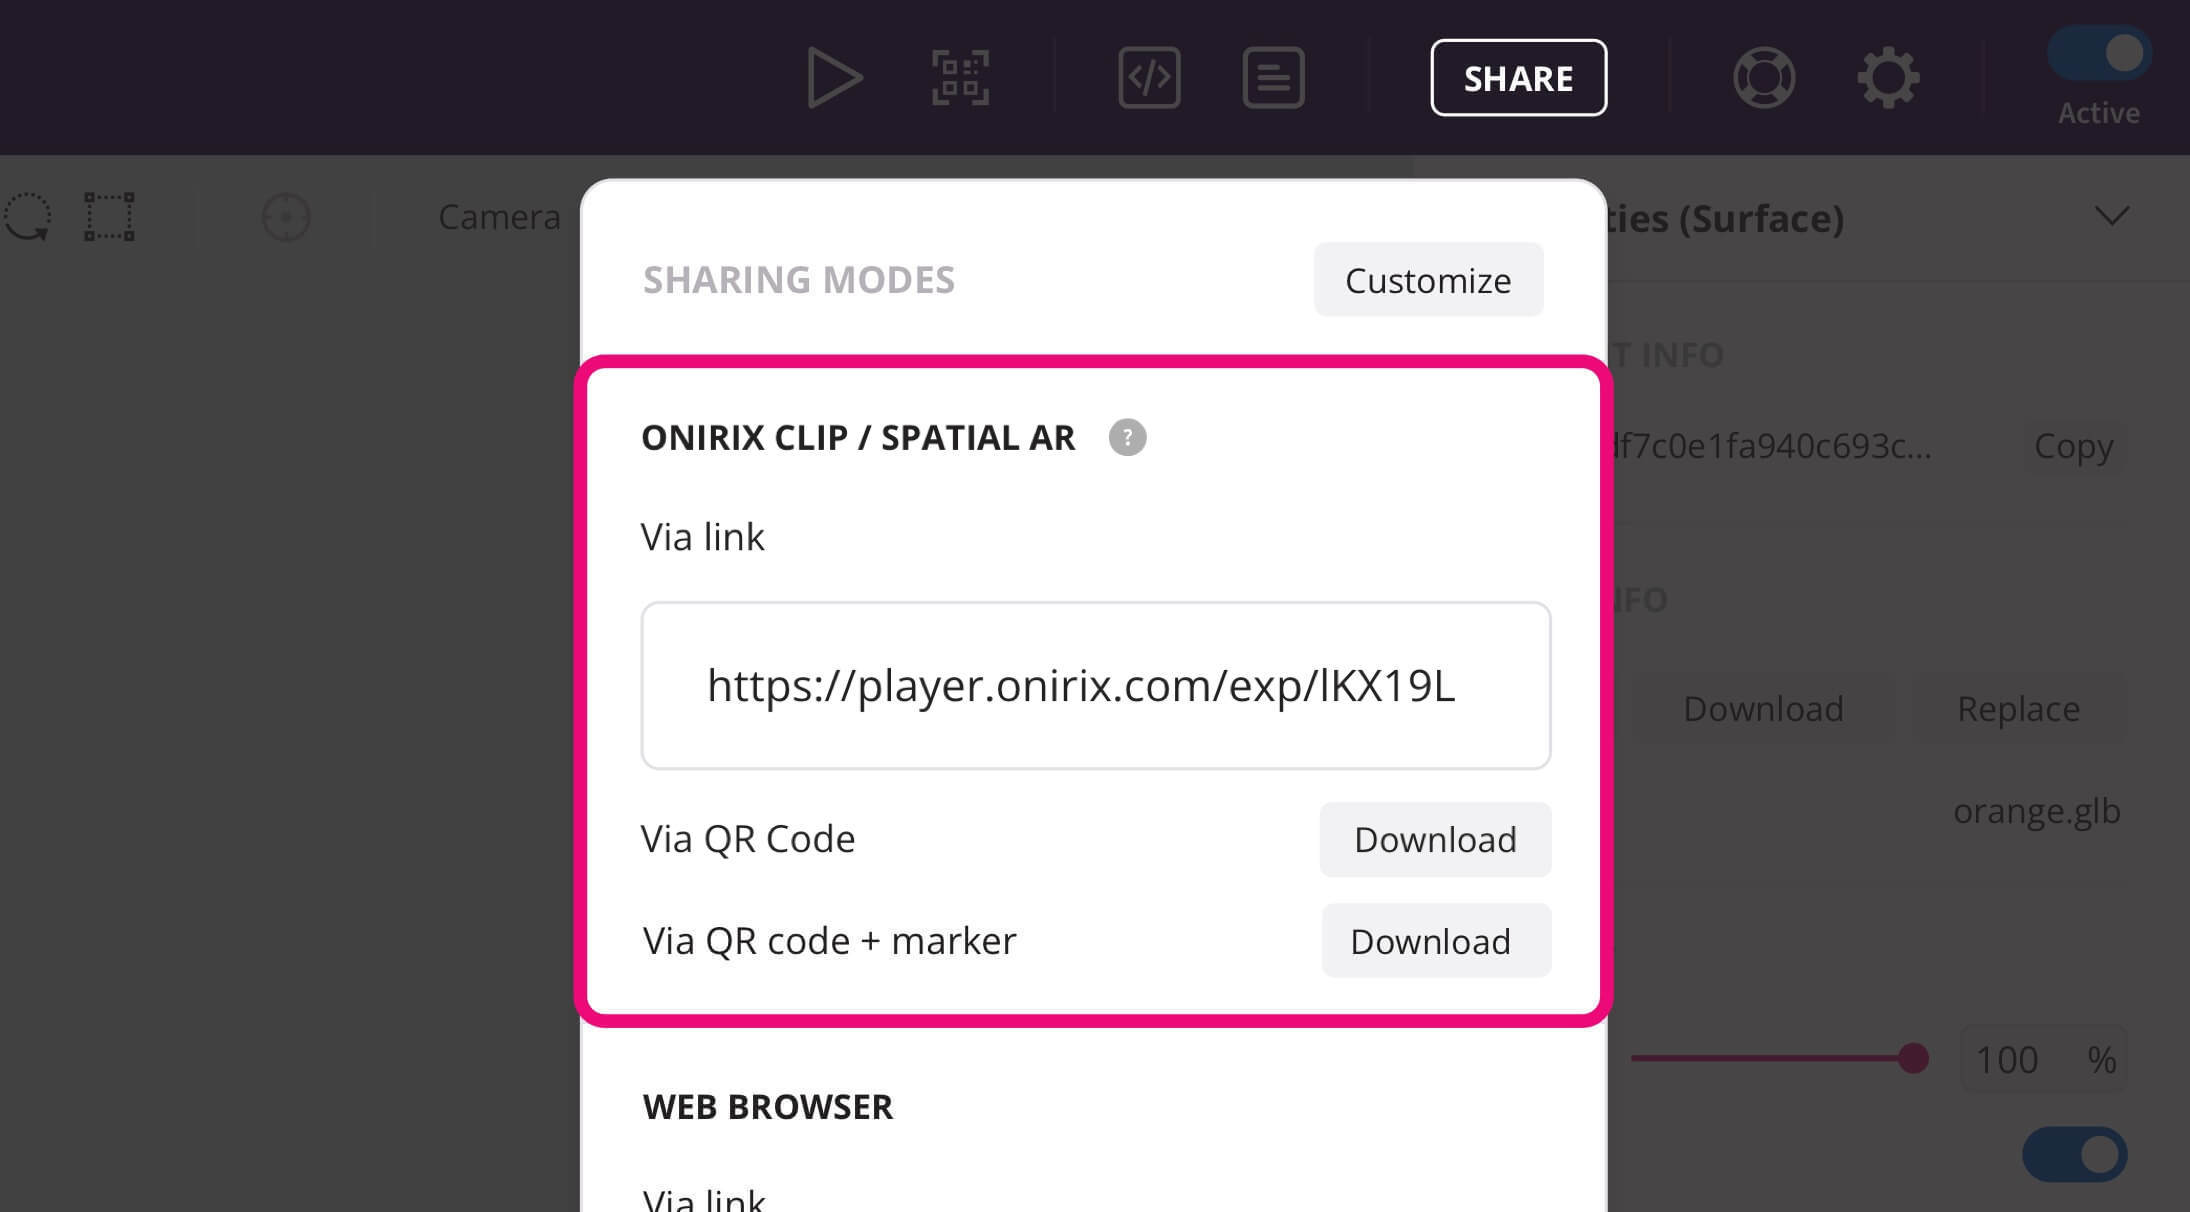
You will have to be in the same environmente where the capture was taken in order to localize yourself in the environment. After that, AR content will appear and you will be able to play with the experience.
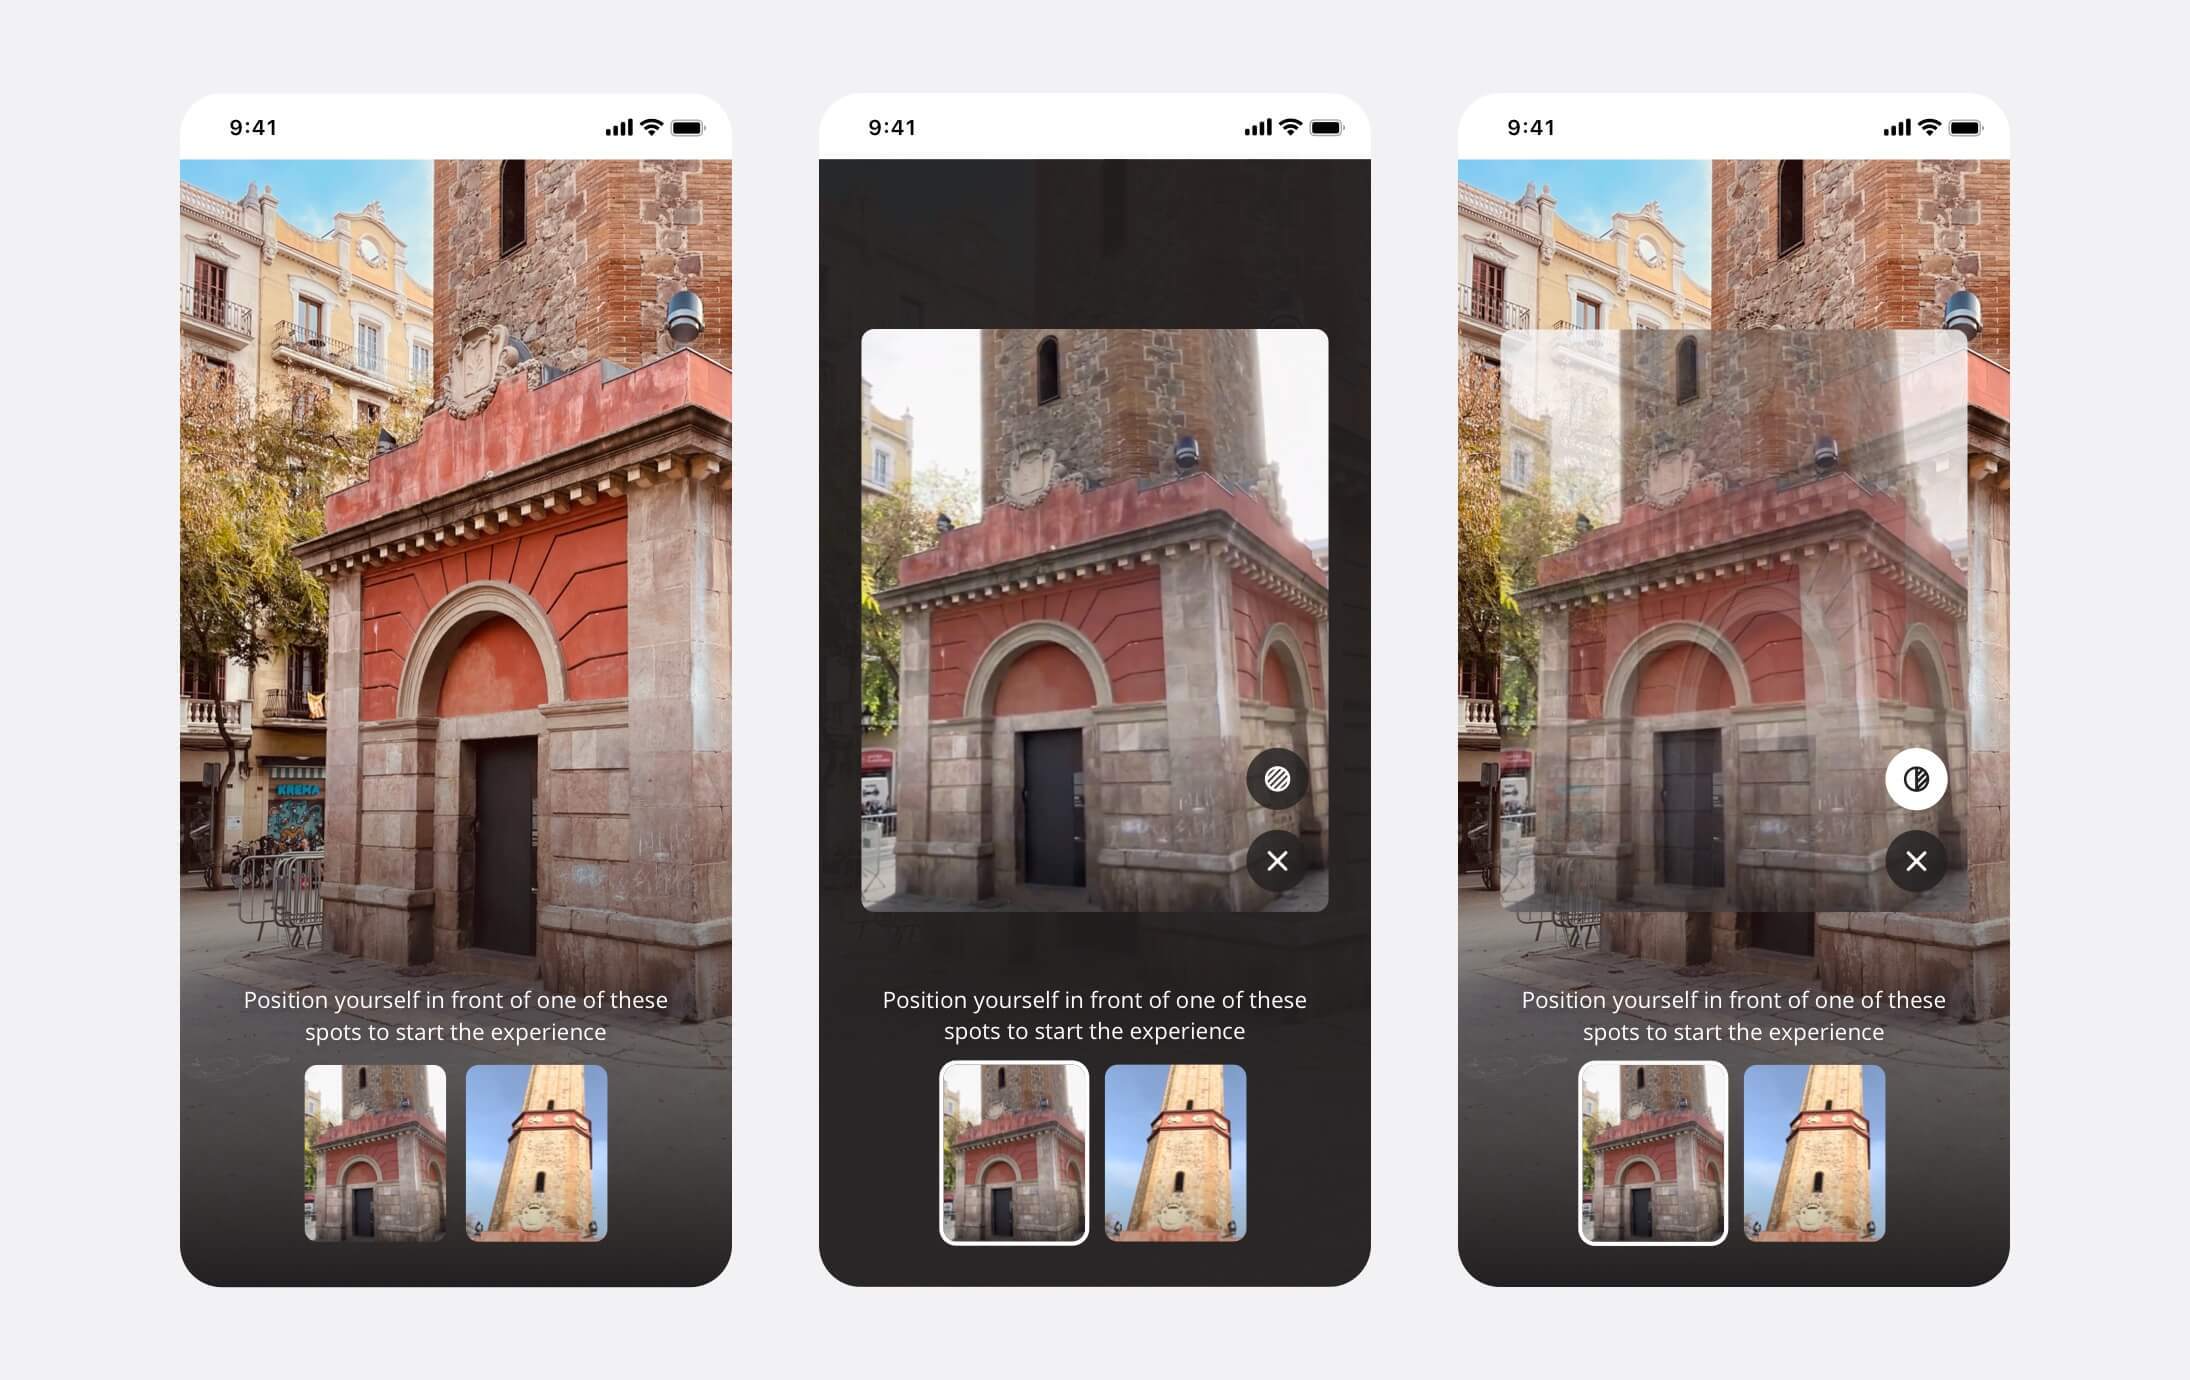
In the AR experience, the user, upon initialisation, will be able to see a list of the images available on their phone, as well as select to view them in more detail in opaque format, or even in semi-transparent format to fit in with the immediate environment.
Compatibilities for Spatial AR
End-users consumption:
To visualise the final result, i.e. location and tracking of the contents:
-
Android: the available for Android phones with ARCore compatibility. Mobile web support for Android using the Google Chrome browser.
Important: Make sure you have updated Google Chrome to at least version 128, released in August 2024: see release notes link.
-
iOS: iOS devices with ARKit compatibility (from iPhone 6s onwards). It is necessary to have the operating system version updated to 16.4 or higher. Available by accessing the Onirix Clip as the experience player.
Approximately 60-70% of existing devices in use have this compatibility for use on Android, and more than 90% are compatible on iOS.
Spaces configuration:
To generate new spaces it will be necessary to use our construction app: Onirix Constructor. Only available for iOS at the moment.
