Geolocated AR treasure hunt for events
In this tutorial you will learn to set up and customize an augmented reality treasure hunt with Onirix, Firebase and Vue. This project can be used to provide a game-like experience to clients and visitors, for example, you could use the games to attract attention to stands at an event, shops at a mall, different points of interest at a festival, etc. You can download the code needed for this tutorial from our Github repository.

The complete flow of the experience would be:
- Users will access the url where the game has been hosted (or via QR code). This action will open the client application in the web browser (Google Chrome or Safari).
- If they are not registered, they will need to input their email, a password and some basic information which will be stored. If they are registered but not logged in, they will need to write their credentials.
- Once they are registered and logged in, the AR game will start. Users can visit different locations within a map, where points of interest marked with in-game pins can be viewed. By being near each of them (within a radius of action), they will be able to launch the AR (logo hunting game) experience.
- The goal of the game is to visit as many locations as possible, and get as many points in each of them, in order to exchange them for potential prizes (at a festival, event, etc.).
- After completing each game you will be able to see your score, and how close or far you are from the different prize tiers available. This encourages players to continue searching for active locations.
The bellow instructions regarding Firebase and Vue correspond to the latest review on February 2024. As these platforms are external to Onirix, we are not responsible for their operation, updates, or any changes that may occur in them
Application overview
Screens of the game
The previously described flow is divided in a set of different screens.
Landing page
This page shows an introduction to the game and the different awards the application has.

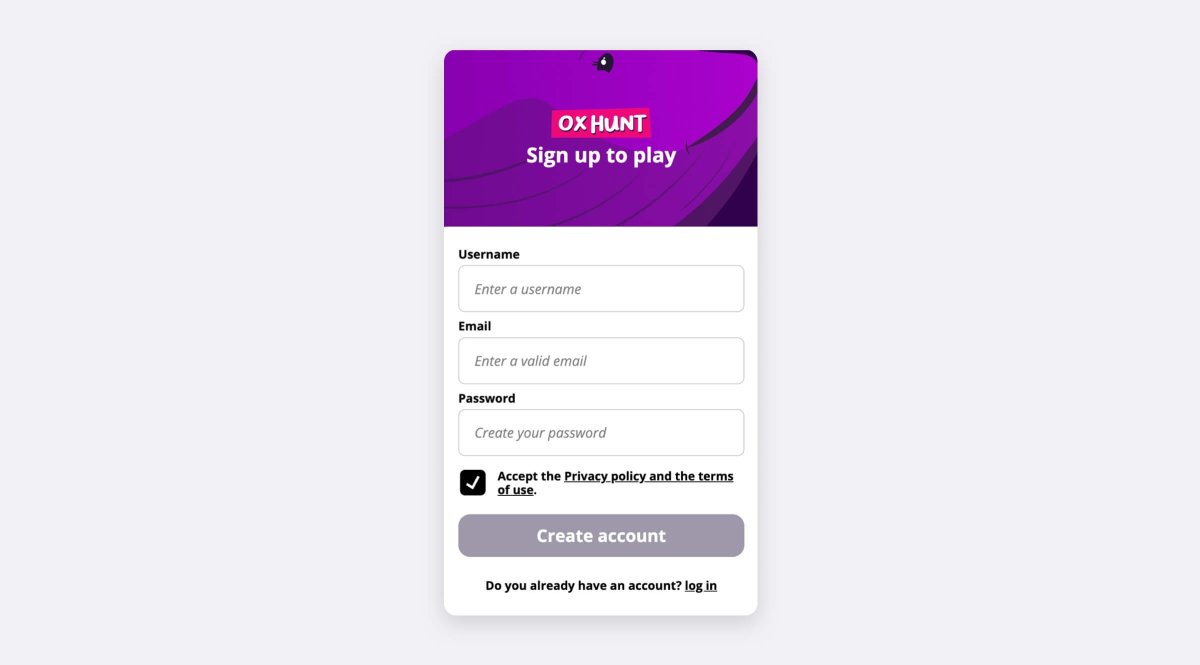
Login/Registration page
The login form is a simple view with two fields (email and password) where the user will input their previously defined credentials.


Home page
After registering or login, the user will see the home page, where he can check his points and the level in which he is.
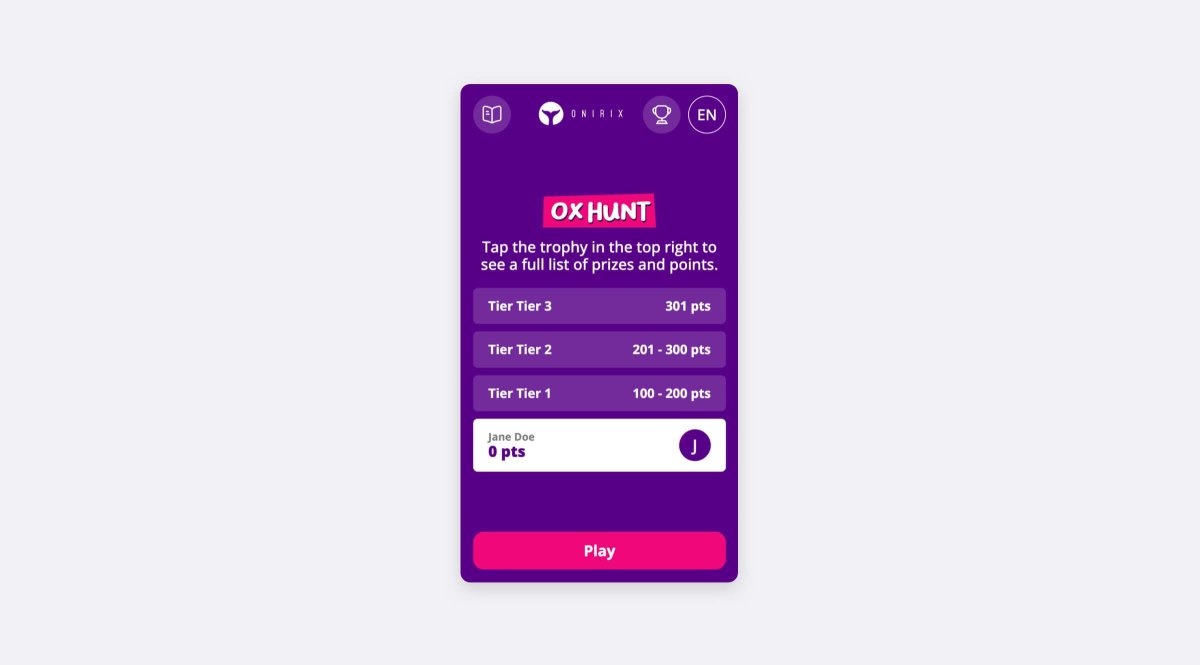
Tiers page
The Tiers page shows the prizes that can be obtained based on the points you have. In this case these are "fake" tiers, but you can set the type of tiers you want, with your own prizes.

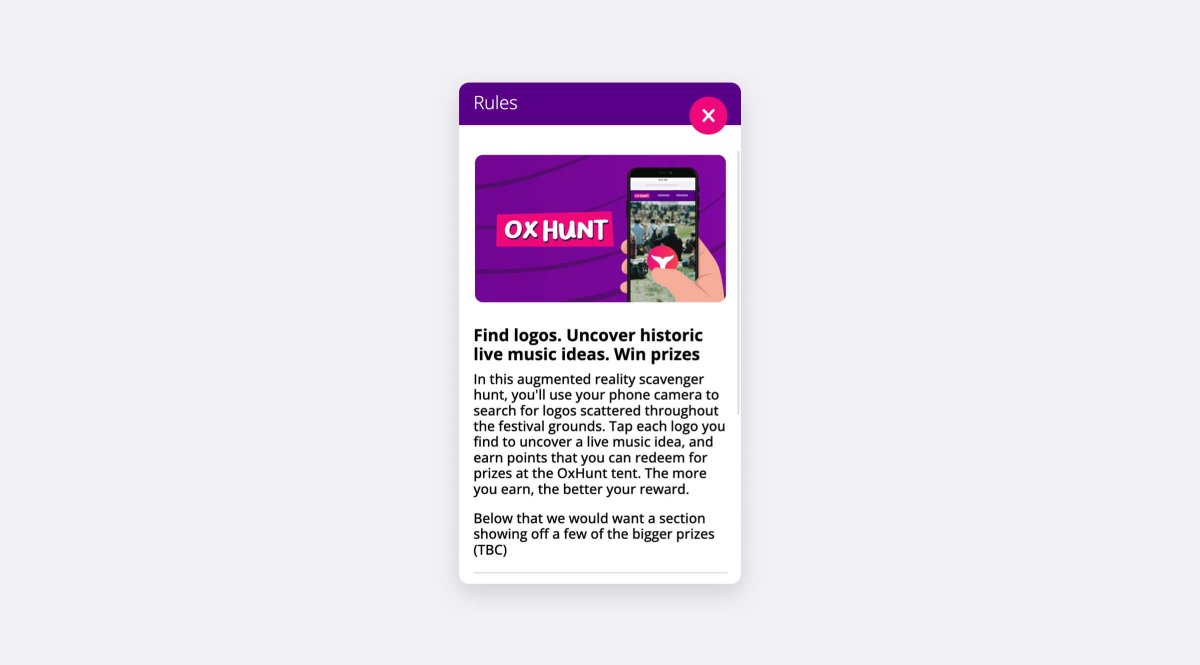
Rules page
Here the user can see how it is played and the rules that apply. This is a good place to include a link to a legal terms as well, in case it is needed.
Locations Page: Map
When the user start playing a map is shown with the different locations where he can play. Different pins will appear indicating the potential locations to play.

Game page
Once the user select a location the game start and the user must catch the logos. For more information about the game access to our experience library, where we explain the Onirix logos hunt with more detail.

Game summary page
On this page the user can see the points he wins and also he has two options: Keep playing if he want play another location or go to home page and redeem the points.

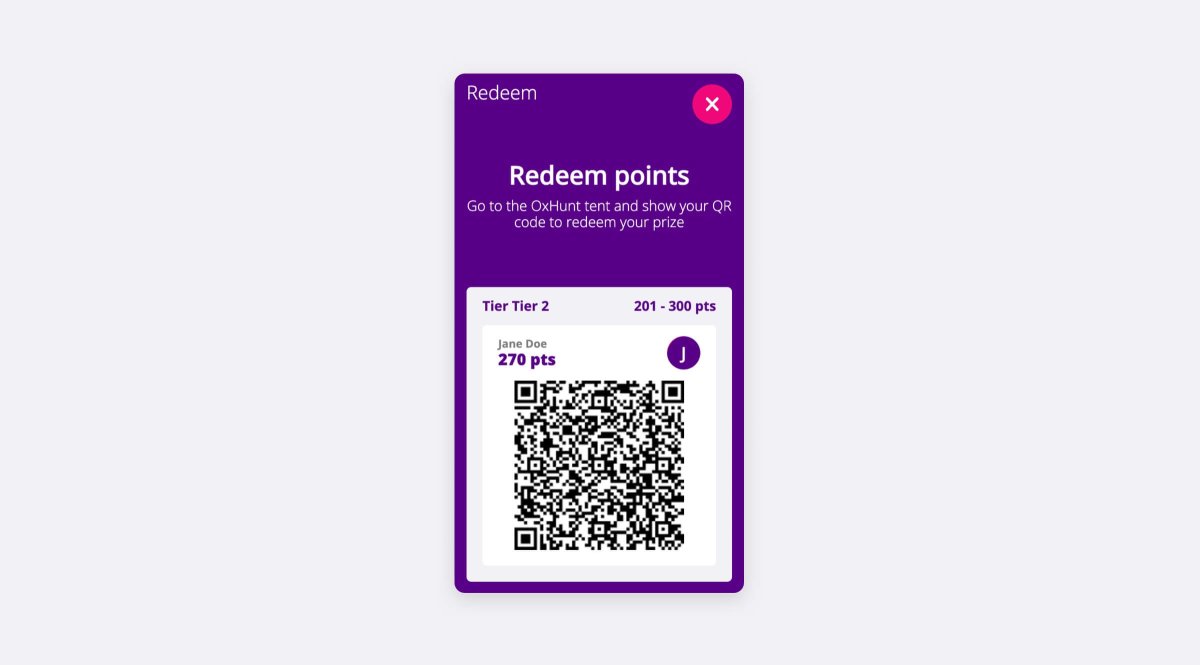
Redeem page
In this example experience we propose that the user can go to an establishment to redeem his points, and that is why we added this screen where he can request his rewards. This logic is completely modifiable and adaptable to the type of experience you want to add for your event or establishment. For example you could accumulate points on different days, or have an active game throughout the year with a general ranking. This is up to you!
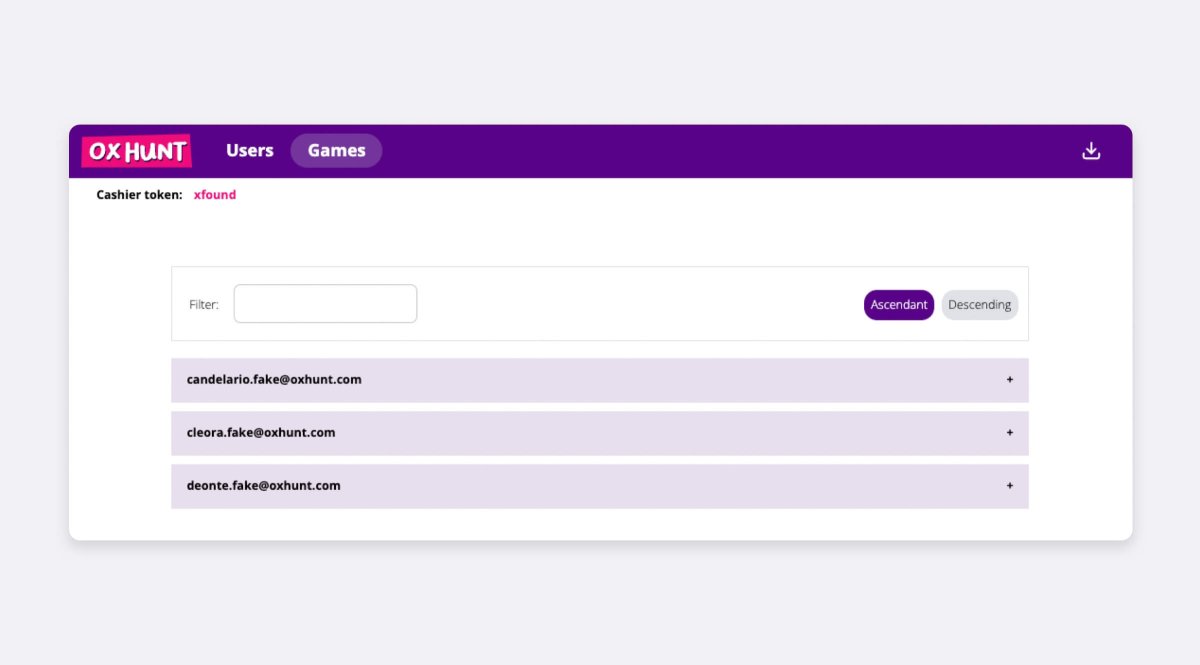
Admin Panel
The administration panel allows us to control the users of the application as well as the different games played by each of the users.
It is nothing more than an informative panel, from here we can not modify user data, just check data such as name, creation date or the times you have redeemed points. On the other hand in the games tab you can see the users but this time to consult info corresponding to the game and scene they have played and on what date, as well as the score obtained and if they have redeemed points and when.
This panel is divided into the following tabs:
Users tab
All information about users are on this tab.

Games tab
On this tab is the relationship between the user and all the locations he has played.
Architecture
Like it was mentioned before, the treasure hunt is built on three main pillars: Onirix for augmented reality, Firebase for the backend and database and Vue for the web client used to consume the experience and administrate the hunt and its data.
Onirix allows us to create immersive AR scenes that can be directly consumed from our phone browsers (no downloads or installations needed) thanks to its WebAR capabilities. On the Onirix Studio platform we can define different scenes that will be later associated with the stands and customized to fit their logos (or the chosen objective). Furthermore, Onirix, through the Embed SDK package, exposes a series of events that allows us to control, extend and personalize our AR experience using JavaScript.
Google’s Firebase is a platform used to provide database and backend support for mobile and web applications. Its dashboard and easy configuration is ideal to set up quickly the infrastructure needed for the treasure hunt project. For more information, visit their documentation.
Lastly, Vue is the JavaScript framework used to create the web application where the administrators of the hunt can create the events, add the different stands and link them to scenes defined in Onirix and see the data about users and their played games. It will also provide the user with all the functionalities shown in the previous section. For more information, visit their documentation.
Backend
The previously mentioned administration panel built with Vue provides the managers of the event CRUD operation over the users, and games. To achieve this it invokes the functionalities defined in Firebase.
Step 1: Get the code
The first thing you need is to download our template project from the Onirix repositories on Github. Open this link in a new tab, login with your GitHub account and select the Fork option and fill the form. Through the Fork functionality you will be able to make a personal copy of this repository and modify it freely.
After the fork is created, click the Clone button and copy the link inside. Now, open a terminal in the desired folder and execute the “git clone” command followed by the URL you just copied. This will create a local copy of the repository in the folder.
Once it is downloaded, you can open it in your IDE of choice and take a look at the content. However, before you run and test the project, you need to set up Firebase to store the data (events, users, etc) of the treasure hunt.
If you are not able to connect to firestore with code on github, try to update the version of the firebase-functions (View here).
Step 2: Set up Firebase
The Ipsum Hunt example uses Firebase to store and consume the data generated in the application and thus you will need to create a Firebase account using your Google account and configure a new project to connect it to the application.
Create Firebase project
Once you are logged in on Firebase’s console, choose the “Add project” option. This will take you to the creation form, input the name for the project, enable (or disable Google Analytics for the project). If you choose to enable it, you will need to create an account on Analytics and Google will automatically create a new property for this project.

If you are interested in setting up Google Analytics on an Onirix Web AR experience check this tutorial.
Finally, select create project, wait for the process to complete and click Continue.
Add and configure the application
In the project overview page, select the </> icon in order to add a web app to the project, fill in the field with the name of the app (in this case “ox-hunt”) and click Register app.
After a short wait, Firebase will provide you with all the information you need to connect to it from the app (apiKey, authDomain, projectId, ...). Once you have copied it, head to the index.ts file under client > src > services > firebase.service.js in your project local repository and paste the values here:

If you need to view this information again, in the dashboard, click on the project’s name and press the gear icon. This will lead you to the project’s settings where you can check the SDK configuration at the end of the page.

Create the database
Navigate to Firestore Database through the sidebar on the dashboard and select “Create database”. A creation wizard will appear, click next and select the desired location for you Cloud Firestore storage.
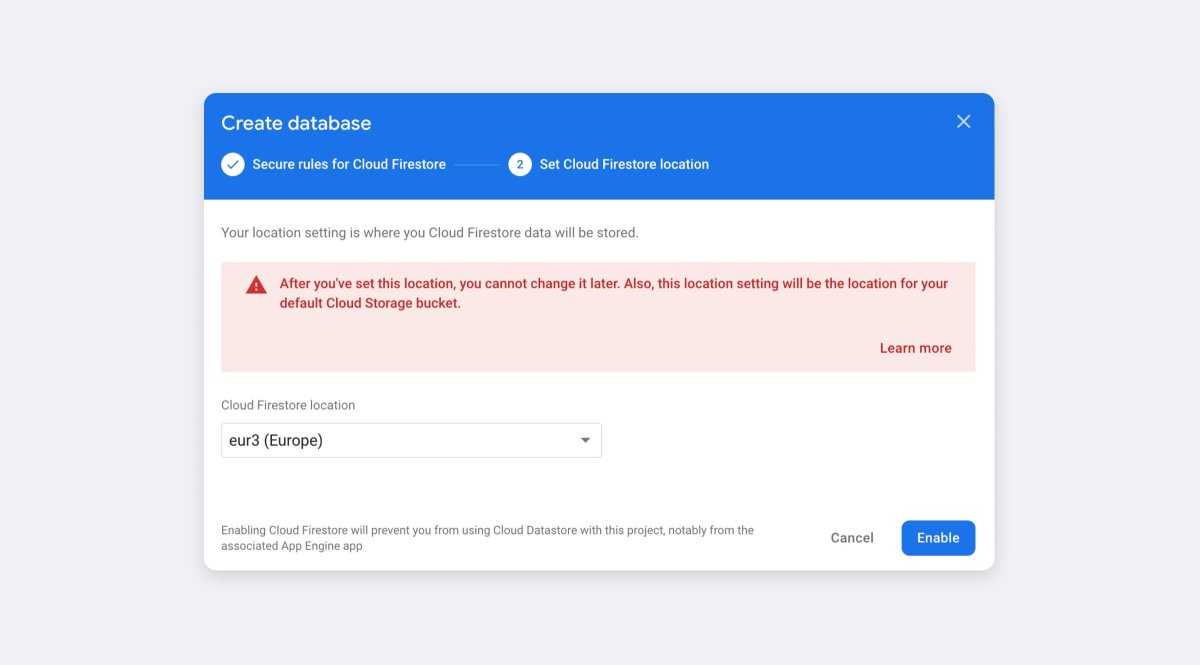
In this case the example was set up in europe-west, nevertheless you should choose your own region or the one where the project will be used. Click enable and after a short wait your database will be created.
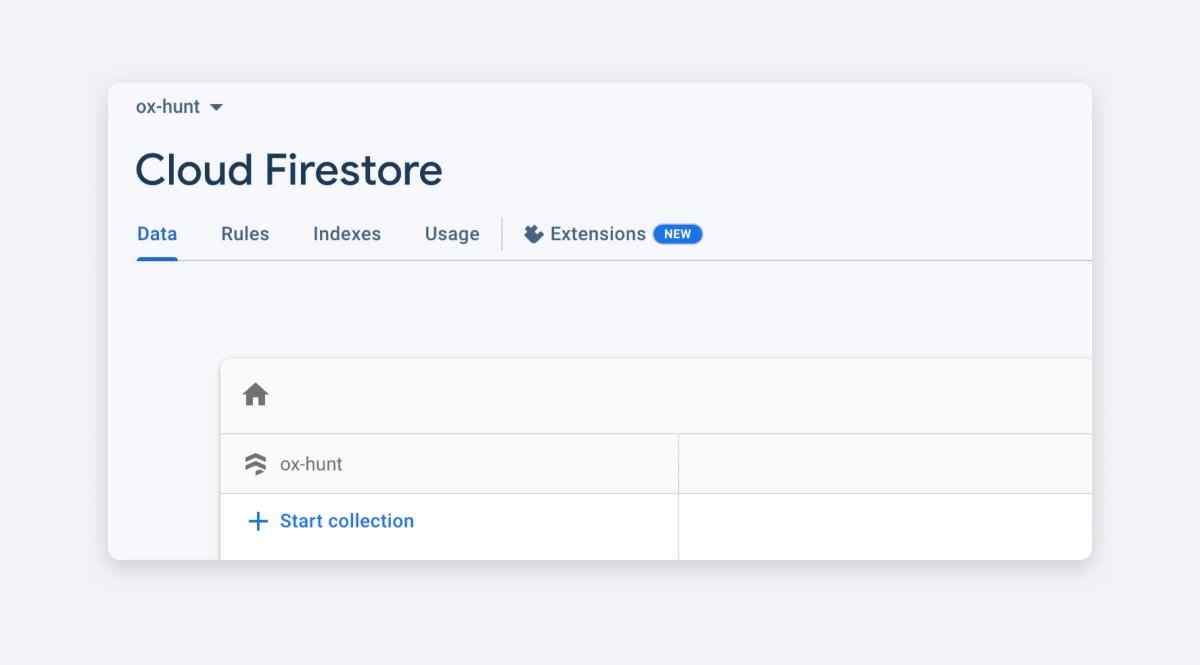
Once it’s created, you will need to copy the name of the Firebase application (in this case “ipsum-hunt”) and paste it on the .firebaserc file “default” field. You will also have to change Firestore region to the one you selected on two files:
- On backend > functions > src > index.ts.

- On client > src > services > firebase.service.js.

Authentication
In this example the authentication is handled directly with JWT tokens saved on the Firebase collections. The only requirement to start using this approach is defining a secret for the JWT and generating a token for the Admin user. The defined secret should be written in the CONSTANTS object on index.ts.
After creating it, go to the backend > functions > scripts folder and execute (node) the tokenService.js script setting the _jwtsecret to the one you just defined. Then, copy the generated token printed on the console and paste on client > src > services > firebase.service.js.

Nevertheless, you can set it up with your authentication method of choice. For example, under the Authentication options on Firebase’s dashboard, Google provides many different types of authentication that can be enabled and configured for your project.
Step 3: Set up mail notifications
When the registered users forget their password and ask for a new one, the application handles it through emails. For this to work a mail service will be needed, in this example Sendgrid is used. However, you can utilize any that you prefer and then change the code accordingly.
To set it up with Sendgrid:
- Create a new account and follow their documentation to generate an API key.
- Then copy this key and paste it on the CONSTANTS object in index.ts.
You will also need to write the email address that will be used as the sender of the notifications and the URL of the domain where your application will be hosted.
Step 4: Create Studio project
The next step is to create an Onirix Studio account and build a new AR project that can be connected to the Ipsum Hunt example. Navigate to Onirix Studio and fill both parts of the form and validate the account.
Once you are logged in Studio, you will be presented with several videos, tutorials and some premade assets and projects that you can use to get familiarized with the tool.
Create Treasure Hunt experiences
A Scavenger Hunt consists in capturing certain elements that will appear in the AR experience. Where and when these objects appear is configured through the scene editor of Onirix Studio. So, the first step is creating a new surface scene.
To achieve this, you need to create a new Project and name it, or you can also download from the experience library the following projects to get a general idea and examples of the topics that will be discussed below.
Once it’s created, the form to create a new scene will show up. Select surface type and input a name. Then, click the “Share” button on the top right corner of the page and make sure that the project is set to “Public” as it needs to be public in order to be consumed from the web or the app.
For the games to be divided into different locations, it is essential to have a geolocated project. To achieve this, in the upper right corner, you must click on settings and then activate "Geolocated project".

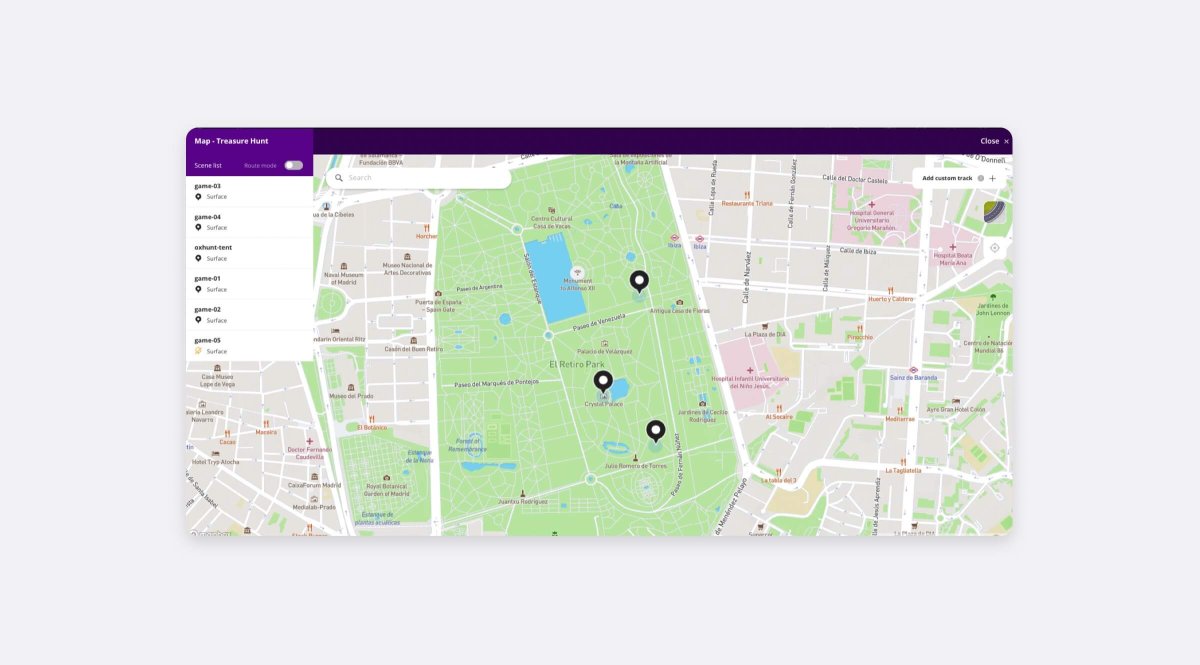
Add locations
Once the scenes are created it's time to put them in a certain location.
To do this you need to click on "Show Map" button at the top bar. Once there you can see a map and a list of the different scenes. To set a location for a scenes it's only necessary to click on a scene, then click on "Add location" and finally select a point on the map.
Add elements to the scene
Inside the scene editor, you will now have to add the game objectives that the user will need to capture on their mobile phones. For this to work correctly, the most important step will be to name the elements (one or more) that form your objectives so they can be correctly identified. For example, if your objective is formed by logos, you will have to add elements with the name “logo” to the scene.

To complete the game, the user will have to capture (click) in every objective element that we add to the scene.
Custom styles
To custom the styles of the AR experience we need to use online code editor to include the new CSS rules that overwrite the default styles.
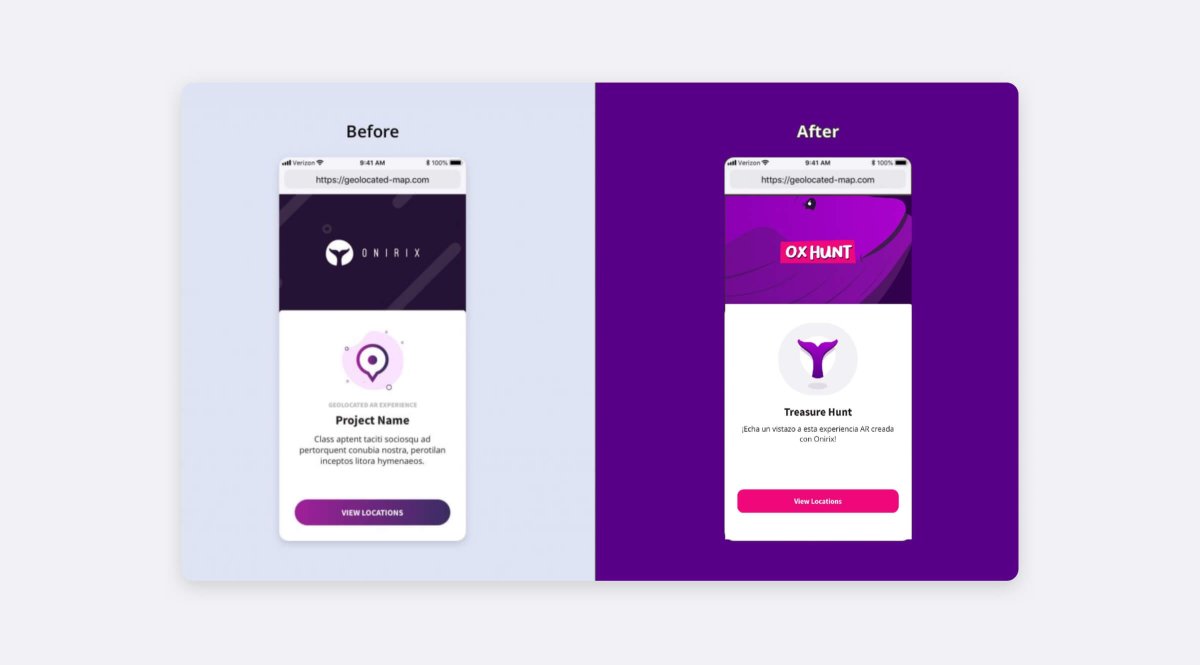
Landing page
Using the #webar-geolocated-welcome-logo selector we can change the landing page image and with #webar-geolocated-welcome-card the section below which is shown until the GPS activates and the user clicks the start button. We can also swap the location icon inside it.
We can also change de image inside the welcome logo as well as the image inside the card.
#webar-geolocated-welcome-logo {
    background-image: url("https://my-host/images/oxhunt-welcome-logo.png") !important;
}

#webar-geolocated-welcome-logo img {
    content: url("https://my-host/images/oxhunt-logo.png") !important;
}

#webar-geolocated-welcome-card img {
    content: url("https://my-host/images/oxhunt-card-logo.png");
}
In this same view, the menu buttons and the options can also be changed with the following selectors:
- .ox-g-round-button: for all the buttons with rounded borders. It includes the “View locations” button of the welcome page.
- .ox-navigate-button: for the round buttons used for navigation (“View on map”).
- #webar-geolocated-back-button: for the back button on the top left corner.
- #webar-geolocated-menu-button: for the hamburger menu button on the top right corner.
- .ox-locations-menu: for the close icon on the locations menu.
.ox-location-panel .ox-g-round-button.ox-navigate-button span {
    display: none;
 }
.ox-location-panel .ox-g-round-button.ox-navigate-button::after {
    content: "Play this location";
    position: absolute;
    color: white !important;
    border-radius: 14px !important;
    background-color: #ee0979 !important;
 }
Map styles
On the online code editor we can change the location icon, the radius os the location, etc.
With .ox-map-location-wrapper .ox-map-location we can change the default image of the point on the map.
.ox-map-location-wrapper .ox-map-location {
    background-image: url("https://my-host/images/oxhunt-poi.png") !important;
}
Also there are other states for available locations:
- Normal: the usual state of the location. It is neither selected nor accessible. Use .ox-map-location-wrapper to modify it.
- Accessible: when the user is inside the range of activation of a location the class .ox-ar-enabled is added to the location wrapper.
- Selected: a location is selected when the user has clicked on the location. Use .ox-selected to change its style.
For example:
.ox-map-location-wrapper.ox-ar-enabled .ox-map-location {
    background-image: url("https://my-host/images/oxhunt-poi-selected.png") !important;
}
Finally, to change the radius you must use .ox-location-radius.
.ox-location-radius {
    opacity: 1 !important;
    border: solid 3px rgba(49, 0, 76, 0.12) !important;
    background-color: rgba(49, 0, 76, 0.1) !important;
}
All of these can be combined to create custom states:
.ox-map-location-wrapper.ox-selected .ox-location-radius {
border: solid 4px rgba(238, 9, 121, 0.38) !important;
background-color: rgba(238, 9, 121, 0.1) !important;
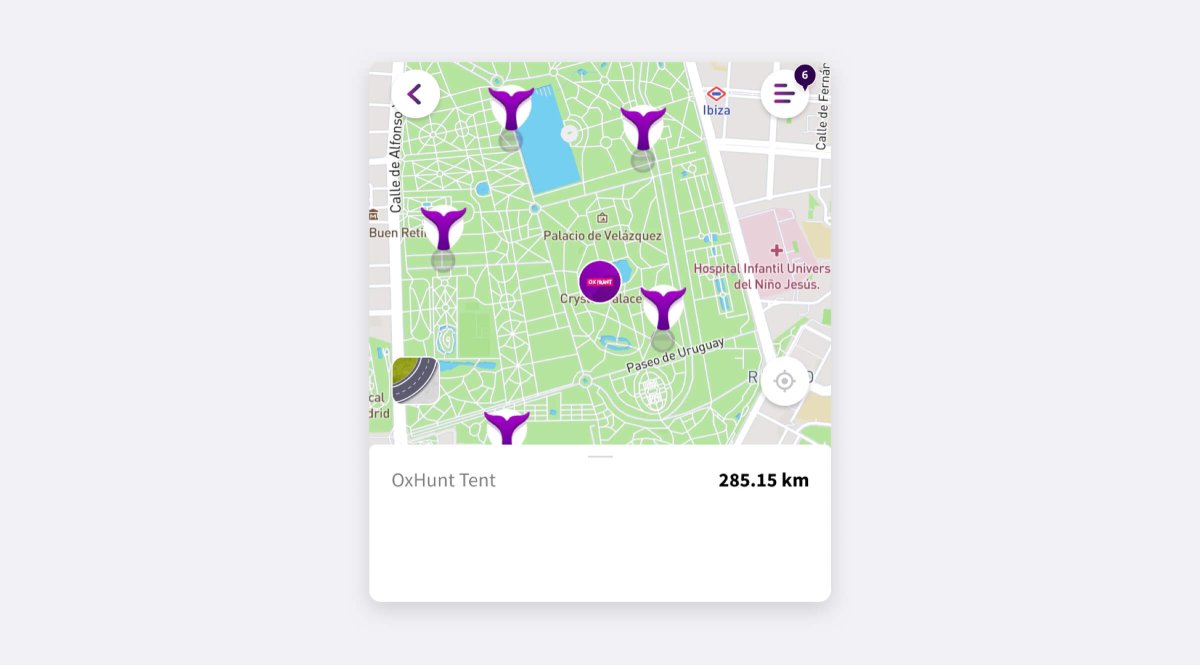
}OxHunt Tent
To custom a single point on the map (in this case this point indicates a stand where the users can redeem theirs points), it is necessary to know the OID of the scene that represent this point.

Once the oid is known the steps to change the styles are the same, but adding the reference to that oid.
.ox-map-location-wrapper.ox-map-location-wrapper--e1c89e721aea46b4b1f298caa0fe3eea {
    width: 50px;
    height: 50px;
}

.ox-map-location-wrapper.ox-map-location-wrapper--e1c89e721aea46b4b1f298caa0fe3eea .ox-map-location {
    background-image: url("oxhunt-tent-poi.png") !important;
    width: 100%;
    height: 100%;
    transform: translateY(50%);
    background-size: cover !important;
}

.ox-map-location-wrapper.ox-map-location-wrapper--e1c89e721aea46b4b1f298caa0fe3eea.ox-selected .ox-map-location {
    background-image: url("https://my-host/images/oxhunt-tent-poi.selected.png") !important;
}

.ox-map-location-wrapper.ox-map-location-wrapper--e1c89e721aea46b4b1f298caa0fe3eea .ox-location-radius {
    display: none;
}

.ox-map-location-wrapper.ox-map-location-wrapper--e1c89e721aea46b4b1f298caa0fe3eea.ox-selected {
    width: 50px !important;
    height: 50px !important;
}

.ox-map-location-wrapper.ox-map-location-wrapper--e1c89e721aea46b4b1f298caa0fe3eea.ox-selected .ox-map-location {
    width: 100% !important;
    height: 100% !important;
}

.ox-location-panel.ox-location-panel--e1c89e721aea46b4b1f298caa0fe3eea .ox-location-header > span:first-child {
    position: relative;
    color: transparent;
}

.ox-location-panel.ox-location-panel--e1c89e721aea46b4b1f298caa0fe3eea .ox-location-header > span:first-child::after {
    content: "OxHunt Tent" !important
}

.ox-location-panel.ox-location-panel--e1c89e721aea46b4b1f298caa0fe3eea .ox-g-round-button {
    display: none;
}
With this styles you can obtain something like this:
Step 5: Connect to Onirix Studio
Set up the token
After you have created a project and the scenes that you want to play on the web application, you need to set your Onirix API key on the client so it can read your Studio data and pull the projects and scenes.
To achieve this, select the project that you have just created, click the Settings button on the top right corner, look for the “Onirix token” section and click “Copy Onirix token” to copy your key to the clipboard. Finally, paste it on the .env.development and env.production files in the client folder.

Add IFrame
In order for the experience to be seen, it is necessary to embed the iframe of this experience in the application code.
To do this you need to copy the Iframe from Studio.

Once copied, we simply have to paste it into one of our components (the one we want to be responsible for the game itself)

Here an example of a component with communication with Studio to send and receive messages and save the score using integration with firebase:
<template>
    <div>
       <iframe id="visor"
       ref="onirixIframe"
       style="position:fixed;top:0;left:0;right:0;bottom:0;width:100%;height:100%;z-index:999;display:block;border:none;"
       src="https://studio.onirix.com/projects/9986960545584d38ba33e14d817b2d28/webar/beta?token=eyJhbGciOiJIUzI1NiIsInR5cCI6IkpXVCJ9.eyJ1c2VySWQiOjEyNjczLCJwcm9qZWN0SWQiOjMyMDQ3LCJyb2xlIjozLCJpYXQiOjE2NjI5ODE1ODd9.eEtm74BzSU57VJ8wt52V2uDnT-Ojp82WhEwtXFV6p4s"
       allow="camera;gyroscope;accelerometer;magnetometer;fullscreen;xr-spatial-tracking;geolocation;">
       </iframe>
    </div>
</template>
<script>
import firebaseService from "../../services/firebase.service";
import oxhuntFunctions from "../../services/functions.service";

export default {
    name: 'GameView',
    data() {
        return {
            iframeUrl: null,
            messageListener: (messageEvent) => this.onMessageReceived(messageEvent)
        }
    },
    beforeMount() {
        this.setIframeUrl();
    },
    async created() {
        window.addEventListener('message', this.messageListener);
    },
    beforeUnmount() {
        window.removeEventListener('message', this.messageListener);
    },
    methods: {
        async setIframeUrl() {
            const settings = await firebaseService.getSettings();
            const user = await firebaseService.getUser(true);
            let scenesPlayed = '';
            if (user.playedGames && 0 < user.playedGames.length) {
                scenesPlayed = `&oxhuntPlayed=${user.playedGames.map( game => game.sceneOid).join()}`;
            }
            this.iframeUrl = `${settings.onirixHost}/projects/${settings.onirixProjectOid}/webar?token=${settings.onirixProjectToken}${scenesPlayed}&locale=${this.$i18next.language}`;
        },
        async onMessageReceived(msg) {
            if (msg && msg.data) {
                try {
                    const gameMessage = JSON.parse(msg.data);
                    if ('oxhunt-game-end' === gameMessage.action) {
                        try {
                            const response = await this.saveScore(gameMessage.sceneOid, gameMessage.score);
                            this.sendMessageToStudio(response, 'score-saved');
                        } catch (error) {
                            console.error(`Error on save score`, error.message);
                            let msg = {
                                title: error.message,
                                detail: ''
                            }
                            if (error.message == 'Game already played.') {
                                msg = {
                                    type: 'played',
                                    text: this.$t('game-played'),
                                }
                            } else if (error.message == 'Unknown game') {
                                msg = {
                                    type: 'played',
                                    text: this.$t('game-location'),
                                }
                            } else {
                                const settings = await firebaseService.getSettings();
                                msg = {
                                    type: 'closed',
                                    title: this.$t('game-closed-title'),
                                    text: this.$t('game-closed-text'),
                                    detail: oxhuntFunctions.getDateString(settings),
                                }
                            }
                            this.sendMessageToStudio(msg, 'error');
                        }
                    } else if ('oxhunt-go-home' === gameMessage.action) {
                        this.$router.push('/');
                    }
                } catch (error) {
                    console.debug(`Unknown message`, msg.data, error);
                }
            }
        },
        async saveScore(sceneOid, score) {
            const response = await firebaseService.saveScore(sceneOid, score);
            return response;
        },
        sendMessageToStudio(msg, action) {
            msg['origin']= 'OxHuntMusic';
            msg['action']= action;
            this.$refs.onirixIframe.contentWindow.postMessage(JSON.stringify(msg), '*');
        }
    }
}
</script>
Once this is set up, you can start to develop the experience.
Step 6: Test the game
After you have cloned the project code, configured Firebase, registered on Onirix account, designed the scenes associated with the hunt and written all the API keys, you can start testing the application and developing it more.
To accomplish this, launch the application on localhost following the next steps:
- On one terminal window, navigate to the functions folder inside the backend one. 1.1. Run npm install to get all the npm packages. 1.2. Then, run npm run build:watch so a new bundle is built after every change.
- On another terminal, navigate to the backend folder. 2.1. Execute firebase init emulators and select at least Functions, Firestore and Storage. 2.2. On the same terminal, run firebase emulators:start. 4.3. You should be able to see the Firestore Emulator Suite on http://localhost:4000.
- On another terminal, navigate to the client folder. 3.1. Execute npm install to get Vue and the other packages. 3.2. Run npm run serve in order to deploy the web client on port 8080.
Apart from third party packages, the client application depends on two Onirix libraries: @onirix/api-client and @onirix/embed-sdk. Make sure everything is correctly installed when running npm install.
Settings collection
To configure the project you have to create two collections on Firestore. The first one must be the USERS collection, this collection does not need any document to be inserted because it will be filled as the users register.
The second one must be the SETTINGS collection, in this collection a single document must be created containing the following fields, all of them with their complete values:
- name: name of the festival / event (string)
- appHost: host where the app is deployed (used in mails, string).
- emailFrom: emails from address (string).
- startDate: the date when the event starts (UTC, timestamp).
- endDate: the date when the event ends (UTC, timestamp).
- startTime: the hour and minutes that game period starts (UTC, string).
- endTime: the hour and minutes that game period ends (UTC, string).
- onirixHost: the Onirix Studio host (string).
- onirixProjectOid: the oid of the project used by de app (string).
- onirixProjectToken: the public token of the project (string).
- scenes: the oids of playable scenes (an array of strings).
- cashierToken: password used by cashier to redeem user's points. ("xfound")
- tiers (an initially empty array):
- name: name of the tier (string).
- min: min score (number).
- max: max score (can be null, number).
Start and end time applies to each day between start and end date.
Firestore stores dates in UTC so be careful because Firebase considers the date entered as local and is automatically converted to UTC.
Play the game
Now that your game is running in local, you need to access localhost:8080 from the browser, once there, the landing page will be displayed.
The first time you access any user account has been created, so, the first step y register on the application.
Once you're register, the second step is read the game rules. This is an important step because here are the rules and how the game works. When you have read the rules, go back to the home page and click on "Play". This will take you to the AR experience, where "View Locations" option is displayed.
When you click on "View Locations" the map will appear with the different locations. To be able to play one of them, you must be in its access radius, then, once inside the radius, simply click on it and press "Play this location".
This example shows how you must be inside the radius to be able to play:

When we access the location game, we will see several logos that we have to capture in less than 30s, each captured logo gives a number of points, ideally we would like to catch all the logos to get the highest score.
Once the game is over, we can stay on the map to play another location or redeem the points to obtain the corresponding prize.
Step 7: Deploy your Scavenger Hunt
In order to deploy your own scavenger hunt on a server, you will have to deploy the custom Firebase functions, serve the clients bundle from a server or cloud service and secure the administration panel so only the managers of the application can access it.
Deploy firebase functions
To correctly deploy the firebase functions on index.ts to the online Firebase application, you will need to open a new terminal and run the command firebase deploy. This will compile the code, connect to Google’s cloud services and deploy the functions there.
To achieve this you will need to upgrade your Firebase plan to the “Blaze (pay as you go)” billing plan.
Generate and serve the client’s bundle
After the Firebase backend is deployed, your next action should be to serve the web application so it can be publicly accessed.
To achieve this, first, navigate to the client folder and, from a terminal, run npm run build. This command will compile the Vue application and generate in the “dist” folder all the files that you need to deploy in a server. Although an Apache Server was used for this example, you can deploy this with your tool of choice (AWS, Google Cloud, Window Server, …).

Secure the administration panel
As you already saw, this application is divided in two different parts: the administration panel and the client (phone oriented) zone. Through the first one, the manager of the event can inspect the data generated by the users of the AR experience (registered users and the games played by them). On the second part, the user can register if they are a new user, log in with their credentials if they already participated before, read the game instructions and play with the AR scenes.
As the name indicates, the administration panel should be exclusive to the managers of the application and as such has to be protected from the public. In order to achieve this, in this example Nginx was used but, as mentioned before with the email or the storage, you can implement your preferred method of security.
If you opt for using Nginx for deploying the app, you can protect the admin location from your Nginx configuration file like:
location / {
    try_files $uri /index.html;
}

location /admin {
    auth_basic "Administrator's Area";
    auth_basic_user_file /etc/nginx/.ipsumhunt.htpasswd;
    try_files $uri /index.html;
}
For more information on how to achieve this HTTP security with Nginx and how to generate the htpasswd file check their documentation.